
Body Care
How to Poach an Egg
Aug
Poaching an egg sounds like something a chef whispers about while holding tweezers and wearing clogs. In reality, it is one of the simplest, most useful egg-cooking skills you can learn. No butter. No frying pan. No flip-and-pray moment. Just an egg, hot water, a little patience, and the courage to stop poking it like it owes you money.
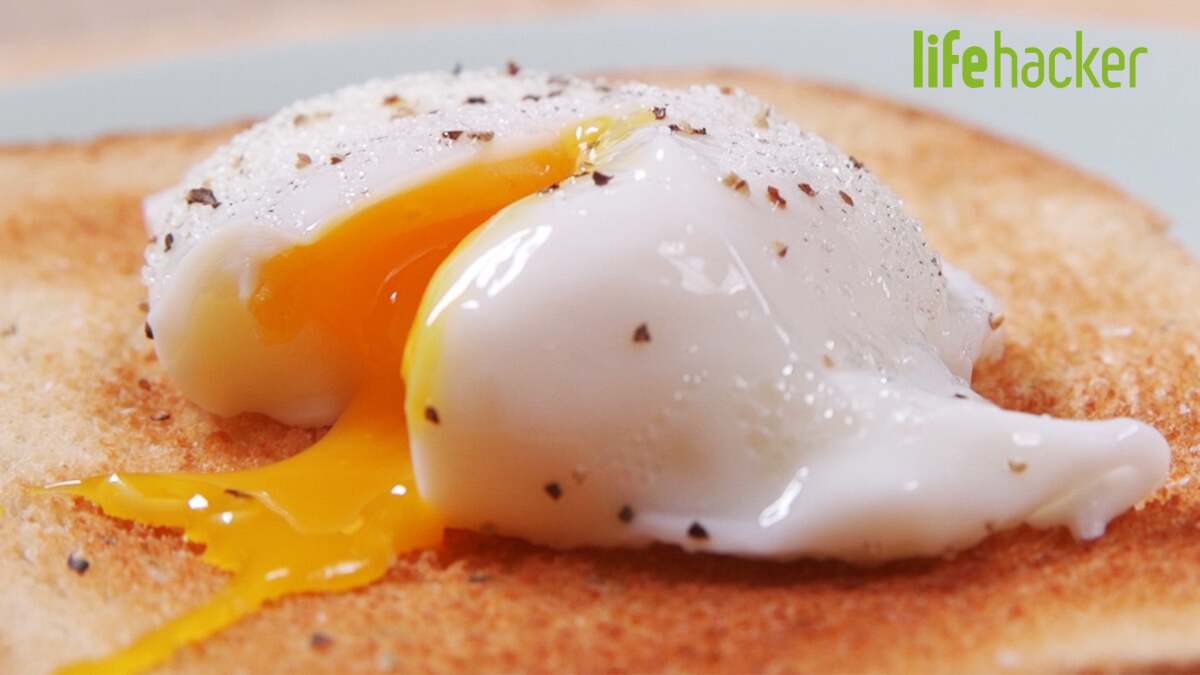
A perfectly poached egg has tender, fully set whites wrapped around a warm, runny yolk. Cut into it and the yolk should flow like breakfast sunshine over toast, avocado, salads, grain bowls, asparagus, hash, ramen, or anything else that would benefit from a tiny edible sauce packet. Once you understand the method, poached eggs stop being a restaurant-only luxury and become a weekday superpower.
This guide explains how to poach an egg step by step, why the method works, which mistakes cause wispy egg ghosts in the pot, and how to fix them. Whether you are making one egg for toast or several for brunch, this is your no-drama roadmap.
What Is a Poached Egg?
A poached egg is an egg cooked outside the shell in gently heated water. Unlike fried eggs, scrambled eggs, or omelets, poached eggs do not need added fat. The water cooks the egg white until it becomes soft and set, while the yolk stays creamy or runny depending on timing.
The magic is in the temperature. Boiling water is too aggressive. It throws bubbles around like a tiny hot tub with anger issues, tearing the egg white into loose strands. A gentle simmer is the sweet spot. You want small bubbles near the bottom of the pan and only a little movement on the surface.
Ingredients You Need
Basic Ingredients
- 1 large egg, as fresh as possible
- Water, enough to fill a saucepan or skillet 2 to 3 inches deep
- 1 to 2 teaspoons white vinegar, optional
- Salt, optional for serving
- Black pepper, herbs, chili flakes, or hot sauce, optional for finishing
Helpful Tools
- A small bowl, ramekin, or measuring cup
- A slotted spoon
- A medium saucepan or wide skillet
- A fine-mesh strainer, optional but very useful
- A clean kitchen towel or paper towel for draining
The ramekin is not fancy nonsense. It lets you slide the egg gently into the water instead of cracking it directly into the pot and hoping for the best. Hope is beautiful, but it is not a cooking technique.
The Best Method: How to Poach an Egg Step by Step
Step 1: Choose the Freshest Egg You Have
Fresh eggs make neater poached eggs because their whites are thicker and cling more closely to the yolk. Older eggs tend to have looser, watery whites, which spread in the water and create those wispy threads that make the pot look haunted.
If your egg is not super fresh, do not panic. A fine-mesh strainer can help. Crack the egg into the strainer and let the watery part of the white drain off for a few seconds. Then transfer the egg to a small bowl. This small move can make your poached egg look much cleaner.
Step 2: Heat the Water Gently
Fill a saucepan or wide skillet with 2 to 3 inches of water. Heat it until it reaches a gentle simmer. You should see tiny bubbles forming, but the water should not be rolling, bubbling wildly, or auditioning for a volcano documentary.
If the water starts boiling, lower the heat and wait a moment. A calm water bath helps the egg white set around the yolk instead of flying apart.
Step 3: Add Vinegar, If You Like
A small splash of white vinegar can help the egg white firm up faster. This is especially useful if your eggs are not extremely fresh. Use about 1 to 2 teaspoons for a medium pan of water. Too much vinegar can make the egg taste sharp, and nobody ordered salad dressing for breakfast.
Vinegar is helpful, not mandatory. If you dislike the flavor, skip it and focus on fresh eggs, gentle heat, and careful handling.
Step 4: Crack the Egg into a Bowl
Crack the egg into a ramekin or small bowl. Check that the yolk is intact. If the yolk breaks, save that egg for scrambling. A broken-yolk poached egg is not a tragedy, but it will not give you that beautiful golden center.
Using a bowl also lets you lower the egg close to the water before sliding it in. The shorter the drop, the better the shape.
Step 5: Slide the Egg into the Water
Lower the bowl close to the surface and gently tip the egg into the simmering water. Some cooks like to stir the water first to create a whirlpool, especially when poaching one egg. The swirl can help wrap the white around the yolk. However, if you are cooking more than one egg, skip the whirlpool because multiple eggs in spinning water can become breakfast bumper cars.
For beginners, the easiest method is often simple: calm water, egg in a bowl, gentle slide, no panic.
Step 6: Cook for 3 to 5 Minutes
Poach the egg until the white is set and the yolk is cooked to your liking. For a soft, runny yolk, start checking around 3 minutes. For a slightly thicker yolk, cook closer to 4 minutes. For a firmer yolk, cook about 5 minutes.
Use your slotted spoon to lift the egg gently from the water. The white should feel set, not slippery or loose. The yolk should still have a little jiggle if you want it runny.
Step 7: Drain and Serve
Remove the egg with a slotted spoon and place it briefly on a clean towel or paper towel. This step prevents watery toast, which is one of breakfast’s least glamorous crimes. Season with salt and pepper, then serve immediately.
How Long to Poach an Egg
Timing depends on egg size, water temperature, and personal preference. Use this simple guide:
- 3 minutes: set whites with a very runny yolk
- 4 minutes: set whites with a creamy, jammy yolk
- 5 minutes: firmer yolk, less runny
If you are new to poaching eggs, cook one test egg first. Consider it your breakfast rehearsal. The egg may not win a beauty contest, but it will teach you what your stove, pan, and timing are doing.
Common Poached Egg Mistakes and How to Fix Them
Mistake 1: Using Boiling Water
Boiling water is the fastest way to turn an egg into confetti. Lower the heat until the water barely simmers. Gentle heat gives the white time to set without being ripped apart.
Mistake 2: Using Old Eggs
Older eggs spread more because the whites become thinner over time. Use the freshest eggs available, or strain the egg before poaching to remove loose whites.
Mistake 3: Cracking the Egg Directly into the Pot
Cracking straight into the water gives you less control. The yolk can break, shell pieces can sneak in, and the egg may drop too hard. Crack into a bowl first, then slide it in gently.
Mistake 4: Crowding the Pan
Too many eggs in a small pot can stick together or cook unevenly. Use a wide skillet if you want to poach several eggs at once. Give each egg enough personal space. Eggs, like people in elevators, appreciate boundaries.
Mistake 5: Skipping the Drain
A poached egg carries water with it. Always drain it on a towel before serving. This one tiny step makes toast, English muffins, and salads much better.
Should You Use Vinegar?
Vinegar is one of the great poached egg debates. Some cooks swear by it. Others skip it completely. The practical answer is: use a little if it helps you. Vinegar encourages the egg white to set quickly, which can lead to a neater shape. But too much can leave a noticeable tang.
For most home cooks, a teaspoon or two of white vinegar in the water is enough. If you are using very fresh eggs and gentle heat, you may not need vinegar at all.
Should You Make a Whirlpool?
The whirlpool method works best for one egg at a time. Stir the water in a circle, slide the egg into the center, and the moving water helps wrap the white around the yolk. It feels dramatic, like you are casting a breakfast spell.
However, the whirlpool is not required. In fact, it can be annoying when cooking several eggs. For multiple poached eggs, use a wide pan with calm water and slide each egg in separately. The result may be less theatrical, but brunch will be calmer.
How to Poach Multiple Eggs
To poach several eggs, use a wide skillet instead of a narrow saucepan. Heat 2 to 3 inches of water to a gentle simmer. Crack each egg into its own small bowl. Slide the eggs into different areas of the pan, leaving space between them.
Cook for 3 to 5 minutes, then remove each egg with a slotted spoon. If one egg went in first, remove it first. This keeps the doneness consistent.
Can You Make Poached Eggs Ahead?
Yes, poached eggs can be made ahead for brunch or meal prep. Cook them slightly under your desired doneness, then transfer them to cold water to stop the cooking. Store them covered in cold water in the refrigerator and reheat gently in warm water before serving.
For best quality, use them soon. Keep cooked eggs refrigerated, and do not leave them sitting out at room temperature for long. If serving people who are pregnant, older adults, very young children, or anyone with a weakened immune system, choose fully cooked eggs or pasteurized eggs for extra safety.
Food Safety Tips for Poached Eggs
Because classic poached eggs often have runny yolks, they may not be fully cooked by food-safety standards. For healthy adults, many people choose runny yolks and enjoy them without concern, but it is important to understand the risk.
Buy clean, refrigerated eggs from a reliable source. Store eggs in their carton in the refrigerator at 40 degrees Fahrenheit or below. Avoid cracked eggs. Wash hands, utensils, and surfaces after handling raw eggs. For anyone at higher risk of foodborne illness, use pasteurized eggs or cook eggs until both whites and yolks are firm.
Best Ways to Serve Poached Eggs
Once you know how to poach an egg, you can upgrade dozens of meals. A poached egg is not just breakfast; it is a sauce, protein boost, and dramatic garnish all in one.
Classic Toast
Place a poached egg on buttered toast, sourdough, or an English muffin. Add salt, pepper, and a few chili flakes. Simple, fast, perfect.
Avocado Toast
Top mashed avocado with a poached egg, lemon juice, everything bagel seasoning, and a little hot sauce. This is the café breakfast that keeps charging rent in our hearts.
Eggs Benedict
Layer toasted English muffins with Canadian bacon or ham, poached eggs, and hollandaise sauce. It is rich, classic, and not something you eat while wearing a white shirt unless you enjoy danger.
Grain Bowls
Add a poached egg to rice, quinoa, farro, roasted vegetables, greens, and a punchy sauce. When the yolk breaks, it coats everything beautifully.
Salads
A poached egg turns a salad into a meal. It pairs especially well with bitter greens, bacon, roasted potatoes, asparagus, mushrooms, or warm vinaigrette.
Soups and Noodles
Float a poached egg on ramen, broth bowls, or tomato soup. The egg adds richness without needing cream.
Experience Notes: What I Learned from Poaching Eggs the Hard Way
The first time many home cooks poach an egg, the result looks less like brunch and more like a jellyfish having a personal crisis. That is normal. Poached eggs are simple, but they are also honest. They reveal every little detail: water too hot, egg too old, pan too crowded, hands too rushed. The good news is that each “failed” egg is still usually edible. Put it on toast, call it rustic, and continue living your life.
One of the biggest lessons is that calm water matters more than fancy tricks. Beginners often focus on the whirlpool, vinegar, or some gadget they saw online, but the real secret is gentleness. When the water is barely simmering, the egg has a chance to settle into itself. When the water is boiling hard, the egg white stretches, shreds, and floats away. Think spa day, not washing machine.
Freshness also makes a surprising difference. A fresh egg behaves like it has a plan. The white stays close to the yolk and forms a compact shape. An older egg acts like it just heard bad news and wants to leave in every direction. If your eggs are older, the fine-mesh strainer method is a lifesaver. It removes the watery white that creates most of the wisps. This trick alone can make your poached eggs look cleaner and more restaurant-like.
Another practical discovery: a shallow, wide pan is often easier than a deep pot. A deep pot looks official, but a wide skillet gives you more control, especially if you want to cook two or three eggs. You can see what is happening, space the eggs apart, and remove them without chasing them around like slippery treasure.
Timing is personal. Some people want a yolk that runs immediately; others prefer a jammy center that moves slowly. The difference between 3 minutes and 5 minutes can be huge. Instead of relying only on the clock, lift the egg with a slotted spoon and gently touch the white. If it feels set and the yolk still jiggles, you are in runny-yolk territory. If the yolk feels firmer, you are moving toward medium.
Draining the egg is another small detail that separates good from great. Straight from the pan, a poached egg carries extra water. If you place it directly on toast, the bread can turn soggy before you even find the pepper grinder. A quick rest on a towel keeps the plate neat and the texture better.
Poached eggs are also forgiving once you stop expecting perfection. Not every egg will be a perfect oval. Some will have little tails. Some will sit slightly crooked. That is fine. The goal is tender whites and a delicious yolk, not architectural certification. Add herbs, sauce, toast, or greens, and suddenly the imperfect egg looks intentional.
With practice, poaching an egg becomes less of a recipe and more of a rhythm: fresh egg, calm water, gentle slide, patient wait, careful lift. After a few tries, the process feels easy. And once you can poach an egg, you can make almost any simple meal feel special. That is a pretty good return on one egg and a pot of water.
Conclusion
Learning how to poach an egg is one of those kitchen skills that pays off again and again. The method is simple: use fresh eggs, keep the water at a gentle simmer, crack the egg into a bowl first, cook for 3 to 5 minutes, and drain before serving. Vinegar, whirlpools, strainers, and wide skillets can all help, but the heart of the technique is calm heat and gentle handling.
A poached egg can turn toast into breakfast, salad into lunch, noodles into dinner, and leftovers into something that looks like you meant to do it. It is elegant without being fussy, quick without being boring, and impressive without requiring a culinary diploma. In other words, it is the little black dress of eggs.

