
Beauty Unlocked
How to Move Mac Apps to Your Menu Bar (and Why You Should)
Sep
Your Mac’s menu bar is prime digital real estate. It is always nearby, rarely covered by piles of windows, and capable of giving you one-click access to calendars, clipboard history, VPN controls, timers, cloud storage, audio settings, and dozens of other useful tools.
Yet many Mac users treat it as little more than a decorative shelf for the clock, battery indicator, and an impressive collection of mysterious icons they are afraid to click. That is a shame. When configured thoughtfully, the macOS menu bar can replace repeated trips to the Dock, reduce window clutter, and turn frequently used apps into lightweight control panels.
This guide explains how to move supported Mac apps to the menu bar, add built-in macOS controls, rearrange icons, hide unnecessary items, and design a setup that improves productivity without turning the top of your screen into a crowded airport departure board.
What Does “Move an App to the Menu Bar” Actually Mean?
Before dragging everything northward, there is an important distinction to understand: you generally cannot drag an ordinary application from the Dock or Applications folder directly into the menu bar.
The menu bar does not work like a second Dock. An app must specifically support a menu bar icon, sometimes called a menu bar extra, status item, status menu, or menu bar utility. When the feature is available, the icon usually opens a compact interface containing the app’s most useful controls.
For example, a calendar app might display upcoming meetings, while a VPN app may show connection status and server options. A clipboard manager can reveal recently copied items, and a window-management tool may present commands for snapping windows into position.
Some applications can operate almost entirely from the menu bar and hide their Dock icons. Others use the menu bar only as a shortcut while the full application remains available. If an app does not include menu bar support, macOS cannot magically squeeze it into that narrow strip, no matter how politely you ask.
Why Move Mac Apps to the Menu Bar?
Faster Access to Everyday Tools
The strongest reason is simple: fewer steps. Opening an app through the Dock, Launchpad, Finder, or Spotlight may take only a few seconds, but those seconds multiply when you repeat the process throughout the day.
A menu bar utility remains available above almost every application. You can check your next appointment, start a timer, change an audio output, pause cloud syncing, or activate a VPN without rearranging windows or abandoning your current task.
Less Dock and Desktop Clutter
Many utilities do not need a permanent Dock icon. Battery monitors, clipboard managers, screen-capture tools, meeting assistants, and network utilities typically run quietly in the background. Their full windows are rarely needed.
Moving their everyday controls to the menu bar allows you to reserve the Dock for applications that deserve full windows, such as Safari, Messages, Photoshop, Final Cut Pro, or Microsoft Word. Your Dock becomes a launcher again instead of a digital junk drawer.
Useful Information at a Glance
Some menu bar apps communicate information without requiring a click. They can show the outside temperature, battery percentage, remaining focus time, current VPN state, microphone status, cloud synchronization progress, or the title of the song playing.
The best indicators answer a useful question instantly. The worst ones merely sit there looking important. Keep the former and politely evict the latter.
A More Focused Workflow
Menu bar tools work well for small, frequent actions. Instead of opening an entire task manager to check the next assignment, you can view a short list from the top of the screen. Instead of keeping a music window open, you can control playback from a compact menu.
This reduces visual interruption. You remain in the application where the real work is happening while using the menu bar as a lightweight command center.
How to Add Built-In macOS Controls to the Menu Bar
Apple provides several system controls that can be displayed directly in the menu bar. Depending on your macOS version and hardware, these may include Wi-Fi, Bluetooth, battery, sound, Focus, Screen Mirroring, accessibility shortcuts, keyboard brightness, weather, and other controls.
Method 1: Use Menu Bar Settings
- Click the Apple menu in the upper-left corner.
- Select System Settings.
- Scroll down and open Menu Bar.
- Review the available menu bar controls.
- Enable the items you want to show and disable those you rarely use.
On older macOS versions, many of these options are found under System Settings > Control Center. Apple occasionally reorganizes System Settings, apparently to make sure longtime Mac users remain humble.
Method 2: Drag Controls from Control Center
- Click the Control Center icon in the menu bar.
- Choose Edit Controls.
- Find the control you want in Control Center or the controls gallery.
- Drag it into the menu bar.
This method is convenient when you want to build your layout visually. It also helps you decide which controls deserve permanent visibility and which can remain tucked inside Control Center.
How to Move a Third-Party Mac App to the Menu Bar
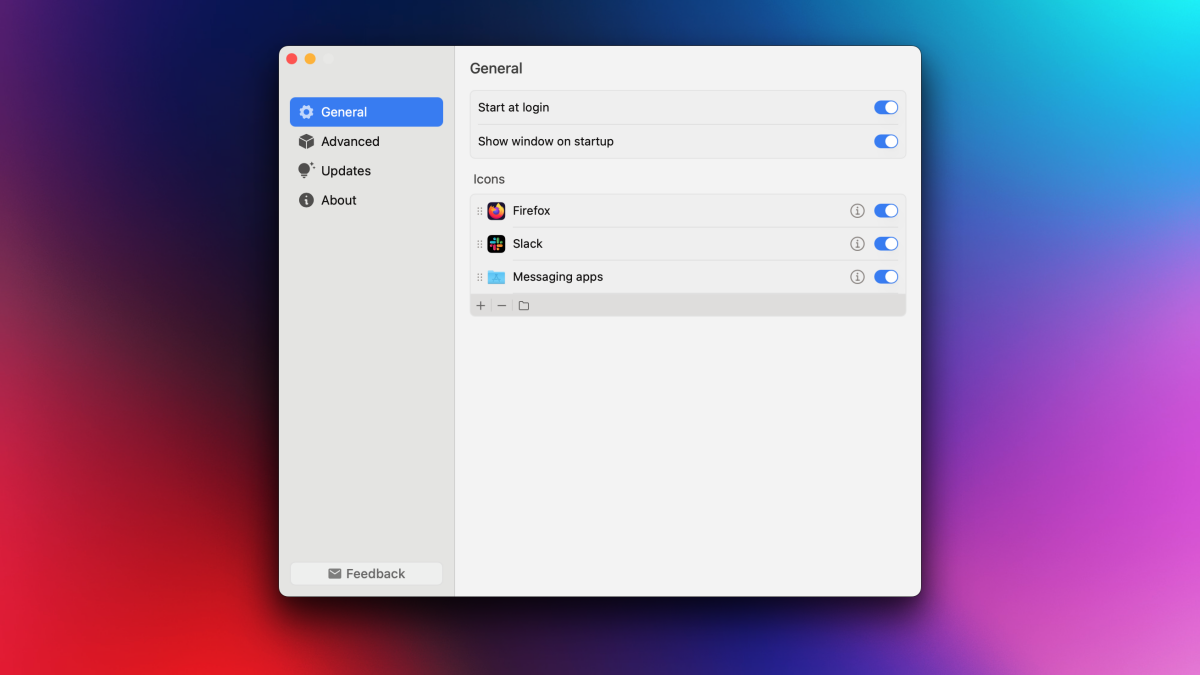
Third-party applications control their own menu bar behavior. The exact wording varies, but the feature is usually found in the app’s settings.
Step 1: Open the App’s Settings
Launch the application and look for Settings or Preferences. You can often open this window by clicking the app’s name in the main macOS menu and selecting Settings. The common keyboard shortcut is Command + Comma.
Step 2: Find the Menu Bar Option
Check sections named General, Appearance, Interface, Advanced, or Startup. Look for options such as:
- Show in menu bar
- Display menu bar icon
- Run as menu bar app
- Menu bar mode
- Hide Dock icon
- Show in Dock and menu bar
Enable the menu bar option. The app’s icon should appear near the upper-right corner of the screen.
Step 3: Decide Whether to Hide the Dock Icon
If the app can be controlled entirely from its menu bar interface, consider hiding its Dock icon. This is especially useful for clipboard managers, timers, system monitors, window tools, screenshot utilities, and meeting assistants.
Do not hide the Dock icon merely because the option exists. Applications with large workspaces, document windows, or complex editing tools are usually easier to manage from the Dock or Spotlight.
Step 4: Enable Launch at Login When Appropriate
A menu bar app is most useful when it is available as soon as you sign in. Many utilities include an Open at Login or Launch at Startup option.
Be selective. Starting 27 tiny utilities at login is still starting 27 applications. Keep automatic startup for tools you use daily, not an app you installed six months ago because its icon looked clever.
How to Rearrange Mac Menu Bar Icons
Once your apps appear in the menu bar, arrange them according to importance rather than installation order.
- Hold down the Command key.
- Click and hold the menu bar icon you want to move.
- Drag it left or right.
- Release the icon when it reaches the desired position.
This works with most macOS status items and many third-party menu bar icons. A few system-controlled icons may remain fixed, and some applications manage their own positions.
A practical arrangement is to keep essential status information near the right side, place frequently clicked utilities together, and push occasional tools farther left. The exact order matters less than consistency. Your hand should learn where an icon lives without conducting a visual search party every time.
How to Remove or Hide Menu Bar Icons
Remove a Built-In macOS Item
Open System Settings > Menu Bar and turn off the item you no longer want displayed. For certain system icons, you may also be able to hold Command and drag the icon away from the menu bar until a removal indicator appears.
Remove a Third-Party App Icon
Open the app’s settings and disable its “Show in menu bar” option. You may also find a Quit command by clicking the icon. Remember that quitting the app is not the same as preventing it from returning at the next login.
If the icon keeps reappearing, check the application’s startup settings and your Mac’s login items. Uninstalling an app should be the final step, not your opening negotiation tactic.
Use a Menu Bar Manager
When you need many menu bar utilities but do not want to see them constantly, a menu bar manager can create visible and hidden sections. Popular tools in this category may let you reveal hidden icons with a click, keyboard shortcut, hover gesture, or secondary bar.
Review a manager’s permissions before installing it. Some advanced features may require Accessibility, Screen Recording, or other system access so the app can identify and control menu bar items. Download from a trusted developer, read the privacy information, and grant only the permissions needed.
Which Apps Belong in Your Mac Menu Bar?
A good menu bar app performs a small action quickly or presents information that matters throughout the day. Strong candidates include:
- Calendar and meeting apps: View upcoming events or join video calls.
- Clipboard managers: Retrieve text, links, or images copied earlier.
- VPN and network tools: Check connection status or change servers.
- Cloud storage apps: View syncing progress and recent file activity.
- Audio utilities: Switch speakers, microphones, or playback devices.
- Window managers: Resize and position windows with fewer clicks.
- Timers and focus tools: Start work sessions without opening a dashboard.
- System monitors: Check battery, temperature, memory, or network activity.
- Note and task tools: Capture an idea before it escapes into the wilderness.
Avoid adding an app merely because it offers a menu bar icon. If you never click it and it provides no valuable status information, it has become decorative clutter.
How to Design a Productive Menu Bar
Use the One-Glance Test
Every permanently visible item should either provide useful information at a glance or support an action you perform frequently. If it does neither, hide it.
Separate Status Indicators from Action Tools
Group passive indicators such as battery, VPN status, weather, and cloud syncing separately from tools you actively click, such as clipboard history, calendars, timers, and window controls. Grouping reduces the time needed to find the correct icon.
Avoid Duplicate Controls
You probably do not need separate menu bar icons for every audio, Bluetooth, and display setting if Control Center already handles them efficiently. Direct icons are valuable when they save time; otherwise, they simply repeat controls that are one click away.
Account for the MacBook Notch
MacBook models with a camera notch have less uninterrupted menu bar space. When too many icons compete for that space, some may become difficult to access, particularly when an application has numerous menus on the left.
Keep the most important icons visible and hide the rest behind a menu bar manager or Control Center. A compact layout is not merely prettier; it is more reliable.
Audit the Menu Bar Monthly
Menu bar clutter develops quietly. An app adds an icon, another utility arrives a week later, and suddenly your screen looks like the control panel of a submarine.
Once a month, remove unused items, review login apps, and check whether two utilities perform the same job. This five-minute audit keeps the menu bar useful.
Useful Menu Bar Keyboard Controls
The menu bar is not limited to mouse and trackpad users. Press Control + F2, or Fn + Control + F2 on keyboards where the function keys control hardware features, to move keyboard focus to the menu bar.
You can then use the arrow keys to navigate and press Return to open a selected menu. Keyboard access is particularly valuable for accessibility, repetitive workflows, or those moments when your mouse appears to have entered an unapproved labor strike.
Common Problems and Their Solutions
The App Does Not Offer a Menu Bar Option
The application may not support menu bar mode. Check its documentation and latest settings before assuming the feature is hidden. If it is unsupported, continue using the Dock, Spotlight, a keyboard shortcut, or a launcher.
The Icon Disappears Behind the Notch
Reduce the number of visible icons, shorten crowded app menus by switching applications, or use a menu bar manager that displays hidden items in a separate panel.
The Icon Returns After You Remove It
Disabling an icon through Command-dragging may not change the third-party app’s preferences. Open the application and turn off its menu bar setting or remove it from login items.
The Menu Bar Is Hidden in Full Screen
Open System Settings > Menu Bar and adjust the option for automatically hiding and showing the menu bar. You can choose behavior for the desktop, full-screen apps, both, or neither, depending on your macOS version.
A Menu Bar Utility Is Using Too Many Resources
Every menu bar utility is still a running application. If your Mac feels slow or its battery drains unusually quickly, open Activity Monitor and inspect CPU, memory, and energy usage. Remove utilities whose resource consumption is greater than the convenience they provide.
Conclusion: Small Strip, Surprisingly Big Payoff
Moving supported Mac apps to the menu bar can make everyday work noticeably smoother. The goal is not to cram every application into the top-right corner. It is to create a carefully selected collection of controls that saves clicks, reduces window switching, and keeps important information visible.
Start with three or four tools you genuinely use every day. Rearrange them into a predictable order, hide unnecessary system icons, and review the setup after a week. A successful Mac menu bar should feel almost invisible: always available, never demanding attention, and quietly saving you time.
Experience Notes: What Happened When I Moved My Workflow Upstairs
My first attempt at building a productivity-focused menu bar was not elegant. I enabled every available system control and allowed nearly every utility to add an icon. Within a few days, I had battery statistics, two calendar apps, three cloud services, a VPN, a clipboard manager, a timer, a screenshot tool, an audio switcher, and several icons whose purpose had already become a historical mystery.
The menu bar was technically powerful, but finding anything required staring at a row of tiny symbols and playing a disappointing game of “Which Gray Circle Opens My Meetings?” The lesson arrived quickly: convenience disappears when every app receives equal visibility.
I reset the layout and selected only the tools connected to actions I performed repeatedly. My calendar stayed because it let me check the next meeting without opening a full window. The clipboard manager stayed because I used it dozens of times per day. The VPN remained visible because its status mattered, while cloud storage icons moved into a hidden section because I rarely needed them unless a sync problem occurred.
I also separated indicators from action-oriented tools. Battery, Wi-Fi, and VPN status went near the clock. Clipboard history, window controls, and the timer formed another small group. That simple arrangement made the bar easier to understand because I stopped scanning the entire row whenever I needed one item.
The biggest improvement came from removing Dock icons for utilities that never needed full windows. Previously, my Dock contained several background tools alongside the applications where I actually created documents, edited images, and communicated with coworkers. After switching those utilities to menu bar-only mode, the Dock became shorter and far more useful.
There were also mistakes. I once hid an app’s Dock icon before learning how to reopen its settings, which produced several entertaining minutes of clicking everything except the correct menu. I enabled too many launch-at-login utilities and wondered why a newly restarted Mac behaved like it had a lengthy morning routine. Both problems were easy to fix, but they reinforced the importance of changing one setting at a time.
After several weeks, the menu bar settled into a compact daily dashboard. It did not transform the Mac into a magical productivity machine, and it did not complete any work on my behalf. What it did was remove small points of friction. Joining a meeting took one click. Recovering copied text took one click. Starting a focus timer took one click. Switching audio devices no longer required opening multiple settings panels.
Those saved actions seem minor individually, but repeated throughout the week, they create a calmer workflow. The most successful configuration was not the one with the greatest number of features. It was the one that made frequently used tools available while leaving enough empty space for the menu bar to breathe.

