
Hair Care
Bridge Exercise: 5 Fun and Challenging Variations
Aug
Note: This article is for general fitness education and is not a substitute for medical advice. If you have current back, hip, knee, pelvic, or post-surgical concerns, ask a qualified healthcare or fitness professional before trying new bridge exercise variations.
Introduction: The Small Floor Move With Big “Wow, My Glutes Are Awake” Energy
The bridge exercise looks suspiciously simple. You lie on your back, bend your knees, lift your hips, and suddenly your glutes, hamstrings, core, and pride all have something to say. It is one of those classic bodyweight exercises that appears in beginner workouts, physical therapy routines, Pilates sessions, warm-ups, and strength programs because it does a lot without asking for much equipment. A mat helps. A little patience helps more. Fancy shoes? Optional. Dramatic workout music? Highly recommended.
At its core, the bridge exercise trains hip extension: the action of driving your hips upward by squeezing your glutes. That movement matters in everyday life more than people realize. Walking, climbing stairs, standing up from a chair, running, jumping, lifting groceries, and not folding like a lawn chair after eight hours at a desk all depend on strong hips and a stable core. The bridge is also popular because it is joint-friendly for many people, easy to scale, and surprisingly effective when performed with control instead of speed.
This guide breaks down the basic bridge exercise, explains why it deserves a place in your lower-body workout, and then introduces five fun and challenging bridge variations. You will learn how to perform each version, who it is best for, what mistakes to avoid, and how to build a smart routine without turning your living room into a medieval glute-testing chamber.
What Is the Bridge Exercise?
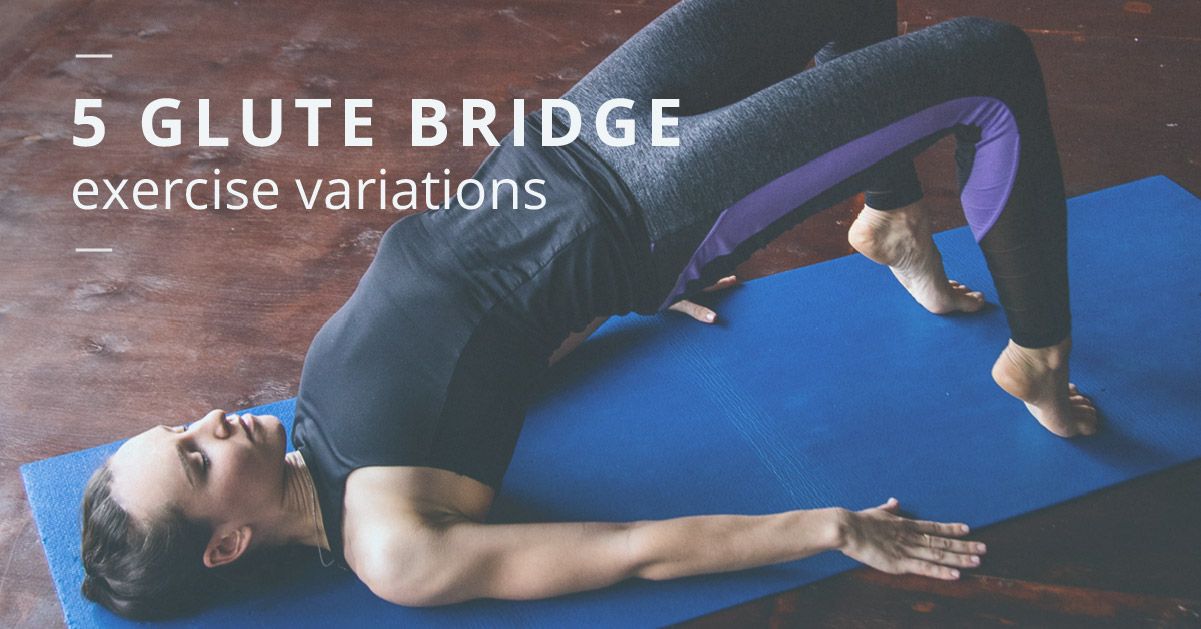
The bridge exercise, often called the glute bridge, is a floor-based movement performed while lying on your back with your knees bent and feet flat on the ground. From there, you brace your core, press through your feet, squeeze your glutes, and lift your hips until your body forms a straight line from shoulders to knees. Then you lower with control and repeat.
The primary target is the gluteus maximus, the largest muscle in the buttocks and one of the main drivers of hip extension. The hamstrings assist, the core helps stabilize the pelvis and spine, and smaller hip muscles work to keep the knees and hips aligned. When done well, a bridge should feel like a focused glute exercise, not a lower-back cramp festival.
Why Bridge Exercises Are Worth Your Time
They Strengthen the Glutes and Posterior Chain
The posterior chain includes the muscles along the back side of the body, especially the glutes, hamstrings, and spinal stabilizers. Strong posterior-chain muscles help support athletic movement, posture, balance, and daily activities. A bridge exercise teaches you to use your hips instead of relying too heavily on the lower back.
They Help Wake Up “Sleepy” Glutes
Long periods of sitting can make the hip flexors tight and the glutes underactive. This does not mean your glutes literally fall asleep and dream about squats, but it can mean they are slow to engage when you need them. Bridge exercises are commonly used as activation drills because they make it easier to feel the glutes working before more demanding moves like lunges, deadlifts, step-ups, and squats.
They Support Core Stability
A proper bridge is not just a butt exercise. Your abdominal muscles help keep your ribs, pelvis, and spine in a controlled position. If your hips rise but your lower back arches aggressively, you are not building a bridge; you are building a tiny human suspension bridge with questionable engineering. Core engagement keeps the movement safer and more effective.
They Are Easy to Modify
Beginners can start with short holds and small ranges of motion. Intermediate exercisers can add bands, single-leg variations, or elevated feet. Advanced trainees can load the movement with dumbbells or a barbell. The bridge grows with you, which is more than we can say for most jeans after Thanksgiving.
How to Do a Basic Bridge Exercise Correctly
Before jumping into the five variations, master the standard bridge. Good form is the foundation. Without it, the more advanced versions become creative ways to irritate your lower back.
Step-by-Step Instructions
- Lie on your back on a mat with your knees bent and feet flat on the floor.
- Place your feet about hip-width apart, roughly close enough that your shins are near vertical at the top of the movement.
- Rest your arms by your sides with palms down for light support.
- Gently brace your core as if preparing for a small cough.
- Squeeze your glutes and press through your heels and midfoot to lift your hips.
- Stop when your shoulders, hips, and knees form a straight line.
- Pause for one or two seconds at the top.
- Lower slowly, keeping control all the way down.
Form Cues That Actually Help
Think “ribs down, hips up.” Keep your chin relaxed, your neck long, and your gaze toward the ceiling. Avoid pushing so high that your lower back arches. Your goal is hip extension, not winning a flexibility contest with your lumbar spine. If you feel the movement mostly in your hamstrings, move your feet slightly closer to your hips. If you feel it mostly in your lower back, reset your rib position, brace your abs, and reduce the height of the lift.
Bridge Exercise: 5 Fun and Challenging Variations
Once the basic bridge feels smooth and controlled, it is time to add variety. These five bridge exercise variations make the move more interesting while targeting strength, stability, endurance, balance, and coordination.
1. Single-Leg Bridge
The single-leg bridge is the classic “Oh, one side is definitely more dramatic than the other” variation. By lifting one foot off the floor, you force one glute to work harder while your core fights to keep your hips level.
How to Do It
- Lie on your back in the standard bridge setup.
- Brace your core and lift one foot off the floor.
- Keep both knees aligned, or extend the lifted leg slightly if that feels stable.
- Press through the grounded foot and lift your hips.
- Pause at the top while keeping your pelvis level.
- Lower slowly and repeat before switching sides.
Why It Works
This variation builds unilateral strength, meaning each side works independently. That matters because many people have one stronger or more coordinated side. The single-leg bridge also challenges the gluteus medius and deep core muscles, which help control hip position during walking, running, and stairs.
Suggested Reps
Start with 2 sets of 6 to 10 reps per side. Quality matters more than quantity. If your hips wobble like a shopping cart with one bad wheel, reduce the range of motion or return to the standard bridge.
2. Banded Bridge
The banded bridge adds resistance around the thighs, usually just above the knees. It turns a regular bridge into a glute medius party, and yes, the glute medius did RSVP with intensity.
How to Do It
- Place a mini resistance band around your thighs, just above your knees.
- Set up in a normal bridge position with feet hip-width apart.
- Gently press your knees outward against the band without rolling onto the outer edges of your feet.
- Brace your core and lift your hips.
- Hold the top position while maintaining band tension.
- Lower slowly and repeat.
Why It Works
The band encourages your hips to resist inward knee collapse. This is useful for building better lower-body alignment and improving awareness of how your knees track over your feet. The banded bridge is excellent as a warm-up before squats, lunges, cycling, running, or any workout where your hips need to show up and do their job.
Suggested Reps
Try 2 to 3 sets of 12 to 20 reps. For a spicy finish, hold the top position for 20 seconds and perform tiny outward knee presses. Your glutes may send a strongly worded email.
3. Marching Bridge
The marching bridge looks friendly until you realize your pelvis must stay still while your legs take turns leaving the floor. It is a sneaky core stability drill disguised as a glute exercise.
How to Do It
- Begin in a standard bridge position and lift your hips.
- Brace your core and keep your hips level.
- Slowly lift one foot a few inches off the floor.
- Place it back down with control.
- Repeat on the other side, alternating like a slow march.
Why It Works
This variation trains anti-rotation, which is your body’s ability to resist twisting or dropping to one side. That is useful for sports, running, walking, and carrying uneven loads. The marching bridge also teaches you to keep tension through the glutes and core instead of collapsing between reps.
Suggested Reps
Start with 2 sets of 8 to 12 marches per side. Move slowly. If the hips dip, shorten the march or return to a regular bridge hold until your stability improves.
4. Feet-Elevated Bridge
The feet-elevated bridge changes the angle of the exercise and often increases the challenge for the hamstrings and glutes. You can place your feet on a low bench, step, sturdy chair, or stability ball. A bench is more stable; a ball adds chaos. Choose your fighter.
How to Do It
- Lie on your back with your heels on a low bench or step.
- Keep your knees bent and feet about hip-width apart.
- Brace your core and press your heels into the elevated surface.
- Squeeze your glutes to lift your hips.
- Pause at the top, then lower slowly.
Why It Works
Elevating the feet can increase the range of motion and change the muscle emphasis. It is especially useful when the standard bridge feels too easy but a single-leg bridge is still too demanding. If you use a stability ball, your core and hamstrings work harder to keep the ball from wandering away like it has weekend plans.
Suggested Reps
Perform 2 to 3 sets of 8 to 15 reps. Keep the movement controlled and avoid flinging your hips up. Momentum is not strength; it is just impatience wearing gym shorts.
5. Weighted Glute Bridge
The weighted glute bridge is the strength-builder of the group. By placing a dumbbell, kettlebell, weight plate, or barbell across your hips, you increase resistance and give your glutes a clear reason to adapt.
How to Do It
- Sit on the floor and place a weight across your hips. Use a pad or folded towel for comfort.
- Lie back with knees bent and feet flat on the floor.
- Hold the weight securely with both hands.
- Brace your core, squeeze your glutes, and lift your hips.
- Pause at the top without over-arching your back.
- Lower slowly and repeat.
Why It Works
Adding load helps build strength and muscular endurance. This bridge variation is a good stepping stone toward hip thrusts, deadlifts, and more advanced lower-body training. It is also easier to set up at home than many gym machines, which is wonderful news for anyone whose home gym is basically a yoga mat and a dumbbell named Steve.
Suggested Reps
Start with 3 sets of 8 to 12 reps using a manageable weight. Increase resistance gradually only when you can maintain clean form, full control, and a strong glute squeeze at the top.
Common Bridge Exercise Mistakes to Avoid
Arching the Lower Back
If your lower back takes over, the bridge becomes less effective and potentially uncomfortable. Keep your ribs down, brace your core, and lift only as high as your hips can extend without spinal compensation.
Placing the Feet Too Far Away
Feet placed too far from the hips often shift the work into the hamstrings. A little hamstring involvement is normal, but the glutes should be the star. Adjust your feet until you feel the movement in the back of your hips.
Letting the Knees Cave In
Your knees should generally track in line with your hips and feet. If they collapse inward, slow down and consider using a light resistance band to practice pressing gently outward.
Rushing the Reps
Fast bridges can look energetic, but slower bridges build better control. Pause at the top. Lower with intention. Pretend your glutes are signing a contract and every rep needs a clear signature.
How to Add Bridge Variations to Your Workout
Bridge exercises can fit into your routine in several ways. As a warm-up, use bodyweight or banded bridges for 1 to 2 sets of 10 to 15 reps. As a strength move, choose weighted bridges or single-leg bridges for 3 sets of 6 to 12 reps. As a finisher, try bridge holds, pulses, or banded reps for 30 to 60 seconds.
A simple beginner-friendly bridge workout might look like this:
- Basic bridge: 2 sets of 12 reps
- Banded bridge: 2 sets of 15 reps
- Marching bridge: 2 sets of 8 marches per side
- Bridge hold: 2 rounds of 20 seconds
An intermediate routine could include:
- Banded bridge: 2 sets of 20 reps
- Single-leg bridge: 3 sets of 8 reps per side
- Feet-elevated bridge: 3 sets of 10 reps
- Weighted bridge: 3 sets of 10 reps
Train bridge variations two to four times per week depending on your goals, recovery, and overall workout plan. If your glutes are sore, tired, or staging a protest every time you sit down, give them recovery time.
Who Should Be Careful With Bridge Exercises?
Many people can perform bridge exercises safely, but not every variation is right for every body. Be cautious if you have acute lower-back pain, recent hip or spine surgery, pelvic pain, severe knee discomfort, or any condition that makes floor exercise difficult. Stop if you feel sharp pain, numbness, tingling, or pressure in the wrong places. Muscle effort is normal. Pain that feels like a warning light on your dashboard is not something to ignore.
If getting on and off the floor is hard, a physical therapist or qualified trainer may suggest alternatives, such as seated hip activation, supported standing hip extension, or modified mat exercises. The best exercise is not the fanciest one; it is the one you can perform consistently, safely, and well.
Experience Section: What Bridge Training Feels Like in Real Life
Bridge exercises have a funny way of humbling almost everyone. The first time many people try them, they think, “That’s it?” Then they hold the top position for 30 seconds and discover a previously unknown region of the glutes that apparently has its own emergency siren. The movement is small, but the feedback is immediate.
One of the most useful real-life experiences with bridge training is learning the difference between moving and actually engaging the right muscles. A beginner may lift the hips and feel everything in the lower back or hamstrings. With a few form adjustments, the exercise suddenly changes. Pull the ribs down slightly. Move the feet a little closer. Exhale before lifting. Squeeze the glutes before pushing the hips up. Suddenly the bridge feels less like a random floor maneuver and more like a targeted strength exercise.
Another common experience is discovering side-to-side imbalance. During a single-leg bridge, one side may feel strong and steady, while the other side shakes like it just read a scary email. That is not failure. That is information. The body often hides small asymmetries during two-leg exercises because the stronger side quietly helps the weaker side. Single-leg bridge variations reveal those differences, making them easier to train.
For people who sit most of the day, bridges can feel like a reset button. After hours at a desk, the hips may feel stiff and the glutes may feel offline. A short bridge sequence can bring awareness back to the posterior chain. Even two sets of slow bridges can make standing, walking, or beginning a workout feel smoother. It is not magic, although when your hips stop feeling like rusty door hinges, it can seem close.
Bridge training also teaches patience. The best results usually come from controlled reps, not heroic flailing. Holding the top position for two seconds, lowering slowly, and maintaining knee alignment creates more benefit than rushing through 50 sloppy reps while thinking about lunch. Slow bridge reps have a way of making time expand. Ten seconds can feel like a documentary. But that tension is where the work happens.
Adding bands or weights makes the experience more interesting. A mini band can make a familiar bridge feel brand new, especially when you focus on keeping the knees gently pressed outward. A dumbbell across the hips adds a strength challenge without requiring a large gym setup. The trick is to progress gradually. The bridge rewards consistency, not ego. Your glutes do not care how impressive the weight looks on social media; they care whether you can control it.
Many exercisers also appreciate bridges because they are easy to fit into normal life. You can do them before a run, after a walk, during a home workout, or as part of a quick mobility break. They do not require a treadmill, a squat rack, or a motivational speech from a trainer named Chad. They require a floor, a few minutes, and enough focus to make each rep count.
The biggest lesson from regular bridge practice is that simple exercises are not automatically easy exercises. A bridge can be gentle, challenging, rehabilitative, athletic, beginner-friendly, or brutally effective depending on how you perform it. That is what makes it so valuable. Whether your goal is stronger glutes, better hip stability, improved workout performance, or simply feeling less stiff after sitting, bridge variations offer a practical path forward.
Conclusion: Build a Better Bridge, Build a Better Base
The bridge exercise earns its place in fitness programs because it is simple, scalable, and effective. It strengthens the glutes, trains hip extension, supports core stability, and helps create better lower-body control. Once the basic bridge feels easy, variations like the single-leg bridge, banded bridge, marching bridge, feet-elevated bridge, and weighted glute bridge can keep your workouts fresh and challenging.
The key is to move with intention. Keep your core engaged, squeeze your glutes, control your hips, and choose the variation that matches your current ability. You do not need to do every version in one workout. Start with one or two, practice consistently, and progress when your form stays clean. Strong bridges are built one controlled rep at a timeand yes, your glutes will notice.

