
Makeup
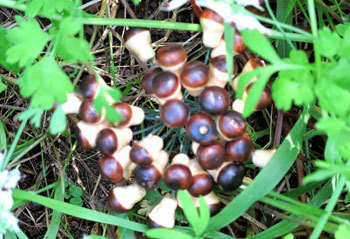
Tiny Mushrooms Ornaments
Aug
Tiny mushroom ornaments have an impressive amount of personality for objects that are usually no bigger than a walnut. With their plump stems, spotted caps, and storybook proportions, these miniature decorations can make a Christmas tree look like it wandered into an enchanted forest and decided to stay for cocoa.
They also offer unusual creative freedom. A mushroom can be rustic, elegant, playful, Scandinavian, vintage, glittery, or delightfully strange. It can hang from a holiday tree, decorate a wreath, top a wrapped gift, brighten a nursery mobile, or live year-round on a shelf beside a tiny ceramic frog that seems to know too much.
This guide explores the best materials, construction methods, color combinations, decorating ideas, storage practices, and hands-on lessons for making tiny mushroom ornaments at home. Whether you prefer felt, polymer clay, air-dry clay, wood, paper, or repurposed craft supplies, there is a mushroom waiting to emerge from your craft drawer.
Why Tiny Mushroom Ornaments Are So Appealing
Mushroom-shaped décor works because the basic silhouette is instantly recognizable: a rounded cap balanced on a short stem. That simple structure leaves plenty of room for interpretation. A red cap with white spots suggests a fairy-tale toadstool, while brown, cream, and moss-green shades create a more natural woodland look.
Mushroom motifs have appeared in lamps, glassware, textiles, wreaths, and other home accessories as part of a broader interest in nature-inspired and whimsical décor. Small ornaments are an especially practical way to enjoy the theme because they introduce character without turning an entire room into what Architectural Digest jokingly described as a “fungi fortress.”
Handmade ornaments also feel more personal than mass-produced decorations. Slightly uneven stitches, imperfect dots, and quirky cap shapes are not necessarily mistakes. They are proof that a person made the ornament rather than a highly caffeinated factory robot with suspiciously perfect motor skills.
Choosing the Best Material
The ideal material depends on the appearance you want, the tools you own, and how much time you are willing to spend chasing tiny white beads across the floor.
Felt Mushroom Ornaments
Felt is one of the easiest materials for beginners. Its edges generally do not unravel like woven fabric, so mushroom shapes can be cut without hemming. Craft felt is inexpensive and available in many colors, while wool or wool-blend felt tends to look denser and more refined.
A basic felt ornament uses two matching mushroom silhouettes. The front piece is decorated, the pieces are stitched or glued together, and the center is lightly filled with fiberfill or clean fabric scraps. A blanket stitch produces a finished decorative edge, although a running stitch works perfectly well for a simpler design.
Beads, sequins, embroidery, miniature buttons, and felt circles can be added before the front and back are joined. A ribbon loop should be placed between the layers and securely stitched into the top. Felt ornament tutorials from Better Homes & Gardens and Good Housekeeping similarly emphasize tracing paired shapes, adding embellishments, joining the layers, inserting a hanger, and lightly stuffing the finished form.
Polymer Clay Mushroom Ornaments
Polymer clay is an excellent choice for detailed, durable miniatures. Begin by rolling a short cylinder for the stem and a small ball for the cap. Flatten the underside of the ball slightly, press it onto the stem, and blend the connection carefully.
Insert an eye pin or form a hole for the hanger before curing. Keep the cap reasonably light so the ornament hangs upright instead of leaning forward like a mushroom that has received troubling financial news.
Acrylic details may be applied before or after curing, depending on the product and desired finish. Manufacturer instructions should always control the oven temperature and curing time because different polymer clay formulas have different requirements. Sculpey, for example, advises following the directions for the specific clay line and confirms that dry acrylic details can be cured with compatible polymer clay.
Not every polymer clay piece needs a sealer. A compatible glaze may be used when a glossy, dimensional, or color-protective finish is desired. Test paint and glaze combinations on leftover clay first, since some coatings can remain sticky or react poorly with particular formulas.
Air-Dry Clay Mushroom Ornaments
Air-dry clay is convenient for people who do not want to use an oven. It can be rolled, pinched, stamped, and painted once completely dry. Textured fabric, lace, leaves, or patterned paper can be pressed gently into the cap to create surface detail.
The main challenge is moisture loss. Thick pieces may dry unevenly, so small ornaments should be shaped with relatively consistent thickness. Allow them to dry on a flat, breathable surface and turn them occasionally if the product instructions recommend it. Paint only after the center is fully dry.
Real Simple has highlighted air-dry clay ornaments as an affordable, relatively low-effort craft that can gain sophisticated texture from everyday patterned materials.
Wooden Mushroom Ornaments
Wood creates a rustic ornament that pairs naturally with pinecones, dried oranges, plaid ribbon, and other woodland Christmas decorations. You can paint an unfinished mushroom cutout, assemble one from a wooden bead and small peg, or paint a mushroom scene on a predrilled wood slice.
Unfinished wood rounds and mushroom cutouts are widely sold for holiday decorations and DIY craft projects. Predrilled pieces are particularly helpful because the hanger can be attached without bringing power tools into what was supposed to be a relaxing afternoon.
Sand rough edges, remove dust, apply a thin base coat, and let each painted layer dry. For an aged appearance, lightly dry-brush cream or brown over the surface. A matte protective craft finish can help reduce scuffing during storage.
Paper, Cardboard, and Recycled Materials
Paper mushroom ornaments are lightweight and budget-friendly. Cut several identical mushroom shapes from decorative paper, fold each one vertically, and glue the folded halves together to create a dimensional ornament. Add thread before closing the final seam.
Cardboard packaging, old book pages, wrapping-paper scraps, and holiday cards can all become mushroom decorations. Better Homes & Gardens recommends repurposed paper and other everyday materials for handmade ornaments, while Real Simple has featured personalized decorations made from cardstock, ribbon, wood slices, felt, and recycled items.
Basic Supplies for a Tiny Mushroom Ornament Workshop
You do not need every supply listed below. Choose materials that suit your preferred method:
- Felt, polymer clay, air-dry clay, wood blanks, or heavy paper
- Sharp craft scissors
- Embroidery floss, sewing thread, ribbon, twine, or thin cord
- Fabric glue, tacky craft glue, or another material-compatible adhesive
- Acrylic craft paint and small detail brushes
- Fiberfill or clean fabric scraps for stuffed felt ornaments
- Beads, sequins, miniature pom-poms, glitter, or rhinestones
- A pencil, washable marking tool, sculpting tool, or toothpick
- Clear craft finish when appropriate for the material
For felt projects, use adhesive sparingly. Excess glue can soak through the fabric and create stiff, shiny patches. A precision applicator helps with small decorations, and a nontoxic craft adhesive is a sensible choice when children are participating.
How to Make a Simple Felt Mushroom Ornament
Step 1: Create the Pattern
Draw a mushroom about three inches tall on cardstock. Keep the outline simple, with a broad cap and sturdy stem. Cut out the template and trace it twice onto felt.
Step 2: Cut and Decorate
Cut both shapes carefully. Choose one as the front. Add contrasting circles to the cap, embroider tiny stars, sew on beads, or create gills with curved stitches beneath the cap.
Step 3: Add the Hanger
Cut a short length of ribbon or cord and fold it into a loop. Place the loose ends between the felt layers at the top of the cap. Secure them with several stitches rather than relying on one heroic stitch to carry the entire mushroom’s future.
Step 4: Join and Stuff
Sew around the edge, leaving a small opening. Add just enough stuffing to create gentle dimension. Too much filling can distort the stem and turn your woodland mushroom into a holiday balloon animal.
Step 5: Close the Opening
Finish stitching, knot the thread securely, and hide the end between the layers. Inspect the hanger before placing the ornament on a tree.
How to Make a Painted Clay Mushroom Ornament
Shape the Stem and Cap
Form a tapered stem and a rounded cap. Press them together firmly, blending the seam without crushing the shape. Add shallow lines beneath the cap for gills if desired.
Create the Hanging Point
Insert an eye pin into the cap or make a clean hole with a toothpick. The hole should be large enough for cord after the piece is dry or cured but not so large that the mushroom appears to have been surprised.
Dry or Cure Correctly
Follow the clay manufacturer’s instructions. Never guess at curing temperature, and do not assume that instructions for one clay brand apply to another.
Paint in Thin Layers
Apply a base color, let it dry, and add spots with the end of a paintbrush handle or dotting tool. A darker wash beneath the cap can make the gills more visible. Finish with tiny highlights along one side to create dimension.
Color Palettes That Work Beautifully
Classic Fairy-Tale Red
Combine a bright red cap, ivory stem, and white spots. Add a little moss-green embroidery or ribbon to keep the ornament from looking too much like it escaped from a video game.
Natural Woodland Neutrals
Use chestnut brown, oatmeal, taupe, cream, rust, and muted green. These shades pair well with wood bead garlands, burlap ribbon, dried citrus, and warm white lights.
Pastel Enchanted Forest
Try blush pink, lavender, pale blue, butter yellow, and mint. Gold thread or pearly beads add a polished finish without overpowering the small shape.
Scandinavian-Inspired Simplicity
Choose red, white, gray, and natural wood. Use clean shapes, restrained stitching, and repeated geometric marks. Scandinavian-inspired felt ornaments commonly rely on strong silhouettes, folk-style details, and a limited palette.
Midnight Forest
Deep navy, charcoal, black, burgundy, and antique gold produce a moodier ornament. Paint tiny stars on the cap or embroider a crescent moon for a miniature nighttime scene.
Creative Ways to Display Tiny Mushroom Ornaments
Christmas trees are only the beginning. Tie a mushroom to a wrapped gift so it doubles as a keepsake. Hang several from a bare decorative branch in a vase. Add them to a wreath, garland, table centerpiece, miniature village, or seasonal wall hanging.
A collection of tiny mushrooms can also form a woodland mobile for decorative use. Vary the hanging lengths and mix mushrooms with felt leaves, acorns, stars, or small animals. Keep decorative mobiles and small detachable parts out of the reach of babies and young children.
For place settings, tie one ornament around each folded napkin and add a handwritten name tag. Guests receive both a table decoration and a small handmade gift. That is efficient holiday hosting, also known as making one craft perform two jobs because December has no respect for your schedule.
How to Make the Ornaments Look More Professional
Consistency matters more than perfection. When producing a set, use one template, repeat a limited color palette, and position hangers at roughly the same height. Lay all ornaments together before attaching embellishments so the collection feels coordinated.
Use thin coats of paint rather than one heavy layer. Trim loose threads. Remove visible glue strings. Let adhesives, paint, clay, and finishes dry or cure completely before packaging the pieces.
Most importantly, keep the ornament lightweight. Oversized beads, thick clay caps, and dense decorations may pull the piece forward or bend a small tree branch. Test one finished ornament before creating an entire mushroom population.
Common Mistakes to Avoid
- Making the hanger too short: Leave enough room for a branch, hook, or ribbon.
- Using incompatible finishes: Test glaze, varnish, and paint on scrap material first.
- Overstuffing felt: Add small amounts of filling gradually.
- Painting damp air-dry clay: Trapped moisture can contribute to cracking or peeling.
- Skipping reinforcement: Stitch or anchor the hanging loop securely.
- Using too much glue: Small dots usually hold better and look cleaner than a craft-glue landslide.
- Storing ornaments loose: Caps, stems, beads, and eye pins can break when pieces collide.
Storing Handmade Mushroom Ornaments
Store each ornament only after it is fully dry and clean. Wrap delicate clay or wooden pieces individually with acid-free tissue paper or place them in divided compartments. Felt ornaments can be layered between sheets of tissue, but avoid crushing heavily stuffed designs.
Use a sturdy, labeled container and keep it in a dry, temperature-stable area. Dedicated ornament boxes with dividers help prevent movement, dust, and accidental impact, while irregularly shaped decorations may need adjustable compartments or extra padding.
Five Hundred Words of Realistic Crafting Experience
The first lesson learned while making tiny mushroom ornaments is that “tiny” does not mean “fast.” A three-inch felt mushroom may require only a handful of materials, yet it can absorb an entire evening once embroidery, beads, stuffing, and repeated debates about cap color become involved.
Starting with felt is usually the least intimidating approach. The pattern looks simple on paper, but the narrow stem can become uneven when cut too quickly. Folding the felt and cutting both layers together may produce matching pieces, although thick felt can shift under the scissors. Tracing and cutting each piece separately often gives better control. Placing the two finished shapes together and trimming them as a pair helps correct minor differences.
Decoration is where the project becomes addictive. One white spot leads to another. Then the cap apparently needs French knots. Then the stem looks lonely and receives embroidered grass. Soon the mushroom has a beaded collar, a golden hanging loop, and the confidence of a much larger ornament.
Stuffing requires restraint. The natural temptation is to keep adding fiberfill until the piece looks luxuriously plump. Unfortunately, too much filling can widen the stem, separate glued edges, and hide delicate stitching. A pencil, chopstick, or blunt sculpting tool helps guide tiny amounts into the cap. The finished ornament should feel softly dimensional rather than prepared for flotation.
Clay produces a different set of surprises. Caps that appear light while being sculpted may become too heavy for their stems. A successful design usually has a compact cap, a firmly blended joint, and a hanger positioned near the visual center. Making the hanging hole too close to the edge can weaken the clay, while placing it too low may cause the ornament to tilt.
Painting is easier when several mushrooms are made at once. Apply the base color to every ornament, allow the batch to dry, and then add spots and shadows. This assembly-line method is faster and keeps the set visually consistent. It also creates the entertaining sight of a table covered with unpainted mushrooms awaiting their identities.
Wooden ornaments are forgiving because mistakes can often be sanded or painted over. They also accept lettering well. Adding a year, family name, or short message to the back transforms a decorative object into a keepsake. A fine paint marker may be easier to control than a brush for very small text.
The most satisfying approach is to create related ornaments rather than identical copies. Use the same palette but vary the cap shapes, dot patterns, and embellishments. One mushroom may have white spots, another tiny stars, and another a stitched fern. The set remains coordinated without looking mechanically produced.
Handmade mushroom ornaments are also excellent small gifts, but packaging matters. A rigid box protects clay and wood better than a soft envelope. Felt mushrooms can be attached to a card with removable thread and mailed inside a padded package. Including a short handwritten note about the materials and year makes the gift feel intentional.
Perhaps the best experience is watching a collection grow over time. A first ornament may be uneven and slightly overstuffed. The next has cleaner stitching. By the sixth, the spots are balanced, the hanger sits correctly, and the creator has developed strong opinions about mushroom stem proportions. Those small improvements become part of the tradition.
Final Thoughts
Tiny mushroom ornaments combine approachable shapes with nearly unlimited design possibilities. Felt offers softness and beginner-friendly construction. Polymer clay captures fine detail. Air-dry clay avoids oven curing. Wood provides rustic durability, while paper makes it possible to create an entire woodland on a modest budget.
The best results come from selecting compatible materials, using a repeatable template, attaching the hanger securely, and letting every layer dry completely. Beyond those practical rules, there is plenty of room for experimentation. Make the caps red, pastel, metallic, embroidered, speckled, or covered in miniature stars. A mushroom ornament does not need to resemble a scientifically accurate fungus. It merely needs to look charming while hanging from a branch.
Note: Tiny mushroom ornaments are decorative objects, not toys or food. Adults should supervise children when projects involve needles, ovens, hot glue, sharp tools, small beads, or other choking hazards.

