Beauty Unlocked
The Easy Way to Make Textured Cardboard Wall Decor
Jun
Cardboard is usually treated like the temporary intern of the household: useful for one delivery, ignored in the corner, then flattened with mild guilt. But give it a little glue, texture, paint, and patience, and suddenly that humble shipping box starts acting like it belongs in a design magazine. Textured cardboard wall decor is one of the easiest ways to create custom art without spending “I accidentally bought a designer lamp” money.
The best part? You do not need to be a professional artist. You do not even need to draw a straight line. In fact, imperfect lines, torn edges, raised layers, and organic ridges are exactly what make this DIY cardboard wall art look stylish instead of stiff. With a few basic supplies, you can turn scrap cardboard into modern wall decor that feels sculptural, handmade, and surprisingly expensive.
This guide walks you through the easy way to make textured cardboard wall decor, from choosing the right cardboard to adding depth, sealing the surface, painting it beautifully, and hanging it safely. Think of it as a makeover show for cardboard, except the cardboard does not cry at the reveal.
Why Textured Cardboard Wall Decor Is Having a Moment
DIY wall art has become popular because it solves three common decorating problems: blank walls, small budgets, and the deeply suspicious price tags on “minimalist” art. Textured cardboard wall decor fits perfectly into this trend because it is affordable, customizable, lightweight, and beginner-friendly.
Corrugated cardboard already has built-in texture. Peel away the top paper layer and you reveal ridges that look architectural. Cut cardboard into strips, curves, tiles, arches, waves, or geometric shapes, and you can create depth without heavy tools. Add paint, spackle, joint compound, paper, or fabric scraps, and the surface begins to look like ceramic, plaster, carved wood, or abstract canvas art.
It is also a smart upcycling project. Instead of buying a new blank canvas, you can reuse clean shipping boxes, food packaging cardboard, or packing inserts. That does not mean every box deserves a second careergreasy pizza boxes may have artistic ambition, but they should stay out of this project. Choose clean, dry, sturdy cardboard for the best result.
What Makes Cardboard Good for Textured Wall Art?
Cardboard is light, easy to cut, easy to layer, and forgiving. If you make a mistake, you can patch it, cover it, or call it “abstract.” That is the kind of supportive material we all need in life.
Corrugated Cardboard Adds Natural Texture
Corrugated cardboard has a wavy inner layer sandwiched between flat paper sheets. When exposed, those ridges create rhythm and shadow. You can use them vertically for a clean modern look, horizontally for a calm landscape effect, or diagonally for more movement.
Flat Cardboard Works Well as a Base
Thicker flat cardboard, mat board, or layered box panels make a strong backing for your design. If your cardboard feels floppy, glue two or three pieces together with the corrugation running in different directions. This helps reduce bending and gives your artwork a more solid feel.
Layering Creates a Sculptural Look
The easiest way to make cardboard wall decor look high-end is to layer pieces. Raised strips, repeated arches, uneven torn shapes, and stacked circles create shadows. Once painted in one color, these layers look intentional and refined.
Materials You Will Need
You can keep this project simple or dress it up depending on the style you want. Here is a practical supply list for beginner-friendly textured cardboard wall decor.
- Clean corrugated cardboard or sturdy shipping boxes
- Craft knife or heavy-duty scissors
- Cutting mat or thick scrap board
- Ruler and pencil
- White craft glue, tacky glue, or hot glue
- Spackle, lightweight joint compound, or texture paste
- Palette knife, old gift card, plastic scraper, or spoon
- Acrylic craft paint or latex paint samples
- Paintbrushes or foam brushes
- Clear acrylic sealer or matte decoupage finish
- Picture hanging strips, sawtooth hanger, or lightweight frame
If younger crafters are helping, use scissors instead of craft knives and choose low-temperature glue tools or regular craft glue. Hot glue and sharp blades are useful, but they are not toys. They are tiny chaos machines with handles.
Step 1: Choose a Simple Design
Before cutting anything, decide what kind of wall decor you want. Simple designs often look the most professional. A beginner-friendly textured cardboard piece can be based on one of these layouts:
- Modern arches: layered half-circles and curved strips
- Sunburst: narrow cardboard strips radiating from a center point
- Organic abstract: torn cardboard pieces layered like stone or bark
- Geometric tiles: squares, triangles, diamonds, or rectangles
- Minimalist waves: long curved strips arranged in flowing lines
For a polished result, limit the design to one main shape family. If you combine arches, zigzags, stars, flowers, lightning bolts, and one mysterious blob, the piece may start looking less like wall art and more like a craft drawer had a dream.
Step 2: Prepare the Cardboard Base
Cut a large rectangle, square, circle, or arch from sturdy cardboard. A good starter size is 16 by 20 inches, which is large enough to make an impact but small enough to manage on a kitchen table.
If the cardboard has printed logos, tape, dents, or rough folds, place that side facing the back. For a cleaner surface, glue a plain sheet of kraft paper, packing paper, or thin cardstock over the front. Let it dry flat under books. Use books you do not mind sacrificing to the noble cause of craft pressure.
Prevent Warping
Cardboard can warp when it gets too wet. Use thin layers of glue and paint instead of flooding the surface. If you are applying spackle or joint compound, keep it light and even. Heavy wet texture on one side can make the board curl as it dries.
To help prevent bending, prime both the front and back with a thin coat of paint or sealer. This balances moisture and gives the finished artwork a more stable shape.
Step 3: Add Texture With Cardboard Layers
This is where the project starts looking fancy. Cut cardboard into strips, curves, blocks, or torn pieces and arrange them on the base before gluing. Take a photo of the layout so you can remember where everything goes. This is especially helpful if your design contains many small pieces and your cat has strong opinions about tabletop arrangements.
Easy Texture Ideas
- Peeled corrugation: Remove the top paper layer to reveal ribbed texture.
- Raised strips: Glue narrow strips in parallel rows for a clean modern look.
- Torn edges: Tear cardboard by hand for rough, natural-looking texture.
- Stacked shapes: Layer the same shape in different sizes for depth.
- Rolled cardboard: Curl thin strips into spirals, coils, or waves.
For a beginner version, try a monochrome arch design. Cut three or four large arch shapes, layer them slightly off-center, then add corrugated strips around them. Once painted, the shadows will do half the decorating work for you.
Step 4: Glue Everything Securely
Use craft glue for large flat pieces and hot glue for raised pieces that need quick hold. Craft glue gives you more time to adjust shapes, while hot glue acts fast. The downside of hot glue is that it also acts fast when it touches your finger, at which point you may invent new vocabulary.
Press pieces firmly into place and allow the glue to dry completely. Do not rush this step. If the layers shift while you are painting, the finished decor may look uneven in a way that says “accident” instead of “artist.”
Pro Tip: Build a Border
Glue strips around the edge of the base to create a built-in frame. This makes the wall decor look more finished and hides uneven edges. You can use flat strips for a simple border or exposed corrugated strips for extra texture.
Step 5: Add Spackle or Joint Compound for a Plaster Look
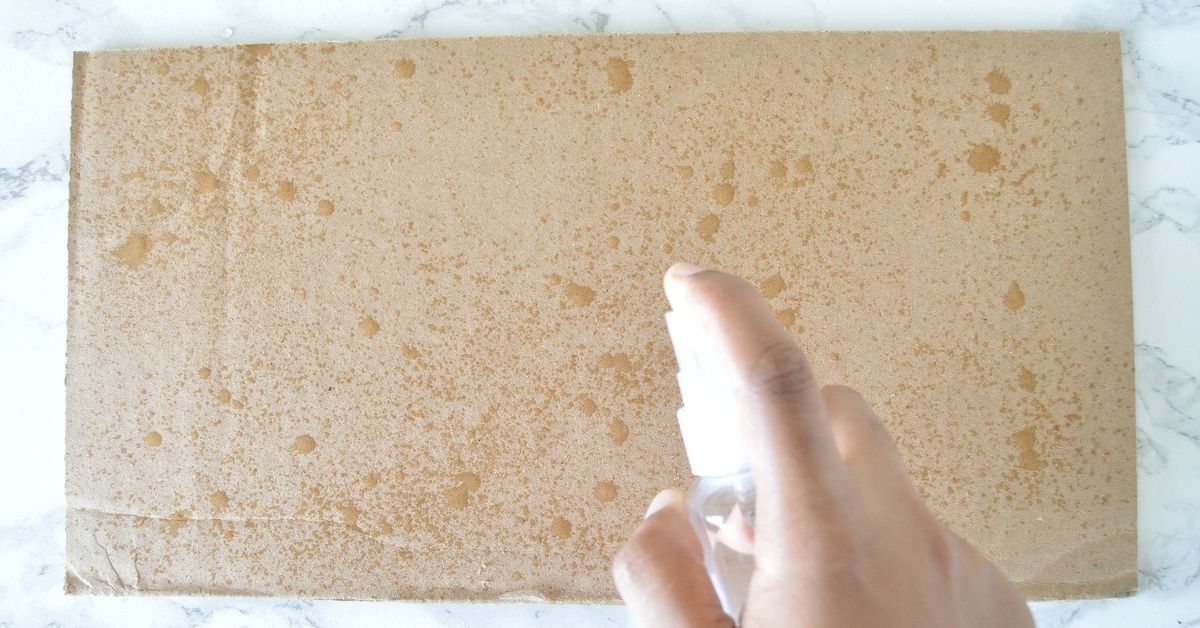
If you want the cardboard to look like textured plaster, apply a thin layer of lightweight spackle or joint compound. Use a palette knife, old gift card, or plastic scraper to spread it across selected areas. You do not have to cover the whole piece. Leaving some cardboard ridges exposed creates contrast.
Keep the layer thin. A heavy coat may crack, take too long to dry, or weigh down the cardboard. For a natural finish, drag the tool lightly through the compound to create ridges, grooves, or soft waves.
Texture Patterns to Try
- Linen texture: Pull a dry brush vertically and horizontally through wet compound.
- Stone texture: Dab with a sponge or crumpled paper.
- Wave texture: Sweep a spoon or palette knife in curved lines.
- Minimal plaster: Smooth the compound unevenly for a handmade look.
Let the texture dry fully before painting. Drying time depends on thickness, humidity, and the product used. When in doubt, wait longer. Paint applied too early can trap moisture and make the finish soft.
Step 6: Paint the Decor
Acrylic craft paint and latex paint samples both work well for cardboard wall decor. For a modern look, choose one color and let the texture create the drama. Warm white, clay, beige, charcoal, sage green, terracotta, soft black, and muted blue are all excellent choices.
Start with a thin base coat. Let it dry, then apply a second coat if needed. A foam brush works well for broad areas, while a small brush helps paint inside corrugated ridges.
Color Ideas That Look Expensive
- Matte white: Clean, gallery-like, and perfect for subtle shadows
- Warm beige: Soft, earthy, and easy to match with most rooms
- Black: Dramatic, modern, and surprisingly forgiving
- Terracotta: Warm and handmade-looking
- Olive or sage: Calm, natural, and great for bedrooms
For extra depth, dry-brush a slightly lighter color over raised areas. Dip the brush lightly in paint, wipe most of it off, then skim across the texture. The raised parts catch the color and instantly look more dimensional.
Step 7: Seal the Finished Piece
Sealing helps protect the surface from dust and light handling. Use a clear acrylic sealer, matte varnish, or decoupage finish. Apply thin coats and let each coat dry fully. Matte finishes usually look more modern, while satin finishes add a soft sheen.
Do not treat sealed cardboard like waterproof outdoor art unless you used outdoor-rated products and tested them carefully. Cardboard is still cardboard. It has upgraded its wardrobe, not its DNA.
Step 8: Hang It Safely
Because cardboard wall decor is lightweight, adhesive picture hanging strips often work well on smooth painted walls. Always check the product’s weight limit and follow the instructions. For textured walls, humid rooms, or heavier framed pieces, use proper picture-hanging hardware instead.
A simple option is to glue a ribbon loop, sawtooth hanger, or lightweight hanging tab to the back. If the piece is large, use two hanging points so it stays level. Avoid hanging handmade cardboard decor over beds, cribs, or anywhere it could fall onto someone.
Design Variations for Different Home Styles
Minimalist Textured Cardboard Wall Decor
Use a square or rectangular base, add a few raised lines or arches, and paint everything matte white or warm gray. The result is simple, calm, and very “I drink water from a glass carafe now.”
Boho Cardboard Wall Art
Try sunbursts, half-moons, torn edges, and earthy colors. Add jute, raffia, or paper cord for more natural texture. Keep the palette warm: sand, clay, cream, rust, and muted gold.
Modern Geometric Decor
Cut triangles, rectangles, and diamonds, then arrange them in repeating patterns. Paint in one color for a sculptural look or use two neutral shades for subtle contrast.
Kids’ Room Cardboard Wall Decor
Create clouds, rainbows, mountains, stars, or oversized initials. Use non-toxic craft materials, skip sharp tools around younger kids, and keep the finished piece lightweight. Let children help with painting, because children are naturally gifted at adding texture to everything, including tables.
Common Mistakes to Avoid
Using Weak or Dirty Cardboard
Thin, greasy, damp, or crushed cardboard will not produce a clean result. Start with strong, dry cardboard that holds its shape.
Adding Too Much Wet Material
Too much paint, glue, or compound can warp the base. Use thin layers and let each layer dry before adding more.
Skipping the Layout Stage
Gluing pieces randomly can work for abstract art, but a quick layout makes the final piece look more intentional. Arrange first, glue second, panic never.
Forgetting the Edges
Raw edges can make the project look unfinished. Paint the edges, wrap them with paper, or glue on a simple cardboard border.
Hanging Without Checking the Weight
Even lightweight wall decor should be hung carefully. Choose hardware based on the final weight, wall surface, and location.
How to Make the Project Look More Expensive
The secret to high-end DIY cardboard wall decor is restraint. Use fewer colors, repeat shapes, and embrace texture. A monochrome finish can make humble materials look sculptural. Clean edges, balanced spacing, and a consistent theme also make a big difference.
Another trick is to frame the piece. A thrifted frame, shadow box, or simple wood trim can make cardboard art feel gallery-ready. Paint the frame the same color as the art for a seamless modern look, or choose natural wood for warmth.
Scale matters too. One tiny cardboard piece floating alone on a large wall may look accidental. Make a larger artwork, group several pieces together, or hang the decor above furniture where it has visual support.
Experience Notes: What Actually Happens When You Make Textured Cardboard Wall Decor
Here is the honest experience: this project begins with confidence, briefly becomes chaos, then somehow ends with a piece of wall decor you want to show people. At first, cardboard seems too ordinary. You cut a few strips, peel some corrugation, and wonder if you are making art or just aggressively recycling. But once the layers start building, the whole project changes. Shadows appear. Patterns form. The surface begins to look intentional.
The most satisfying part is peeling the top layer from corrugated cardboard. It feels oddly dramatic, like revealing a secret identity. Some sections peel cleanly, while others cling stubbornly and tear. That is fine. Those rough areas can become part of the design. In fact, the imperfect pieces often look better than the perfect ones because they create a more natural texture.
Cutting is the step where patience pays off. Long strips look simple, but uneven strips can make a design feel messy. A ruler and pencil help, but you do not need machine-level precision. Handmade decor should look handmade. The goal is not factory perfection; the goal is controlled charm. Think “artisan texture,” not “cardboard fought a lawn mower.”
Glue can be both friend and trickster. White craft glue gives a smooth bond but needs drying time. Hot glue is fast, but it can leave raised blobs if you use too much. The best approach is to use small dots of hot glue for quick hold and craft glue for larger flat areas. If a piece lifts later, do not panic. Add more glue, press it down, and pretend that was part of the creative process.
Painting is the magical step. Before paint, the artwork looks like cardboard. After the first coat, it looks like an experiment. After the second coat, it starts looking like decor. A single matte color can completely transform the project. White makes it look like plaster. Black makes it dramatic. Terracotta makes it warm and earthy. Beige makes it look like it came from a boutique where everything smells faintly of cedar and costs too much.
The biggest lesson is to let everything dry. Drying is boring, but it is also where success lives. If you paint over wet glue or seal damp compound, the finish can wrinkle, soften, or warp. Put the piece somewhere flat, walk away, and resist the urge to poke it every seven minutes. It is not bread dough. It does not need emotional support.
When the finished cardboard wall decor finally goes up, the lightweight feel is a major advantage. You can move it easily, test different locations, and create a gallery arrangement without drilling large holes. It is especially useful for renters, dorm rooms, bedrooms, craft rooms, and budget makeovers. The finished piece may not fool a museum curator, but it can absolutely make a blank wall feel more personal, creative, and complete.
The best experience-related advice is simple: make a small test piece first. Try peeling, gluing, texturing, painting, and sealing on a scrap. You will quickly learn how your cardboard reacts. Some cardboard drinks paint like a thirsty camel. Some bends when wet. Some has beautiful corrugation that deserves to be shown off. Testing saves frustration and gives you confidence before you make the final artwork.
Most importantly, enjoy the low-pressure nature of the project. Cardboard is forgiving. If the design fails, you have not ruined expensive canvas. You have gained useful information and possibly created a very stylish coaster for a giant. Try again with a new box, a simpler pattern, or a better color. The easy way to make textured cardboard wall decor is not about perfection. It is about turning an everyday material into something that makes your home feel more like you.
Conclusion
Textured cardboard wall decor proves that beautiful home design does not have to be expensive, complicated, or reserved for people with a studio full of mysterious tools. With clean cardboard, simple shapes, careful layering, a little texture, and the right paint, you can create custom DIY wall art that feels modern, personal, and surprisingly polished.
The easiest method is to start with a sturdy base, add raised cardboard pieces, apply light texture where needed, paint everything in a cohesive color, seal the surface, and hang it safely. From minimalist arches to boho sunbursts and organic abstract panels, cardboard can become far more than packaging. It can become a conversation piece.
So the next time a delivery box lands at your door, do not rush to flatten it. That box may be one craft session away from becoming textured wall decor. At the very least, it deserves an audition.
