Makeup
Spooky Layered Paper Art and Party Inspiration With Creative Fabrica
Jun
Halloween decorating has a funny way of turning normal adults into theatrical set designers with a suspicious number of glue sticks. One minute you are buying candy “for the kids,” and the next minute you are debating whether your dining room needs a haunted forest silhouette, a glowing paper moon, and a skeleton holding a miniature charcuterie board. This is where spooky layered paper art comes in: dramatic enough to impress guests, affordable enough to make in multiples, and clean enough that your house will not look like a glitter bomb fought a losing battle.
Creative Fabrica has become a favorite resource for crafters who want downloadable design files, fonts, graphics, paper craft templates, and cut files that work well with popular cutting machines like Cricut and Silhouette. For Halloween, that means you can find layered SVG designs, shadow box templates, spooky fonts, printable party signs, treat bag labels, invitation elements, and digital graphics that help turn a basic party into a haunted little masterpiece. The best part? You do not need to be a professional designer. You just need a plan, a few sheets of cardstock, and the confidence to say, “Yes, that bat wall was intentional.”
Why Layered Paper Art Is Perfect for Halloween
Layered paper art creates depth by stacking several cut paper pieces on top of one another. Each layer adds a little shadow, shape, and dimension. The result can look surprisingly polished, especially when framed in a shadow box or placed in front of a small LED light. Halloween is practically built for this technique because spooky visuals depend on silhouettes, contrast, and atmosphere. A haunted house looks better when it has a glowing moon behind it. A black cat looks more mysterious when it sits in front of a pumpkin-orange background. A graveyard scene becomes far more dramatic when the tombstones, bats, trees, and fog are all separated into layers.
Unlike large plastic decorations, layered cardstock projects are lightweight, easy to store, and highly customizable. You can scale them up for wall art, shrink them down for cupcake toppers, or adapt the same theme for invitations, banners, table cards, and favor tags. This gives your Halloween party a coordinated look without requiring a decorator, a warehouse, or a fog machine named “Kevin.”
What Creative Fabrica Brings to the Craft Table
Creative Fabrica is useful because it brings many digital crafting assets into one searchable platform. Instead of drawing every bat, spiderweb, witch hat, and skull by hand, you can browse ready-made SVG files, PNG images, DXF files, EPS graphics, fonts, templates, and printable designs. Many craft files are designed for cutting machines, while others can be printed and cut by hand. This flexibility matters because not every Halloween crafter owns the same tools. Some people have a Cricut Maker ready for action. Others have scissors, coffee, and determination. Both are valid lifestyles.
Layered SVG Files
Layered SVG files are especially helpful for creating dimensional paper art. A good layered file separates the design into pieces that can be cut from different colors of cardstock and stacked in order. For example, a spooky mansion design may include a background sky, moon, clouds, trees, house silhouette, window details, bats, and foreground fence. When assembled, those flat sheets suddenly feel like a tiny haunted stage.
Shadow Box Templates
Shadow boxes are one of the most popular ways to display layered paper art. Creative Fabrica offers many 3D SVG and shadow box style files, and the format works beautifully for Halloween. Think glowing haunted castles, jack-o’-lantern faces, graveyard scenes, moonlit forests, black cats, ghosts, ravens, witches, and sugar skulls. Add foam spacers between layers, place the finished piece in a deep frame, and you get a decoration that feels handmade but boutique-worthy.
Fonts for Spooky Party Details
Fonts are an underrated part of Halloween design. A party sign that says “Snacks” is helpful. A party sign that says “Witch Snacks, Served After Midnight” in a crooked gothic font is an experience. Creative Fabrica’s font library can help match your theme, whether you want elegant Victorian vampire, playful kid-friendly pumpkin patch, horror movie poster, or whimsical witch cottage. Use the same font family across invitations, food labels, banners, and thank-you tags to make everything feel intentional.
How to Plan a Spooky Layered Paper Art Project
Before downloading the first skeleton you see, choose a clear theme. Halloween design can go in many directions, and mixing all of them at once can make your party look like a costume store exploded. A focused theme makes the project easier and the final decor more impressive.
Choose a Halloween Style
For a classic haunted house party, use black, gray, deep purple, bone white, and orange. For a cute Halloween party, try pastel purple, peach, mint, black, and white. For a gothic dinner, use black cardstock, metallic gold, burgundy, ivory, and candlelight. For a kid-friendly event, pumpkins, smiling ghosts, candy corn, friendly bats, and bright colors will keep the mood fun instead of nightmare-adjacent.
Pick the Right Paper
Cardstock is the hero of layered paper art. A medium-weight cardstock works well for most cutting machine projects because it holds shape without being too difficult to cut. For intricate designs, avoid overly fibrous paper that tears easily. For backgrounds, textured cardstock can add richness. For moonlight, fog, or window glow, vellum can soften the effect. Metallic cardstock is great for accents, but use it sparingly so your project looks magical, not like a disco ball joined a coven.
Use Spacing to Create Depth
The secret to layered paper art is not only the cutting; it is the spacing. Foam squares, foam tape, thin strips of cardboard, or layered adhesive dots can lift each paper layer slightly away from the one behind it. That tiny gap creates shadows, and shadows create drama. A haunted tree without spacing is a tree. A haunted tree with spacing is suddenly whispering secrets from 1847.
Creative Fabrica Halloween Project Ideas
The best Halloween projects are the ones that can do double duty. A layered paper design can become wall decor, a centerpiece, a photo booth prop, or a party sign. With the right files and colors, you can create an entire party atmosphere from paper-based elements.
1. Haunted House Shadow Box
A haunted house shadow box is the ultimate spooky layered paper art project. Start with a layered SVG that includes a mansion, moon, bats, trees, and foreground details. Cut each layer from cardstock, then stack them with foam tape. Place the final design in a deep frame and add battery-powered LED lights behind the back layer. The glow through windows, moon shapes, or vellum fog creates a cinematic effect. It is basically a horror movie set, but polite enough to sit on your mantel.
2. Bat Swarm Wall Installation
Paper bats are simple, cheap, and surprisingly effective. Use a bat SVG in several sizes, cut the shapes from black cardstock, and slightly fold the wings for dimension. Arrange them as if they are flying from a fireplace, mirror, doorway, or dessert table. For an upgraded version, mix matte black, glitter black, and charcoal cardstock. The wall will look alive, and you will get to say, “Don’t worry, they’re paper,” at least six times.
3. Layered Pumpkin Party Signs
Use layered pumpkin designs for food stations, welcome signs, or activity areas. A pumpkin with separate layers for the stem, leaves, face, shadows, and text gives a sign much more personality than a flat printout. Try phrases like “Pick Your Poison,” “Boo Bar,” “Candy Cauldron,” “Ghoul Gang Check-In,” or “Resting Witch Face Photo Booth.” Add a spooky font and you have instant party branding.
4. Spooky Cupcake Toppers
Layered paper cupcake toppers are small but mighty. Use mini ghosts, bats, witch hats, skulls, potion bottles, or pumpkins. Cut two or three layers, glue them to toothpicks or food-safe sticks, and place them in cupcakes, brownies, fruit cups, or mini pies. They make store-bought desserts look custom, which is the correct level of effort for a busy host.
5. Printable and Cut Treat Bags
Creative Fabrica designs can also help with party favors. Use Halloween graphics, patterns, and fonts to create treat bag labels, stickers, tags, and toppers. Match the design to your layered decor so the whole party feels cohesive. A black cat shadow box on the dessert table pairs perfectly with black cat favor tags. Guests may not consciously notice the coordination, but their inner Pinterest board will.
Building a Halloween Party Around Paper Art
Layered paper art works best when it becomes part of the overall party design rather than a random craft in the corner. Choose one “hero” piece and build the rest of the decorations around it. For example, if your main piece is a haunted mansion shadow box, repeat mansion windows, bats, iron gates, and moon shapes throughout the party. If your hero piece is a cute ghost scene, use round shapes, white balloons, friendly ghost faces, and soft lighting.
Create a Spooky Entry Moment
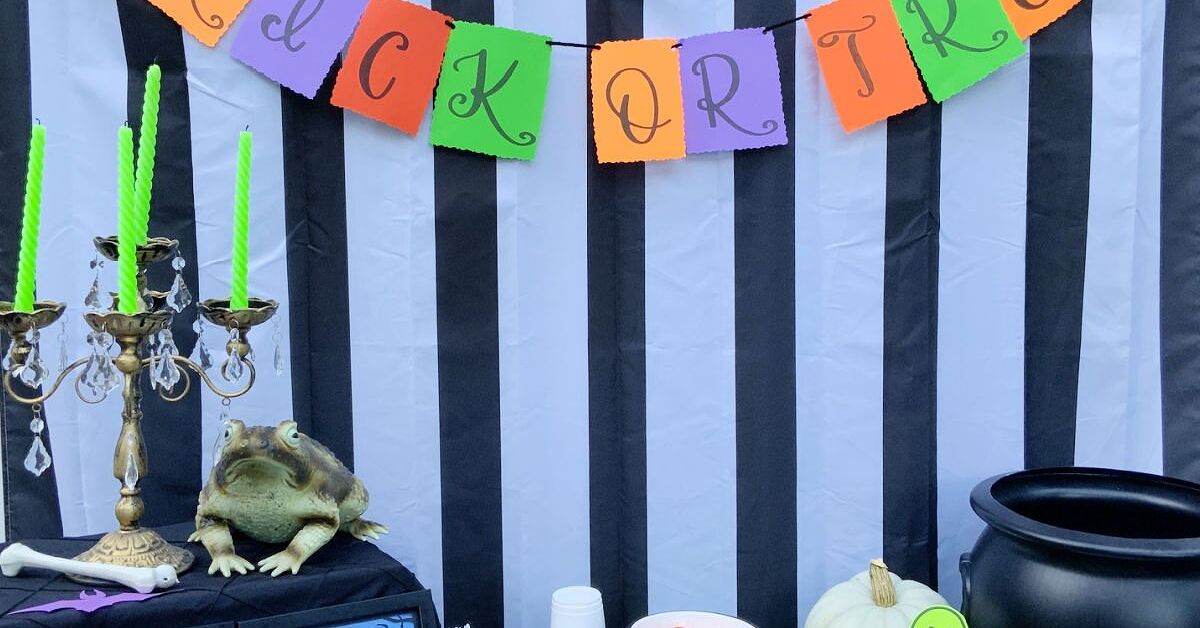
The entry sets the tone. Hang layered paper bats near the front door, place a framed shadow box on a table, and add a sign that matches your theme. Even a simple “Enter If You Dare” sign feels elevated when it uses layered cardstock and a dramatic font. Add a bowl of candy, a small pumpkin, and battery candles, and guests will know they have entered a house where the host owns both scissors and ambition.
Design a Dessert Table With Height
A Halloween dessert table should have levels. Use cake stands, boxes wrapped in black paper, framed art, garlands, and small layered cutouts to create height. Place the biggest paper art piece in the center or back, then arrange smaller labels and toppers around the food. Use Creative Fabrica fonts for food cards: “Mummy Brownies,” “Vampire Bites,” “Witch Fingers,” “Spiderweb Cookies,” and “Pumpkin Patch Popcorn.” The scarier the name, the faster people eat it.
Set Up a Photo Booth
A paper-based photo booth is easy to build. Cut oversized moons, clouds, bats, stars, ghosts, and spooky trees from cardstock or poster board. Layer them on a blank wall with removable adhesive. Add props such as paper masks, speech bubbles, witch hats, and vampire fangs. Use a matching printable sign that says “Spooktacular Selfies” or “Proof You Survived the Party.” Guests love a photo spot, especially when it does not require them to stand next to an inflatable werewolf.
Tips for Cutting and Assembling Layered Paper Art
Good results come from preparation. Before cutting a complex file, open it in your design software and check the layer order. Make sure the design is sized correctly for your frame or display area. If the project has tiny details, test cut one layer first. Nothing ruins the mood like discovering your haunted fence is too delicate after you have already cut eight sheets of cardstock.
Keep Your Mat Clean
A clean cutting mat helps paper stay in place. If the mat is too sticky, delicate cardstock may curl or tear when removed. If it is not sticky enough, the paper can shift and ruin the cut. Use the right mat grip for your material and remove cardstock carefully by bending the mat away from the paper instead of yanking the paper upward.
Label the Layers
Layered files can become confusing once cut, especially if several pieces look similar. Place each layer in order as soon as it comes off the mat. You can use sticky notes, small trays, or a simple stack from back to front. Future you will be grateful. Future you is already holding glue and trying not to swear at a tiny spiderweb.
Choose Adhesive Wisely
Liquid glue is useful for small details, but too much can warp paper. Foam tape is excellent for dimension. Glue dots work well for quick assembly. For shadow boxes, use consistent spacing so layers stay even. If your design includes vellum, apply adhesive only where it will be hidden behind solid cardstock, because visible glue marks can ruin the soft glow.
Party Inspiration: Themes That Work Beautifully
Elegant Gothic Dinner
Use black layered paper lace, raven silhouettes, antique frame shapes, deep red roses, and gold accents. Create menu cards with gothic fonts and small paper wax-seal style decorations. Add black taper candles and dark table linens. The mood should say “haunted mansion,” not “forgot to pay the electric bill.”
Kid-Friendly Boo Bash
Choose smiling ghosts, friendly pumpkins, candy shapes, and silly monsters. Use bright orange, purple, lime green, and white. Make layered name tags, game signs, cupcake toppers, and take-home treat bags. Keep sharp or fragile decorations out of reach and use battery-operated lights instead of open flames.
Witch’s Potion Party
Create paper potion bottle labels, cauldron signs, broom silhouettes, moon phases, and layered spell book decorations. Use Creative Fabrica fonts to label drinks as “Goblin Fizz,” “Swamp Punch,” and “Midnight Elixir.” Add dry ice only if you know how to handle it safely; otherwise, a little black paper fringe and green punch will do plenty of theatrical work.
Haunted Forest Night
This theme is perfect for layered paper art. Use trees, owls, ravens, moons, mushrooms, spiderwebs, and foggy vellum backgrounds. A framed forest shadow box can anchor the decor, while smaller tree silhouettes decorate walls, tables, and favor bags. Add warm lights for an eerie woodland glow.
Common Mistakes to Avoid
The first mistake is choosing a design that is too complex for your available time. Intricate layered paper art is rewarding, but it can take patience. If your party starts tomorrow, maybe do not begin a 17-layer haunted cathedral unless you enjoy crafting under emotional pressure.
The second mistake is using too many colors. Halloween palettes work best when limited. Choose three to five main colors and repeat them. The third mistake is skipping test cuts. A quick test helps you adjust pressure, blade settings, and paper choice before wasting materials. The fourth mistake is forgetting lighting. Layered paper art looks beautiful in daylight, but Halloween decor shines when shadows and small lights are involved.
Why Handmade Paper Decor Feels Special
Store-bought Halloween decor can be fun, but handmade paper art has personality. It shows effort without needing to be perfect. A slightly crooked bat or extra-dramatic ghost can make the party feel warmer, not worse. Guests remember details that feel personal: a custom sign, a handmade treat tag, a glowing shadow box, or a photo booth wall made with care.
Creative Fabrica helps by removing the scariest part of crafting: the blank page. Instead of starting from nothing, you can begin with professionally designed files and customize them with your own colors, scale, paper choices, and party theme. That combination of ready-made design and handmade assembly is ideal for busy hosts who want impressive results without spending three weeks learning vector illustration.
Experience Notes: Making Spooky Layered Paper Art for a Halloween Party
The first time you make spooky layered paper art for a party, the process usually begins with optimism and ends with you deeply respecting the engineering of foam tape. The project looks simple on screen: download a layered SVG, cut the cardstock, stack the pieces, and enjoy your masterpiece. In reality, the magic happens in the little decisions. Which orange looks more pumpkin-like? Should the moon be cream, white, or pale yellow? Is the haunted house spooky enough, or does it need three more bats? These are serious questions. Halloween democracy depends on them.
One of the best experiences is watching a flat pile of paper become dimensional. The first layer may look plain. The second layer makes it interesting. By the fourth or fifth layer, the design suddenly has depth, shadow, and personality. A spooky forest begins to feel like a real scene. A ghost looks like it is floating forward. A pumpkin face gains expression. This transformation is why layered paper art is so addictive. It gives the satisfaction of building something without requiring lumber, nails, or a garage full of mysterious tools.
For party planning, layered paper art also solves a common problem: how to make decorations look coordinated without buying an entire themed collection. Once you choose a design style from Creative Fabrica, you can repeat the same visual language everywhere. A moon-and-bat shadow box can inspire the invitation, cupcake toppers, drink labels, banner, and favor tags. Guests may not know why everything feels polished, but they will feel it. That is the quiet power of design consistency. It whispers, “This host has a plan,” even if the host is secretly hiding store-bought cookies in a handmade box.
The most useful lesson is to start with one main project, not twelve. A shadow box or large wall piece should be the star. Smaller projects can support it. When everything is important, nothing is important, and your craft table becomes a spooky paper swamp. Start with the hero piece, finish it, then use leftover cardstock for small details. This keeps the process fun instead of frantic.
Another experience-based tip is to assemble in good lighting. Halloween lighting is great for atmosphere but terrible for lining up tiny paper branches. Use a bright lamp while building, then test the finished piece with softer lights afterward. If you are using LED lights behind a shadow box, check the glow before sealing the frame. Sometimes one extra vellum layer can turn harsh light into dreamy moonlight.
Finally, accept tiny imperfections. Handmade Halloween decor should feel alive. A slightly uneven web, a moody wrinkle in vellum, or a bat that looks like it had too much cider can add charm. The goal is not factory perfection. The goal is atmosphere, creativity, and the happy moment when guests ask, “Where did you buy that?” and you get to say, with suspicious calm, “I made it.”
Conclusion
Spooky layered paper art is one of the smartest ways to decorate for Halloween because it is flexible, affordable, dramatic, and personal. With Creative Fabrica, crafters can find Halloween SVGs, shadow box templates, fonts, graphics, and printable elements that make party planning easier and more creative. Whether you are hosting a gothic dinner, a kid-friendly boo bash, a haunted forest party, or a witchy dessert night, layered cardstock projects can tie the whole event together.
The key is to choose a theme, use a focused color palette, plan one standout paper art piece, and repeat matching design details throughout the party. Add foam spacing, thoughtful lighting, and a few clever signs, and your Halloween decor will look like it took far more effort than it actually did. That is the sweet spot: spooky, stylish, handmade, and just dramatic enough to make your guests wonder whether your paper bats are judging them.
