
Skincare
Paint Storage & Pegboards In Our Basement Workshop
Jul
A basement workshop has a special talent for collecting half-empty paint cans, mystery hardware, lonely screwdrivers, and tools that disappear precisely when you need them. Our space was no exception. The workbench looked less like a creative command center and more like the aftermath of a very small hardware-store tornado.
We finally addressed the two biggest troublemakers: leftover paint and frequently used tools. A dedicated paint storage system gave every can a safe, labeled home, while a wall of pegboard turned unused vertical space into an adaptable tool organizer. Together, these improvements made the workshop cleaner, safer, and much faster to use.
This guide explains how we planned the layout, organized leftover paint, installed workshop pegboards, controlled basement moisture, and refined the system through actual use. It also covers several mistakes that looked harmless at first but quickly became annoyingwhich is usually how workshop wisdom is acquired.
Why Paint Storage and Pegboards Work Well Together
Paint cans and hand tools create different storage challenges. Paint is heavy, sensitive to temperature, and occasionally hazardous. Hand tools are lighter, used more frequently, and frustrating when hidden inside drawers. Trying to store both in the same cabinet usually produces a crowded shelf where a putty knife is buried behind six gallons of “possibly beige.”
Our solution was to divide the wall into two complementary zones:
- Low, sturdy shelving for paint cans, stains, primers, and painting supplies.
- Eye-level pegboards for brushes, scrapers, measuring tools, pliers, screwdrivers, and other frequently used items.
This arrangement keeps heavy containers close to the floor while placing everyday tools within easy reach. It also preserves the workbench as an actual work surface rather than a long-term parking lot for objects without assigned homes.
Planning the Basement Workshop Layout
Start With the Conditions, Not the Containers
Before installing shelves or hanging pegboard, we checked the basement for leaks, condensation, musty areas, cold exterior walls, and major temperature changes. Basement organization fails quickly when moisture is ignored. Hardboard can swell, steel tools can rust, labels can peel, and paint can deteriorate after freezing or prolonged exposure to unsuitable conditions.
The CDC recommends keeping indoor relative humidity no higher than 50 percent when possible. ENERGY STAR also suggests using a hygrometer when a dehumidifier does not clearly display the room’s relative humidity. We added an inexpensive digital humidity gauge near the workshop and addressed the moisture level before placing valuable tools against the wall.
Map the Workflow
Next, we considered how we actually move through a project. Measuring and marking tools belong near the main work surface. Paintbrushes and roller accessories make sense closer to the paint shelves. Safety glasses and hearing protection should be reachable before a tool is switched onnot hidden behind the holiday decorations in a cabinet across the room.
We marked the proposed zones with painter’s tape and lived with the outline for several days. This simple test revealed that our first pegboard position would have forced us to lean over the bench whenever we reached for a tool. Moving it several inches higher solved the problem before we drilled a single hole.
Building a Practical Paint Storage System
Sort Every Can Before Giving It Shelf Space
The most important part of paint storage happens before anything is neatly arranged. We placed every container on the floor and separated it into four groups:
- Paint worth keeping for touch-ups
- Usable paint that could be donated or reused
- Empty or dried containers
- Unknown, leaking, badly rusted, or unusable products
There is little value in constructing beautiful shelves for paint that has already become a rubbery science experiment. Removing unusable products first gave us a realistic inventory and immediately reduced the space required.
Keep Paint Within Its Recommended Temperature Range
Paint should not be treated like a jar of pickles that can survive indefinitely in any dark corner. Benjamin Moore recommends storing leftover paint between approximately 60 and 80 degrees Fahrenheit, while Sherwin-Williams advises keeping aerosol paint upright, ventilated, away from direct sunlight, and generally between 50 and 80 degrees. Product instructions vary, so the manufacturer’s label should always take priority.
Our basement remains conditioned throughout the year, but we still avoided the coldest exterior wall. We also kept the cans off the concrete floor, where they would be more exposed to moisture, rust, and temperature fluctuations. A raised shelf makes spills easier to notice and prevents a minor seepage problem from becoming a permanent floor decoration.
Clean and Reseal the Containers
Before storing a can, we cleaned dried paint from the rim so the lid could seat properly. Behr specifically recommends cleaning the outside edge and interior rim before storage. PaintCare suggests placing plastic wrap across the opening before reinstalling the lid to help reduce air exposure.
We tapped lids around their edges with a rubber mallet rather than pounding the center with a steel hammer. Hitting the middle can distort the lid or launch a decorative ring of paint onto your shirt, face, ceiling, and previously peaceful marriage.
Containers with damaged lids were replaced only when appropriate and clearly labeled. We retained original containers whenever possible because the manufacturer’s label contains important product information, and PaintCare generally requires original containers with original printed labels for recycling.
Create Labels You Can Read From the Shelf
Manufacturer labels often become stained or turn away from view. We added a large secondary label to the lid and front of each can containing:
- Room or project name
- Paint brand and color
- Finish or sheen
- Approximate purchase date
- Special notes, such as “trim,” “cabinet,” or “needs stirring”
We also brushed a small sample onto each lid. This is much more useful than trusting a printed color name such as “Whispering Oatmeal,” which could apparently describe anything between cream, gray, and emotional confusion.
Arrange Paint by Use, Not Just Container Size
Our shelves are divided into interior wall paint, trim and cabinet paint, primers, stains and clear finishes, and active-project leftovers. Frequently needed touch-up colors occupy the easiest shelf. Rarely used specialty products sit farther to the side.
Heavy gallon cans remain on lower shelves. Quarts and sample containers occupy the shelf above them. Painting accessories such as liners, trays, stir sticks, strainers, and clean rags live in labeled bins rather than balancing on top of cans.
Each shelf has a raised front edge to reduce the chance of a container sliding forward. The shelving is firmly anchored, rated for the expected load, and positioned away from furnaces, water heaters, electrical equipment, and other potential ignition sources.
Handling Oil-Based Paint, Solvents, and Aerosol Cans
Not every finishing product belongs on an ordinary basement shelf. Oil-based coatings, paint thinners, solvents, and aerosol products may present greater fire or vapor hazards than typical water-based wall paint. We read every label and separated these materials from ordinary latex paint.
Ignitable liquids should be kept away from flames, sparks, heat-producing equipment, and sources of ignition. Storage requirements can depend on the product, quantity, building, and local fire code. NFPA 30 addresses safeguards for the storage and handling of flammable and combustible liquids, but homeowners should follow product labels and consult their local fire authority or household hazardous-waste program when conditions are uncertain.
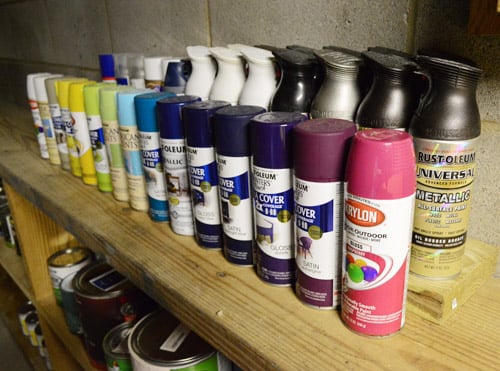
Aerosol cans remain upright and are never placed where they may overheat. We periodically inspect them for corrosion, bulging, or clogged nozzles. Rust-Oleum recommends cleaning spray tips before storage to help prevent blockages, although the correct cleaning method depends on the product and whether its nozzle is removable.
Unwanted paint, solvents, and related chemicals should never be poured onto the ground, into a storm drain, or down a household drain. The EPA advises special care when managing household products that may be flammable, reactive, corrosive, or toxic. PaintCare provides drop-off options in participating states, while local household hazardous-waste programs may serve other areas.
Installing Pegboards in the Basement Workshop
Choose the Right Pegboard Material
Traditional tempered hardboard pegboard is affordable, easy to cut, and suitable for many hand tools. Metal pegboard costs more but generally offers greater durability, improved resistance to occasional moisture, and stronger accessory systems. Some metal panels accept both round peg hooks and proprietary slotted accessories.
We used standard hardboard for lightweight painting tools and a stronger panel near the main workbench for heavier hand tools. The goal was not to create a museum display of every object we own. It was to keep the tools we reach for constantly visible and accessible.
Leave Space Behind the Panel
Pegboard cannot sit completely flat against a wall because hooks need clearance behind the holes. We attached furring strips to the wall framing, then fastened the panels to those strips. The spacer frame also made it easier to keep the pegboard flat against an imperfect basement wall.
Home Depot, This Old House, Lowe’s, and Family Handyman all describe pegboard as a practical workshop system, with installation methods that create rear clearance and secure the panel to appropriate framing. Load limits vary considerably, so the board, fasteners, accessories, and wall structure must all be suitable for the intended tools.
Organize by Task Zones
Our pegboard is divided into recognizable work zones instead of being arranged purely by tool size:
- Painting zone: brushes, scrapers, putty knives, openers, sanding blocks, and caulk tools
- Measuring zone: tape measures, squares, rulers, levels, pencils, and marking gauges
- Hand-tool zone: pliers, cutters, adjustable wrenches, screwdrivers, and small hammers
- Safety zone: goggles, hearing protection, dust masks, and work gloves
Tools used together are stored together. A paint-can opener sits near the brushes rather than beside an unrelated wrench simply because the two objects happen to be similar in length.
Use More Than Basic Hooks
Single peg hooks work well for tools with hanging holes, but a useful pegboard needs a mix of accessories. We added small baskets for tape, pencils, sanding discs, and loose attachments. Short shelves hold glue bottles and compact measuring devices. Multi-prong holders support pliers and screwdrivers without requiring one hook per tool.
Lowe’s recommends baskets beside power tools for cords and accessories, while This Old House notes that magnetic bars can complement pegboard when storing metal tools. We installed a short magnetic strip for frequently used driver bits and small metal rulers.
Do Not Overload the Wall
A common mistake is filling every available hole on installation day. We deliberately left open space for future tools and changing projects. Approximately 15 to 20 percent of the board remains empty, which prevents the layout from becoming cramped the first time a new tool enters the workshop.
Very heavy items, bulky power tools, and expensive equipment that needs dust protection remain in cabinets or on rated shelves. Pegboard is excellent for visibility and flexibility, but it is not automatically the correct storage method for everything with a handle.
Connecting the Pegboard to the Paint Station
The most useful improvement was treating the paint shelves and pegboard as one work system. The paint cans provide the materials, while the pegboard holds the tools needed to prepare, apply, and clean up those materials.
Directly above the paint shelves, we placed clean brushes, rollers, scrapers, stir tools, paint keys, and a small clipboard containing the paint inventory. Disposable supplies live in bins below. Active-project paint moves to a temporary tray rather than remaining mixed with long-term storage.
This arrangement reduces unnecessary movement. We can select a labeled can, reach for the correct opener and brush, and begin preparing the project without searching three cabinets. When the job is finished, each item returns to a clearly defined location.
We avoided hanging dirty brushes or wet equipment directly on the pegboard. Tools are cleaned and dried first. This prevents drips, odors, rust, and the gradual development of what could only be described as abstract pegboard art.
Basement Workshop Maintenance
An organized workshop does not remain organized through optimism alone. We perform a short monthly inspection:
- Check shelves and wall anchors for movement
- Inspect paint cans for leaks, rust, swelling, or loose lids
- Confirm that labels remain readable
- Review the hygrometer and dehumidifier
- Remove tools that have migrated into the wrong zones
- Clean dust from shelves, pegboard, and ventilation openings
- Identify products that should be used, donated, recycled, or discarded properly
We also update a simple digital inventory whenever paint is purchased or removed. The list includes the color, room, sheen, container size, and approximate amount remaining. It prevents us from buying a new gallon of a color already hiding behind the primer.
What We Learned From Using the System
Our First Layout Was Too Perfect
When we initially arranged the pegboard, every tool was spaced evenly. It looked excellent in photographs and slightly ridiculous during real projects. A screwdriver had to be returned to one exact hook, while frequently paired tools were separated because symmetry had apparently become more important than common sense.
Within two weeks, we rearranged everything according to use. The tape measure moved beside the pencils and square. Putty knives moved above the paint supplies. Safety glasses received a large, obvious hook near the entrance. The revised board was less visually precise but dramatically more useful.
Labels Saved More Time Than Expected
We assumed the pegboard would create the biggest improvement, but the paint labels may have saved more time. Before the project, finding touch-up paint meant opening cans and trying to remember whether “Soft Linen” belonged in the hallway or guest room. Occasionally, the answer was neither.
Large lid labels eliminated most of that uncertainty. Adding the room, sheen, and date was especially helpful because two containers can hold nearly identical colors with very different finishes. Flat wall paint does not make a convincing substitute for semi-gloss trim paint, no matter how encouragingly you stir it.
Small Baskets Became the Pegboard Heroes
Hooks receive most of the attention in pegboard systems, but baskets solved our most persistent problems. They captured the awkward objects that had previously formed little clutter colonies across the workbench: sanding sponges, pencils, tape rolls, utility blades, drill-bit cases, and paint-can openers.
We placed each basket near the task where its contents are used. This prevented the pegboard from becoming a random wall-mounted junk drawer. A basket is useful only when its purpose is clear; otherwise, it slowly fills with unidentified screws and one key that nobody remembers owning.
Humidity Control Was Not Optional
During the first humid week of summer, the workshop’s relative humidity climbed faster than expected. Nothing dramatic happened, but the air felt damp and several steel tools developed faint surface discoloration. That was enough warning.
We improved air circulation, used the dehumidifier more consistently, and stopped pushing storage containers tightly against the basement walls. The workshop became more comfortable, and the tools stayed cleaner. Moisture management turned out to be part of tool maintenance, paint preservation, and workshop safetynot a separate home-maintenance project.
We Stopped Saving Every Tablespoon of Paint
Our original collection included cans containing barely enough paint to cover a greeting card. We kept them because throwing away paint incorrectly felt wasteful. Unfortunately, keeping unusable quantities forever is not a recycling program; it is delayed decision-making with a lid.
We began evaluating leftovers honestly. Useful touch-up quantities stayed. Good excess paint was reserved for small projects or reuse when appropriate. Unwanted products went through approved recycling or household hazardous-waste channels. Reclaiming shelf space made the remaining paint easier to inspect and actually use.
The Weekly Reset Keeps the System Alive
After a project, we spend about five minutes resetting the area. Tools return to their hooks, paint rims are cleaned, lids are secured, dirty supplies are handled correctly, and the workbench is cleared. That brief routine is much easier than facing a month of accumulated clutter.
The system is still flexible. Hooks move, baskets change purpose, and new labels appear. That flexibility is the reason the workshop remains organized. A rigid system eventually fights the user; a good one adapts to the work.
What We Would Do Differently
Given another opportunity, we would install the humidity gauge and lighting first. Good lighting makes labels easier to read, reveals spills sooner, and improves every task performed at the bench. We would also purchase fewer generic pegboard hooks and more purpose-specific holders, particularly locking hooks that do not pull out whenever a tool is removed.
Finally, we would create the paint inventory during the sorting stage rather than promising to do it later. “Later” is a mysterious period in which workshop paperwork rarely occurs.
A Cleaner Workshop Is Easier to Use
Our basement workshop did not need an expensive renovation. It needed dependable shelves, sensible paint storage, a properly installed pegboard, moisture control, and clear decisions about where things belonged.
The finished space is not spotless every minute, and it does not need to be. It functions well. Paint is protected and identifiable, common tools are visible, the workbench stays available, and cleanup requires minutes rather than an archaeological expedition.
The best workshop organization system is not the one that looks perfect immediately after installation. It is the one that still works after several repairs, a painting project, two rushed weekends, and the arrival of yet another screwdriver.

