Hair Care
How to Make No Sew Floor Cushions DIY
Jun
Floor cushions are the cozy little rebels of home décor. They do not ask for a chair frame, they do not demand a complicated sewing pattern, and they absolutely refuse to be boring. A good DIY floor cushion can turn an empty corner into a reading nook, make movie night feel like a tiny indoor picnic, or rescue guests from the classic “everyone is sitting on the coffee table” situation.
The best part? You can make beautiful, comfortable, no sew floor cushions without touching a sewing machine. No bobbins. No tangled thread. No dramatic stare-down with a needle that somehow refuses to cooperate. With fabric, foam or stuffing, adhesive, and a little patience, you can create custom floor pillows that fit your style, your room, and your budget.
This guide explains how to make no sew floor cushions DIY style from start to finish, including what materials to choose, how to size your cushion, how to seal the edges, how to add comfort, and how to keep the final project looking less “craft emergency” and more “boutique home décor.”
Why Make No Sew Floor Cushions?
No sew floor cushions are practical, affordable, and surprisingly stylish. They work especially well in small apartments, kids’ rooms, playrooms, dorm rooms, reading corners, meditation spaces, and casual living rooms. Because they are soft and movable, they give you flexible seating without the commitment of buying extra chairs.
They are also beginner-friendly. Traditional cushion making often involves measuring seam allowances, cutting panels, inserting zippers, and sewing corners neatly. A no sew method replaces stitching with fabric glue, iron-on adhesive tape, knotting, wrapping, or folding. That means you can still get a finished cushion cover even if your sewing experience begins and ends with reattaching one suspiciously loose shirt button in 2016.
Best Materials for DIY No Sew Floor Cushions
The quality of your floor cushion depends heavily on what you put into it. Since floor cushions are used directly on the ground, they need stronger fabric and better filling than a decorative throw pillow.
Fabric Options
Choose a medium- to heavyweight fabric that can handle sitting, scooting, lounging, and the occasional snack crumb situation. Good options include canvas, duck cloth, denim, upholstery fabric, outdoor fabric, twill, heavy cotton, or washable home décor fabric.
If the cushion will be used by children or pets, consider darker prints, textured patterns, or washable fabric. A charming cream-colored cushion sounds lovely until someone introduces grape juice, muddy paws, or cheese dust. Patterned fabric is more forgiving and usually looks fresh longer.
Filling Options
For a structured cushion, use upholstery foam. A foam piece that is about 2 to 4 inches thick usually works well for floor seating. Thicker foam feels more luxurious, while thinner foam is easier to fold, store, and stack.
For a softer, pillow-like cushion, use polyester fiberfill, shredded foam, old pillow inserts, folded blankets, or a combination of foam and batting. Foam gives support; batting softens the edges; fiberfill adds puff. Think of it as the cushion version of layering a sweater under a jacketcomfortable, practical, and just a little smug.
No Sew Adhesives and Closures
The most common no sew methods use fabric glue, fusible bonding tape, hook-and-loop strips, safety pins hidden inside folds, or tied fringe edges. Fabric glue is simple and flexible, while iron-on bonding tape creates crisp seams when used with heat-safe fabric. Hook-and-loop closure is helpful if you want to remove the cover for cleaning.
Always test glue or bonding tape on a scrap of fabric first. Some fabrics resist adhesive, some darken temporarily, and some become stiff if too much glue is applied. A tiny test patch can prevent a large cushion tragedy.
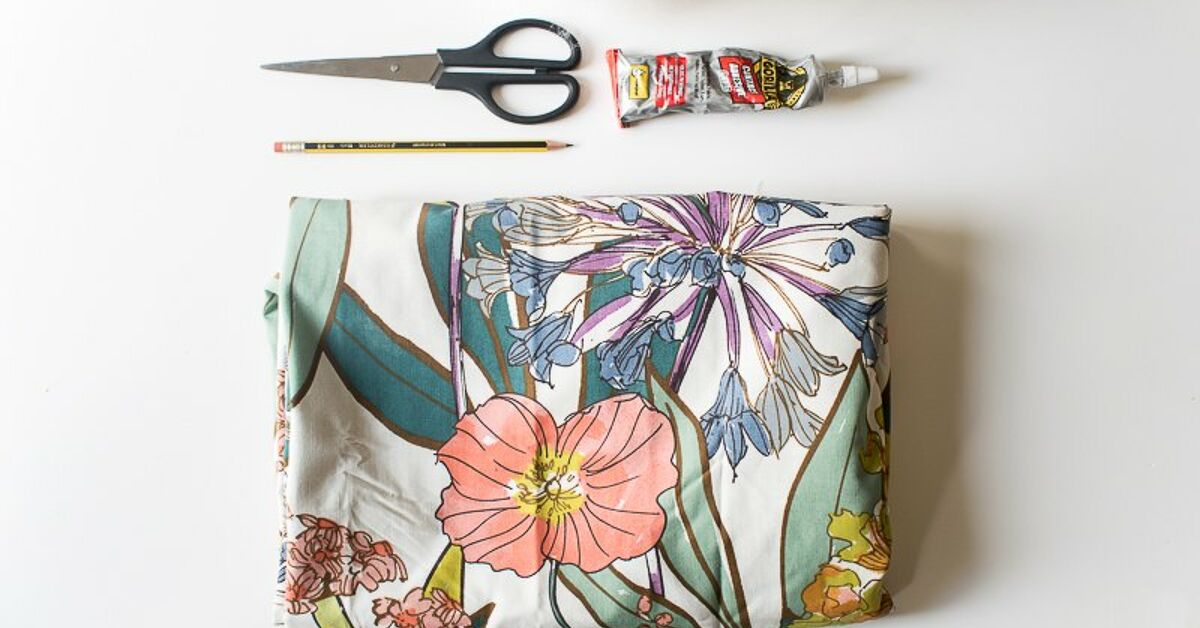
Tools and Supplies You Need
- Heavy fabric or upholstery fabric
- Foam insert, pillow stuffing, batting, or old pillows
- Fabric glue or iron-on hem tape
- Sharp fabric scissors or rotary cutter
- Measuring tape or ruler
- Chalk, fabric marker, or pencil
- Straight pins, clips, or heavy books for holding seams
- Iron and ironing board if using fusible tape
- Hook-and-loop tape if making a removable cover
Step-by-Step: How to Make No Sew Floor Cushions DIY
Step 1: Decide the Cushion Size
A common floor cushion size is 24 by 24 inches, which gives one adult enough room to sit comfortably. For kids, 18 by 18 inches can work. For lounging, try a larger 30 by 30 inch cushion. If you want a long bench-style floor cushion, measure the exact space where it will go.
Add extra fabric for the cushion height and edge overlap. For example, if your foam is 24 inches wide, 24 inches long, and 3 inches thick, you need fabric large enough to wrap around the top, sides, and bottom. Add at least 4 to 6 inches on all sides for folding and securing.
Step 2: Cut the Foam or Prepare the Filling
If using upholstery foam, cut it to your chosen size. Many craft and fabric stores can cut foam for you, which is a wonderful service for anyone who has ever tried to cut foam with a dull knife and ended up with something resembling a lopsided marshmallow.
If cutting foam at home, use a long serrated knife, electric carving knife, or sharp utility blade. Mark your cutting line first and work slowly. Slightly uneven edges are not a disaster because batting and fabric can help hide them.
If using fiberfill or old pillow stuffing, fluff it before inserting it. For a flatter cushion, layer folded blankets or batting inside the cover. For a puffier cushion, use loose stuffing and distribute it evenly into the corners.
Step 3: Measure and Cut the Fabric
Lay your fabric wrong side up on a clean floor or large table. Place the foam or insert in the center. Pull the fabric up around the cushion to check coverage before cutting. This “wrap test” helps you avoid cutting too small, which is one of the great tragedies of DIY life.
For a simple envelope-style cushion, cut one large piece of fabric that wraps around the cushion like a gift. For a cleaner finish, cut two panels for the top and bottom, then glue the edges together on three sides, insert the filling, and close the final side.
Step 4: Create Clean Folded Edges
Fold the raw edges of the fabric inward by about 1/2 inch and press them flat with an iron if the fabric allows heat. This creates a neater edge and reduces fraying. If the fabric is delicate, synthetic, or outdoor-coated, use a low heat setting or skip ironing and use clips instead.
For extra durability, apply a thin line of fabric glue inside the fold and press it down before building the cushion cover. Let it set according to the adhesive instructions. Do not rush this stage. Glue needs time to bond, and impatience is how cushions develop dramatic little openings at the corners.
Step 5: Glue or Bond the Seams
Place the fabric pieces with the right sides facing each other if you are making a cover from panels. Apply fabric glue along the edge, leaving one side open for the insert. Press the seam firmly and hold it in place with clips, pins, or heavy books. If using fusible tape, place the tape between the layers and press with an iron according to the package directions.
Use a thin, even layer of glue rather than a thick bead. Too much glue can seep through fabric, create hard ridges, or take longer to dry. Strong seams come from even pressure, clean fabric, and enough curing timenot from turning the glue bottle into a frosting dispenser.
Step 6: Turn the Cover Right Side Out
Once the glued seams are dry enough to handle, carefully turn the cover right side out. Push out the corners gently with your fingers. Avoid using sharp tools because they can puncture the seam or fabric.
Check the inside seams before adding the insert. If any spots look weak, add more glue and let them dry. It is much easier to reinforce the cover now than after the cushion is stuffed and already being claimed by a child, pet, or tired adult.
Step 7: Insert the Foam or Stuffing
Slide the foam into the cover slowly, compressing it as needed. If the foam sticks to the fabric, wrap it lightly in batting or a thin old sheet first. This makes insertion easier and gives the cushion a smoother surface.
If using loose filling, add it in handfuls and push it into the corners first. Then fill the center. Sit lightly on the cushion to test the firmness. Add more filling if it feels too flat, or remove some if it feels like sitting on an overenthusiastic beach ball.
Step 8: Close the Final Edge
For a permanent cushion, fold the raw edges inward, apply fabric glue, and press the opening closed. Use clips or heavy books while it dries. For a removable cover, attach hook-and-loop tape along the inside edges of the opening. This lets you remove the cover later for spot cleaning or replacement.
A removable closure is highly recommended for households with kids, pets, or people who eat popcorn with ambitious hand gestures. Permanent closures look clean, but removable covers are easier to maintain.
Alternative No Sew Method: The Tied Fringe Floor Cushion
If you want a playful, ultra-beginner version, make a tied fringe floor cushion. Cut two equal squares of fleece or non-fraying fabric. Cut a small square from each corner, then cut fringe strips around all four sides. Tie the top and bottom fringe pieces together on three sides, insert stuffing or foam, then tie the final side closed.
This method is especially good for kids’ rooms, sleepovers, reading corners, and casual spaces. It has a soft, handmade look and requires no glue at all. The downside is that it looks more relaxed than tailored, so it may not be the best match for formal living rooms unless your formal living room already includes beanbags, board games, and a dog named Waffles.
Design Ideas for Stylish Floor Cushions
Boho Floor Cushions
Use woven cotton, mudcloth-style prints, tassels, or earthy colors such as rust, cream, olive, and terracotta. Stack several cushions near a low table for a relaxed conversation area.
Modern Minimalist Cushions
Choose solid canvas in charcoal, beige, black, or warm gray. Keep the shape square and the seams hidden. Add a leather strap or simple fabric handle for easy carrying.
Kids’ Playroom Cushions
Use colorful cotton canvas, washable outdoor fabric, or printed fabric with stars, animals, dinosaurs, or rainbows. Make several smaller cushions so kids can stack, drag, build forts, and generally redesign your home like tiny interior decorators with no budget approval process.
Outdoor Floor Cushions
Choose outdoor-rated fabric and quick-dry foam if the cushions will be used on a patio or porch. Even outdoor cushions should be stored inside during heavy rain to prevent mildew and fading.
Common Mistakes to Avoid
Using Fabric That Is Too Thin
Light quilting cotton can work for small pillows, but floor cushions need more strength. Thin fabric may stretch, tear, or show glue marks. Use sturdier material for better results.
Skipping the Drying Time
Fabric glue and bonding products need time to cure. Moving, stuffing, or sitting on the cushion too early can weaken the seams. Read the adhesive label and let the project rest before use.
Underfilling the Cushion
A flat cushion may look tidy but feel uncomfortable. Floor seating needs enough support to prevent you from feeling the floor underneath. If in doubt, add a foam core and wrap it with batting.
Forgetting About Cleaning
Floor cushions live where dust, crumbs, and pet hair gather. Choose fabric that can be spot cleaned, vacuumed, or removed from the insert. A beautiful cushion that cannot survive normal life is more of a decorative hostage than a useful home accessory.
How to Care for No Sew Floor Cushions
Vacuum your floor cushions regularly using an upholstery attachment. Spot clean stains quickly with a mild fabric cleaner suitable for your material. If you used fabric glue, avoid soaking the seams unless the adhesive is labeled washable and fully cured.
Rotate cushions every few weeks so one side does not flatten faster than the others. If the filling compresses over time, open the removable closure and add more batting or fiberfill. For foam cushions, occasional airing helps keep them fresh.
Budget Tips for DIY Floor Cushions
You do not need expensive supplies to make a good cushion. Look for upholstery remnants, canvas drop cloths, old curtains, retired duvet covers, thrifted tablecloths, or sturdy fabric shower curtains. Many large fabric pieces can be repurposed into cushion covers if they are clean, strong, and comfortable to touch.
Old pillows can also be reused as filling. Combine several pillow inserts inside one floor cushion cover, or use their stuffing to plump up foam. This reduces waste and saves money, which is always nice because your wallet deserves a cushion too.
Real-Life Experience: What Making No Sew Floor Cushions Teaches You
The first thing you learn when making no sew floor cushions is that measuring matters more than confidence. Confidence is great. Confidence says, “I can eyeball this.” Measuring tape says, “Please do not embarrass both of us.” A cushion cover needs enough fabric to wrap around height, corners, and closure areas. The most common beginner mistake is measuring only the top of the cushion and forgetting that foam has sides. That is how a 24-inch cushion somehow ends up wearing a fabric crop top.
The second lesson is that the floor is often the best workspace. A dining table may be too small for large fabric cuts, and fabric loves to slide around when it is hanging off an edge. Working on a clean floor gives you space to smooth wrinkles, line up corners, and place the foam directly on the fabric. It also makes the project feel more relaxed. Put on music, make a cup of coffee, and accept that you may spend part of the afternoon crawling around with scissors like a very determined craft crab.
Another useful experience is learning how much adhesive is enough. Beginners often assume more glue means a stronger seam. In reality, a moderate, even line usually works better. Too much glue can bleed through fabric, dry stiff, or create bumps along the edge. A thin layer pressed firmly between folded fabric pieces is cleaner and more flexible. Clips, clothespins, or heavy books help hold the seam while it dries. A stack of books finally gets to support your craft habit instead of silently judging it from the shelf.
Fabric choice also becomes personal very quickly. Smooth cotton canvas gives a clean look, but textured upholstery fabric hides small mistakes. Outdoor fabric is durable and easy to wipe, but it can be stiffer to fold. Fleece is forgiving and perfect for tied-edge cushions, but it has a casual look. After making one cushion, many people realize they want different fabrics for different spaces: tough fabric for kids, soft fabric for reading nooks, and something stylish for the living room where guests might actually see it.
Comfort testing is the fun part, and it is necessary. Sit on the cushion before closing it permanently. Try it on hardwood, carpet, and rugs if possible. A cushion that feels plush on carpet may feel too thin on tile. Foam provides better support than loose stuffing alone, but loose stuffing gives a softer, squishier feel. The best combination for many DIY floor cushions is a foam center wrapped in batting. It looks smooth, feels supportive, and avoids the sad pancake effect that happens when stuffing spreads out unevenly.
Finally, no sew floor cushions teach you that handmade does not need to mean perfect. A slightly uneven corner will not ruin the cushion. A hidden glue line is not a moral failure. A handmade floor cushion is meant to be used, moved, stacked, leaned on, and enjoyed. Once it is in the room with a throw blanket, a tray of snacks, or a good book, nobody will inspect the underside unless they are either extremely bored or secretly a furniture detective.
Conclusion
Learning how to make no sew floor cushions DIY is one of the easiest ways to add comfort, color, and flexible seating to your home. With sturdy fabric, supportive filling, careful measuring, and the right no sew adhesive or tying method, you can create custom cushions without a sewing machine. The project is budget-friendly, beginner-friendly, and easy to personalize for nearly any room.
Whether you want a cozy reading corner, extra seating for movie night, a soft playroom setup, or a casual boho lounge area, no sew floor cushions are a smart weekend project. They are practical, good-looking, and forgiving enough for beginners. Best of all, when someone asks where you bought them, you get to casually say, “Oh, I made those,” and then pretend not to enjoy the applause.
Note: Always follow the care and curing instructions on your specific fabric glue, bonding tape, foam, and fabric. Test materials on a small scrap before completing the full cushion.
