Beauty Unlocked
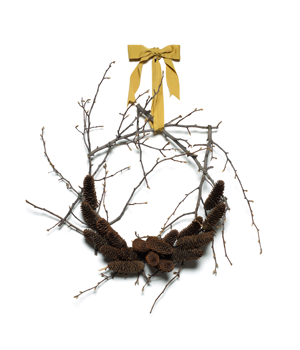
Wreath Of Norway Spruce Cones
Jun
A wreath of Norway spruce cones has a wonderfully old-fashioned charm: rustic, sculptural, slightly dramatic, and just fancy enough to make your front door look as if it has been casually blessed by a woodland interior designer. Unlike delicate floral wreaths that start drooping before you have finished admiring them, a Norway spruce cone wreath is sturdy, textured, and built to last through winter, fall, and even those “I forgot to redecorate” months we do not discuss in polite company.
Norway spruce cones are especially attractive for wreath making because they are long, tapered, and naturally architectural. They hang from the branches of the Norway spruce tree, mature into warm brown tones, and create a layered, forest-inspired look when arranged on a wreath form. Whether you want a Christmas wreath, a winter door decoration, a cabin-style accent, or a handmade gift that says “I am crafty, but not in a glitter-explosion way,” this project delivers beauty without needing expensive materials.
In this guide, you will learn how to choose, clean, prepare, design, assemble, decorate, store, and troubleshoot a wreath of Norway spruce cones. We will also look at practical design examples, seasonal styling ideas, and real crafting experiences so your finished wreath looks intentional instead of like a squirrel started a side business.
What Makes Norway Spruce Cones Special?
Norway spruce cones come from Picea abies, a large evergreen conifer widely planted in North American landscapes, parks, windbreaks, and large gardens. The tree is known for its pyramidal form, dark green needles, and graceful drooping branchlets. Its cones are among the most distinctive features: long, narrow, and pendant, often reaching several inches in length. For crafters, that elongated shape is pure gold.
Compared with small pine cones, Norway spruce cones create a more elegant and vertical texture. They can be layered like feathers, pointed outward like sun rays, arranged in rings, or placed diagonally for movement. Their color ranges from honey brown to deep chestnut, making them easy to pair with burlap, velvet ribbon, evergreen sprigs, dried oranges, berries, bells, twine, or even a light dusting of faux snow.
Norway Spruce Cones vs. Regular Pine Cones
People often call all cones “pine cones,” but spruce cones and pine cones are not exactly the same. Pine cones tend to be chunkier and more rounded, while Norway spruce cones are usually longer and more tapered. That difference matters in wreath design. Pine cones make a wreath look dense and chunky. Norway spruce cones make it look flowing, refined, and slightly Scandinavian, as if it drinks coffee from a stoneware mug and owns excellent wool socks.
Because Norway spruce cones are longer, they work beautifully on medium and large wreath forms. On a small wreath, they can look oversized unless trimmed, angled carefully, or mixed with smaller cones. On a 14-inch to 18-inch wreath form, however, they create a bold natural statement.
Why Make a Wreath of Norway Spruce Cones?
A Norway spruce cone wreath is more than a craft project. It is affordable, sustainable, long-lasting, and versatile. If you collect cones responsibly from your yard, a friend’s property, or a place where gathering is allowed, the main material may cost nothing. The wreath can be reused for years if stored correctly, and it fits multiple styles: farmhouse, woodland, rustic Christmas, minimalist winter, cottagecore, traditional holiday, and natural modern decor.
Another advantage is texture. Home decor often feels flat when everything is smooth, shiny, or store-bought. Spruce cones add depth. Their scales catch light, create shadows, and bring an organic rhythm to a wall, mantel, porch, or front door. A wreath made from natural cones has tiny imperfections, and those imperfections are exactly why it feels warm and real.
Materials You Will Need
You do not need a professional craft studio to make this wreath. A kitchen table, a protected work surface, and a little patience will do. The only warning: once you start sorting cones by size, you may become the kind of person who says, “This one has excellent personality.” That is normal. Mostly.
Basic Supplies
- 30 to 80 Norway spruce cones, depending on wreath size and fullness
- Wire wreath form, grapevine wreath, straw wreath, or foam wreath form
- Floral wire, paddle wire, or pipe cleaners
- Hot glue gun and glue sticks
- Wire cutters or sturdy scissors
- Ribbon, twine, or wreath hanger
- Protective table covering or cardboard
- Optional gloves to protect fingers from sap and sharp cone edges
Optional Decorative Additions
- Dried orange slices for a classic holiday look
- Faux berries or preserved berries for color
- Evergreen clippings, cedar, fir, or juniper
- Small bells, wooden beads, or cinnamon sticks
- Burlap, plaid, velvet, or satin ribbon
- White craft paint or faux snow spray
- Clear acrylic sealer for added durability
How to Collect Norway Spruce Cones Responsibly
The best cones for wreath making are mature, dry, and naturally fallen. Look for cones that are brown, firm, and open. Avoid cones that are soggy, moldy, crumbling, or full of debris. If you are gathering from public land, check local rules first. Many parks and natural areas do not allow collecting because cones, seeds, leaves, and branches support wildlife and soil health.
If you have access to a Norway spruce tree on private property, collect cones after dry weather when possible. Bring a basket, bucket, or reusable bag. Sort as you go: long straight cones in one pile, curved cones in another, damaged cones in a discard pile, and tiny pieces for gap-filling. Curved cones can still be useful, especially along the inner ring where they help follow the wreath’s shape.
Cleaning and Preparing the Cones
Natural cones may carry dirt, sap, tiny insects, spiderwebs, and other outdoor surprises. Cleaning them before crafting helps your wreath last longer and keeps your home from accidentally hosting a miniature forest convention.
Step 1: Brush Off Debris
Use a dry paintbrush, old toothbrush, or soft cloth to remove needles, soil, and loose flakes. Shake each cone gently. If a cone falls apart during this step, thank it for its service and move on.
Step 2: Dry the Cones Thoroughly
If the cones are damp, spread them in a single layer on newspaper, cardboard, or a baking sheet lined with parchment. Let them air-dry in a warm, ventilated area. Wet cones often close their scales, but they usually reopen as they dry. This natural movement can be helpful: closed cones are easier to handle, while open cones provide more texture.
Step 3: Heat-Treat Carefully
Many crafters bake cones at a low temperature to help dry them and reduce hidden pests. If you choose this method, use low heat, keep the cones in a single layer, watch them carefully, and never leave the oven unattended. Place parchment or foil under the cones to catch sap. Let them cool completely before touching or gluing. Heat tools and ovens should always be used with care, especially if kids or pets are nearby.
Step 4: Seal If Desired
A clear acrylic spray can help reduce shedding and make the finished wreath more durable. Use it outdoors or in a well-ventilated area, following the label directions. For a natural matte look, skip the sealer. For a slightly polished finish, use a satin clear coat. For a snowy winter effect, lightly dry-brush the cone tips with white paint.
Choosing the Best Wreath Form
Your wreath form determines the structure, weight, and style of the finished piece. Norway spruce cones are longer and lighter than many dense pine cones, but a full wreath can still become surprisingly heavy. Choose a base that can handle the design.
Wire Wreath Form
A wire wreath form is strong, affordable, and ideal for wiring cones securely. It is especially good for outdoor or semi-outdoor wreaths because the structure holds up well. The downside is that wire forms can show through if you do not cover them. Wrap the form with burlap, jute twine, moss, fabric strips, or evergreen garland before attaching cones.
Grapevine Wreath
A grapevine wreath is forgiving and naturally rustic. You can tuck cone stems and wire between the vines, and gaps look intentional because the base itself is decorative. This is a great choice for beginners because perfection is not required. In fact, grapevine wreaths look better when they are a little wild.
Foam or Straw Wreath
Foam and straw wreath forms provide a full base and are easy to glue onto. They work best for indoor wreaths or covered porch displays. Wrap them first with ribbon, burlap, or brown fabric so any tiny gaps blend in with the cones.
Step-by-Step: How to Make a Wreath of Norway Spruce Cones
Step 1: Sort Your Cones by Size
Before gluing anything, sort your Norway spruce cones into large, medium, small, straight, and curved groups. This simple step makes the finished wreath look balanced. Use the largest cones for the outer ring, medium cones for the center, and smaller cones for filling gaps.
Step 2: Plan the Layout
Lay your wreath form flat and place cones around it without attaching them. Try different directions. Point the cone tips outward for a sunburst effect. Angle them clockwise for movement. Layer them like shingles for a dense woodland look. Planning first prevents the classic craft tragedy known as “everything looked great until the glue became permanent.”
Step 3: Attach the Outer Ring
Start with the outer edge. Attach the largest cones around the wreath, spacing them evenly. If using a wire form, wrap floral wire around the base of each cone and twist it tightly to the frame. If using a grapevine or foam form, use hot glue generously at the base of the cone and press it firmly in place until secure.
Step 4: Add the Inner Ring
Next, attach cones around the inner circle. Angle them slightly inward or sideways so they follow the wreath’s curve. The inner ring frames the opening and gives the wreath a finished look. Avoid covering the center hole too much unless you want a very full, almost medallion-style wreath.
Step 5: Fill the Middle Layer
Add medium cones between the inner and outer rings. Overlap them slightly to hide the wreath base. This is where the design begins to look lush. Rotate cones in different directions for a natural appearance, or keep every cone aligned for a more formal pattern.
Step 6: Fill Gaps and Check Balance
Use small cones, broken cone tips, acorns, seed pods, or evergreen sprigs to fill visible holes. Hold the wreath upright and step back. Look for heavy areas, bare patches, or spots where one cone is stealing the show like it has a talent agent. Adjust as needed.
Step 7: Add a Hanger
Use sturdy ribbon, floral wire, or twine to create a hanger. Attach it securely to the wreath frame, not just to a glued cone. A full cone wreath can be heavier than expected, and nobody wants a dramatic front-door collapse during brunch.
Design Ideas for a Norway Spruce Cone Wreath
Classic Woodland Wreath
Keep the cones natural and add only a burlap bow. This style works beautifully on cabins, farmhouse doors, stone fireplaces, and neutral interiors. The beauty comes from repetition, shadow, and texture rather than bright color.
Rustic Christmas Wreath
Add faux red berries, cedar sprigs, plaid ribbon, and a few cinnamon sticks. The result feels festive without looking overly shiny. For a nostalgic holiday effect, tuck in dried orange slices and small brass bells.
Snow-Dusted Winter Wreath
Dry-brush the tips of the cones with white paint or use a light spray of faux snow. The trick is restraint. A little white on the edges looks frosty and elegant. Too much can make the wreath look like it lost a fight with a powdered donut.
Minimal Scandinavian Wreath
Use a simple wire or grapevine form, arrange cones in one clean direction, and finish with a narrow velvet or linen ribbon. Stick to natural brown, cream, black, forest green, or muted gold. This style is calm, modern, and quietly beautiful.
Autumn Harvest Wreath
Pair Norway spruce cones with dried grasses, wheat, small faux pumpkins, oak leaves, and copper ribbon. This version works from September through Thanksgiving and transitions easily into winter by swapping pumpkins for evergreen sprigs.
Where to Display the Wreath
A wreath of Norway spruce cones can be displayed indoors or outdoors, but it lasts longest in protected areas. A covered porch, interior door, mantel, entryway mirror, or dining room wall is ideal. Direct rain, heavy snow, and strong sunlight can weaken glue, fade color, and encourage moisture damage. If hanging outdoors, choose a weather-sheltered spot and consider wiring the cones instead of relying only on glue.
For indoor styling, hang the wreath above a fireplace, over a console table, on a pantry door, or as part of a gallery wall. It can also be used as a table centerpiece by laying it flat around a hurricane candle or lantern. Use flameless candles for safety, especially when natural cones, dried greenery, ribbon, or other flammable decorations are nearby.
Care and Storage Tips
To keep your wreath looking good for years, handle it gently and store it properly. Dust it with a soft brush or a hair dryer on a cool, low setting. Do not crush it under heavy decorations. Store it in a wreath box, shallow plastic bin, or cardboard box lined with tissue paper. Keep it in a dry area where humidity is low.
If a cone comes loose, reattach it with floral wire or hot glue. If the wreath smells musty after storage, place it in a dry, ventilated spot for a day or two. Avoid spraying strong fragrances directly onto the cones because oils can stain or attract dust.
Common Mistakes to Avoid
Using Damp Cones
Damp cones may shrink, close, mold, or loosen after assembly. Always dry them thoroughly before attaching them to the wreath form.
Skipping the Layout Stage
Attaching cones without planning often leads to awkward spacing. A five-minute dry layout can save an hour of regret and possibly several glue burns.
Relying on Tiny Dots of Glue
Norway spruce cones have uneven bases. Use enough glue to create contact with the wreath form, or wire the cones for extra strength.
Making the Wreath Too Heavy for the Hanger
Always attach the hanger to the structural base. A ribbon glued to one cone is not a hanger; it is a future accident wearing a bow.
Experience Notes: Making a Wreath of Norway Spruce Cones
The first thing you notice when making a wreath of Norway spruce cones is that the cones have opinions. Some are perfectly straight and cooperative. Some curve dramatically, as if auditioning for a role in a botanical soap opera. At first, this can feel annoying, but it quickly becomes part of the fun. The best wreaths are not made from identical cones. They are made from cones that vary slightly in length, shape, color, and attitude.
One practical experience is that sorting matters more than expected. When all the cones are dumped into one pile, the project feels messy. Once they are grouped by size, the wreath almost starts designing itself. Long cones naturally belong on the outer edge. Medium cones fill the body. Small cones become problem-solvers, hiding gaps and covering awkward glue spots. The smallest pieces, which may seem useless at first, often become the secret heroes of the finished wreath.
Another lesson is that a grapevine base is wonderfully forgiving. If you are new to wreath making, grapevine gives you texture before you even begin. A wire form can look cleaner and more professional, but it usually needs to be wrapped first so the metal does not show. Foam is easy for gluing, but it may not be the best choice for a heavy outdoor wreath. After trying different bases, many crafters find that grapevine offers the best mix of strength, rustic charm, and beginner-friendly flexibility.
Hot glue is useful, but floral wire is more dependable for larger cones. A good method is to wire the biggest Norway spruce cones first, then use glue for smaller filler pieces. This combination gives the wreath structure and speed. It also reduces the chance that a cone will drop off later, especially if the wreath hangs on a door that opens and closes often. Doors, as it turns out, are not gentle creatures.
Design restraint is another valuable lesson. It is tempting to add berries, ribbon, dried oranges, bells, glitter, greenery, tiny ornaments, and possibly the emotional weight of every holiday memory you have ever had. But Norway spruce cones are already beautiful. A simple bow and a few accents often look better than too many decorations. The cones should remain the star of the wreath.
The most satisfying moment comes when the wreath is lifted upright for the first time. Flat on a table, it may look like a pile of cones having a meeting. On a door or wall, the pattern suddenly appears. Shadows deepen. The natural brown tones warm up. The wreath looks handmade in the best way: personal, textured, and alive with small details. It feels like something you could have bought from a boutique, except you know exactly how much glue, patience, and quiet muttering went into it.
A Norway spruce cone wreath also ages beautifully. Unlike fresh greenery, it does not wilt in a week. It can be stored, refreshed, repainted, or restyled year after year. One season it can wear a plaid Christmas ribbon. The next, it can become a simple winter wreath with cream velvet. In fall, it can be paired with dried leaves and copper accents. That flexibility makes the time spent crafting feel worthwhile.
Perhaps the best experience of all is the connection to natural materials. In a world full of plastic decorations and instant online purchases, making a wreath from real cones slows the process down in a good way. You collect, clean, sort, arrange, attach, adjust, and finally hang something made by hand. It is not perfect, but that is the point. A wreath of Norway spruce cones brings the forest to your home without needing to vacuum up an entire Christmas tree. That alone deserves applause.
Conclusion
A wreath of Norway spruce cones is a beautiful, durable, and budget-friendly way to decorate with natural materials. The long, elegant cones of the Norway spruce create texture and movement that ordinary wreaths often lack. With careful cleaning, thoughtful sorting, a sturdy wreath form, and a balanced layout, you can create a handmade decoration that works for Christmas, winter, fall, or year-round rustic decor.
The key is to let the cones guide the design. Use their natural shape, warm color, and layered scales as the foundation. Add ribbon, greenery, berries, or snowy touches only where they support the overall look. Whether you prefer woodland simplicity or festive holiday charm, a Norway spruce cone wreath offers a timeless project that feels both creative and grounded. It is proof that sometimes the best decorations are already waiting outside, quietly lying under a tree and looking fabulous.
Note: This article was created as original, publishing-ready content based on real horticultural knowledge of Norway spruce and established DIY wreath-making practices, with no source-link clutter or citation placeholders included.
