
Beauty Tools & Accessories
My Farmhouse Kitchen Table Make Over
Jul
Every home has one piece of furniture that silently witnesses everything: quick breakfasts, late-night snacks, homework battles, birthday cake crumbs, coffee spills, and at least one mysterious sticky spot no one in the family will confess to creating. In my house, that hero was the kitchen table. It was sturdy, useful, and technically still a table, but visually? It had entered its “please do not photograph me” era.
That is how my farmhouse kitchen table make over begannot with a grand design plan, but with me standing in the kitchen, holding a mug of coffee, staring at scratches, cloudy finish, worn corners, and chair marks like they were clues in a tiny domestic crime scene. The table had good bones, which is DIY language for “this thing is ugly, but I refuse to throw it away.” So instead of buying a new one, I decided to refinish it, refresh it, and give it that warm farmhouse kitchen table look: a stained wood top, a painted base, soft rustic character, and enough durability to survive real life.
This guide walks through the full makeover process, from planning the design to sanding, staining, painting, sealing, styling, and learning from all the little mistakes that make DIY projects both educational and mildly humbling. The goal is not a perfect showroom table. The goal is a beautiful, practical farmhouse table that still feels like home.
Why a Farmhouse Kitchen Table Makeover Is Worth It
A farmhouse table has a special kind of charm. It does not need to look brand-new. In fact, it often looks better when it has a little texture, a few softened edges, and a story baked into the wood grain. That is excellent news for anyone who owns a table with scratches, dents, and emotional baggage.
Refinishing a kitchen table is also a smart way to save money. A quality farmhouse dining table can be expensive, especially if you want solid wood, turned legs, a stained tabletop, or a painted base. But if the table you already own is structurally sound, a makeover can give it a completely new personality for a fraction of the cost. It is sustainable, budget-friendly, and deeply satisfying in the way only sanding dust in your hair can be.
The farmhouse style works especially well in kitchens because it blends function with comfort. Neutral colors, natural wood tones, white or soft-colored bases, matte finishes, simple linens, and vintage-inspired accents all help create a space that feels relaxed and welcoming. It says, “Come sit down,” not “Please admire my untouchable furniture museum.”
The Before: A Table With Character, Scratches, and Questionable Life Choices
Before the makeover, my kitchen table had a tired finish that looked dull in some areas and shiny in others. The top had scratches from plates, pens, and possibly a child attempting to engrave their legacy. The legs were scuffed, the apron looked dated, and the overall color felt too orange for the soft farmhouse kitchen style I wanted.
Still, the table was solid. It did not wobble, the joints were tight, and the size worked perfectly for the kitchen. That made it a strong candidate for refinishing. A good makeover starts with honest inspection. If the table is made from solid wood, you usually have more freedom to sand and stain. If it has a thin veneer, you need a gentler approach because aggressive sanding can go through the surface faster than you can say, “Well, that was unfortunate.”
My Farmhouse Design Plan
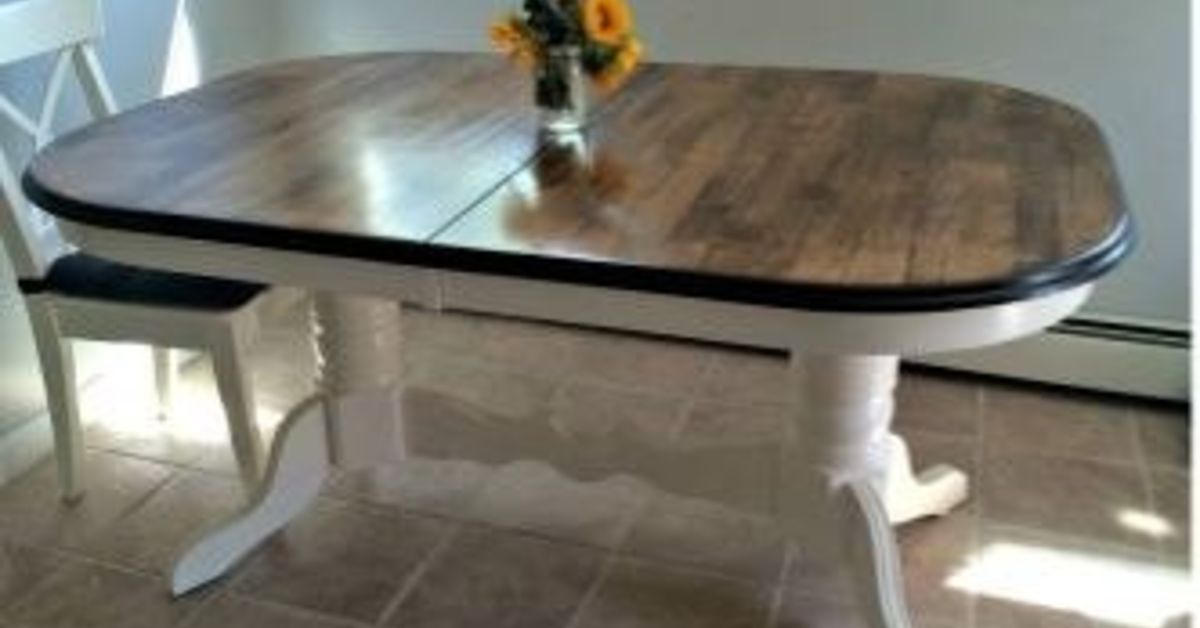
I wanted a classic two-tone farmhouse table: a warm stained wood top paired with a light painted base. This combination feels timeless because it balances rustic texture with clean brightness. The stained top keeps the table grounded and practical, while the painted legs and apron make the whole piece feel fresher and lighter.
Color Palette
For the tabletop, I chose a medium warm brown stainnot too dark, not too yellow, and not so trendy that I would regret it by next Tuesday. For the base, I chose a creamy off-white paint. Bright white can look crisp, but in a busy kitchen, a slightly warm white feels softer and more forgiving. Translation: it does not immediately announce every fingerprint.
Finish Style
I wanted a satin finish rather than high gloss. Satin gives the wood a smooth, protected surface without making it look like a bowling lane. For farmhouse furniture, satin and matte finishes usually feel more natural because they let the wood grain and shape of the table do the talking.
Tools and Supplies for the Table Makeover
A farmhouse kitchen table makeover does not require a professional workshop, but it does require patience and the right supplies. My basic list included a cleaner, drop cloths, painter’s tape, sanding blocks, an orbital sander, several sandpaper grits, wood filler, tack cloth, stain, paint, primer, brushes, foam applicators, a protective topcoat, gloves, and a mask suitable for dust.
Safety matters, especially when sanding old finishes or working with paints, stains, and sealers. Good ventilation, dust control, protective gear, and careful cleanup are not glamorous, but neither is coughing into a paint rag while pretending you are “basically fine.” If your table may have old lead-based paint, avoid sanding it casually and check proper safety guidance before disturbing the surface.
Step 1: Clean the Table Like It Owes You Money
The first real step was cleaning. This sounds boring, but it is one of the most important parts of refinishing furniture. Grease, wax, crumbs, polish, and everyday kitchen grime can interfere with sanding, primer, stain, and paint. A table may look clean until you wipe it down and discover a hidden layer of “family history.”
I removed the chairs, cleared the table, and wiped everything thoroughly: top, edges, apron, legs, and underside corners. The underside matters because dust and cobwebs love to hold secret meetings there. After cleaning, I let the table dry completely before moving on.
Step 2: Repair Scratches, Dents, and Tiny Table Traumas
Next came repairs. Small dents and nail holes can be filled with stainable wood filler if the area will be stained, or regular wood filler if the area will be painted. Deep scratches on the tabletop needed extra attention because stain can make uneven marks more obvious. I filled only what needed filling and avoided overdoing it, because farmhouse style can handle a little imperfection.
That is one of the best parts of a farmhouse kitchen table makeover: character is allowed. A small nick on the edge does not ruin the project. It says, “This table has lived.” The trick is knowing the difference between charming wear and damage that will catch crumbs forever.
Step 3: Sanding the Tabletop
Sanding is where the table begins to change. It is also where your optimism meets reality. I started with a medium grit to remove the existing finish from the tabletop, then moved to finer grits to smooth the surface. The goal was not to punish the table; it was to create an even surface that would accept stain beautifully.
Sanding with the grain is important because cross-grain scratches can show up later under stain like tiny neon signs reading, “Someone rushed this.” I worked carefully across the tabletop, edges, and corners, then wiped away dust with a vacuum and tack cloth. Dust left behind can ruin a finish, so this step deserves more attention than most people want to give it.
Step 4: Sanding and Priming the Base
Since I planned to paint the base, I did not need to strip it down to bare wood. Instead, I scuff-sanded the legs and apron to help the primer grip. For furniture that gets touched, bumped, kicked, and occasionally attacked by a mop, adhesion matters.
I used a bonding primer on the base because kitchen furniture works hard. A table leg may not seem high-traffic until you notice how often chairs hit it, shoes brush against it, and someone hooks a foot around it during dinner. Primer creates a better foundation for paint and helps the final finish last longer.
Step 5: Staining the Farmhouse Tabletop
Staining was the moment the project finally started to look like the picture in my head. Before staining, I tested the color on a hidden area. This is a small step that can prevent a large emotional event. Wood species, age, previous finish, and sanding quality can all affect how stain looks once applied.
Some woods, especially softer woods like pine, can absorb stain unevenly. A wood conditioner can help reduce blotchiness and create a more consistent result. After the surface was ready, I applied the stain in the direction of the grain, let it sit briefly, and wiped off the excess. The longer stain sits, the deeper the color usually becomes, so timing matters.
I wanted warmth, not darkness, so I kept the stain controlled and even. The goal was a farmhouse tabletop that looked cozy and natural, not like it had joined a dramatic furniture soap opera.
Step 6: Painting the Base
Once the primer dried, I painted the base with thin, even coats. Thin coats are better than one thick coat because thick paint can drip, clump, and create brush marks. It is tempting to load the brush and finish faster, but furniture painting rewards patience. Annoying, but true.
I used a brush for detailed areas and a small roller for flat sections. The first coat looked slightly disappointing, as first coats often do. The second coat made everything look intentional. By the final coat, the table base had that soft farmhouse charm I wanted: clean, bright, and classic without feeling too precious.
Step 7: Sealing the Tabletop for Real Kitchen Life
A kitchen table needs a protective topcoat. This is not optional unless the table is purely decorative, in which case congratulations on living a life I do not understand. Real kitchen tables face water glasses, hot plates, cereal bowls, homework, elbows, and the occasional sauce incident.
I chose a durable clear topcoat for the stained tabletop and applied it in thin coats, following the grain. Between coats, I lightly smoothed the surface as needed and removed all dust before applying the next layer. Multiple thin coats create better protection than one heavy coat. The final finish gave the tabletop a soft satin sheen and made the wood grain look richer without feeling overly glossy.
Step 8: Curing Time, Also Known as “Do Not Touch It Yet”
Dry does not always mean cured. A finish may feel dry to the touch before it has fully hardened. This is the part of the project where patience becomes a personality test. I waited before putting the table back into full use, avoided heavy objects, and resisted the urge to decorate it immediately with a centerpiece the size of a small shrub.
Giving paint and topcoat enough time to cure helps prevent dents, smudges, and sticky spots. It is not the exciting part of a farmhouse kitchen table make over, but it is one of the reasons the finished table holds up.
How I Styled the Finished Farmhouse Table
Once the table was ready, styling brought the whole makeover together. I kept it simple: a neutral runner, a small ceramic vase, seasonal greenery, and woven placemats. Farmhouse kitchen decor works best when it feels collected rather than staged. Too many accessories can make the table look like it is auditioning for a catalog.
The stained wood top added warmth, while the painted base brightened the kitchen. I also swapped in simple chairs that complemented the table without matching too perfectly. A little mix-and-match seating can make a farmhouse dining area feel relaxed and lived-in.
Common Mistakes to Avoid
Skipping Prep Work
Prep work is the difference between a table makeover that lasts and one that peels before your next grocery run. Clean thoroughly, sand properly, and do not rush the primer or drying time.
Choosing the Wrong Finish
A wax finish can look beautiful on decorative furniture, but a kitchen table usually needs stronger protection. For a hardworking tabletop, choose a durable topcoat designed for furniture surfaces.
Sanding Unevenly
Uneven sanding can cause stain to absorb differently across the tabletop. Work methodically, move through grits gradually, and check the surface under good light before staining.
Using Too Much Paint or Topcoat
Thick coats can lead to drips, ridges, cloudiness, or slow curing. Thin, even coats may take longer, but they produce a smoother and more professional-looking finish.
The Final Reveal
The finished table looked like it belonged in the kitchen all along. The stained top brought out the grain and added warmth. The painted base gave the piece a clean farmhouse look. The satin finish made it practical without making it feel too shiny or formal.
Best of all, the table still felt like our table. It had a new look, but it had not lost its history. The small imperfections remained, but now they looked intentional instead of neglected. That is the magic of a farmhouse kitchen table makeover: it turns wear into character and function into style.
Extra Experience Notes: What This Makeover Taught Me
After finishing my farmhouse kitchen table make over, I realized that the project was less about furniture and more about learning how to slow down. DIY projects have a funny way of revealing your personality. If you are impatient, sanding will know. If you are overconfident, stain will humble you. If you think “just one thick coat” is a good idea, paint will write a very public review of your choices.
One of the biggest lessons was that preparation is not wasted time. At first, cleaning and sanding felt like the boring opening act before the real makeover. But once the stain went on, I understood why prep matters. Every uneven patch, leftover dust speck, or lazy sanding mark has the potential to show through. A farmhouse table can be rustic, but rustic should not mean careless. There is a difference between charming imperfection and “I gave up halfway through.”
I also learned that lighting matters. The table looked one way in the garage and completely different in the kitchen. Natural light brought out warm undertones in the stain, while evening light made the painted base look creamier. If I were doing the project again, I would test stain and paint colors in the actual room before committing. A sample board is not glamorous, but neither is realizing your “soft beige” looks like pancake batter under kitchen lights.
Another helpful experience was working in stages. Trying to do everything in one day sounds efficient, but it can lead to rushed decisions. I cleaned and repaired first, sanded on another day, stained after testing, then painted and sealed when I had enough time to focus. This made the project feel manageable. It also reduced the chance of me making dramatic statements like, “I have ruined the table,” which, to be fair, I only said twice.
The finished table changed the entire feeling of the kitchen. It made the room warmer, brighter, and more personal. It also made me appreciate the furniture I already had. Sometimes the best home updates are not about buying something new. Sometimes they are about looking at an old piece and asking, “What could you become with a little effort and a lot of sandpaper?”
If you are considering your own farmhouse kitchen table makeover, my advice is simple: inspect the table carefully, choose a realistic finish, protect your workspace, take your time, and do not panic during the ugly middle stage. Every good DIY project has one. The table may look worse before it looks better, but that does not mean the project is failing. It usually means you are right on schedule.
In the end, this makeover gave me more than a prettier kitchen table. It gave me a piece that feels custom, meaningful, and ready for many more family meals. It still gets crumbs on it. It still collects mail. Someone will absolutely spill juice on it again. But now it does all of that while looking charming, warm, and farmhouse-fabulous.
Conclusion
My farmhouse kitchen table make over proved that a tired table does not need to be replaced to feel new again. With careful cleaning, sanding, staining, painting, sealing, and styling, an ordinary kitchen table can become the warm centerpiece of the room. The best part is that the finished piece still carries its history, only now it looks loved instead of worn out.
A farmhouse table should invite people to gather, eat, talk, laugh, work, and occasionally argue over who finished the last biscuit. This makeover did exactly that. It transformed a scratched, dated table into a durable and welcoming piece of furniture that fits real family life. And honestly, any project that makes the kitchen feel cozier without requiring a full renovation deserves a standing ovationor at least a fresh cup of coffee at the newly refinished table.

