
Beauty Tools & Accessories
How to Use Sandpaper Correctly
Aug
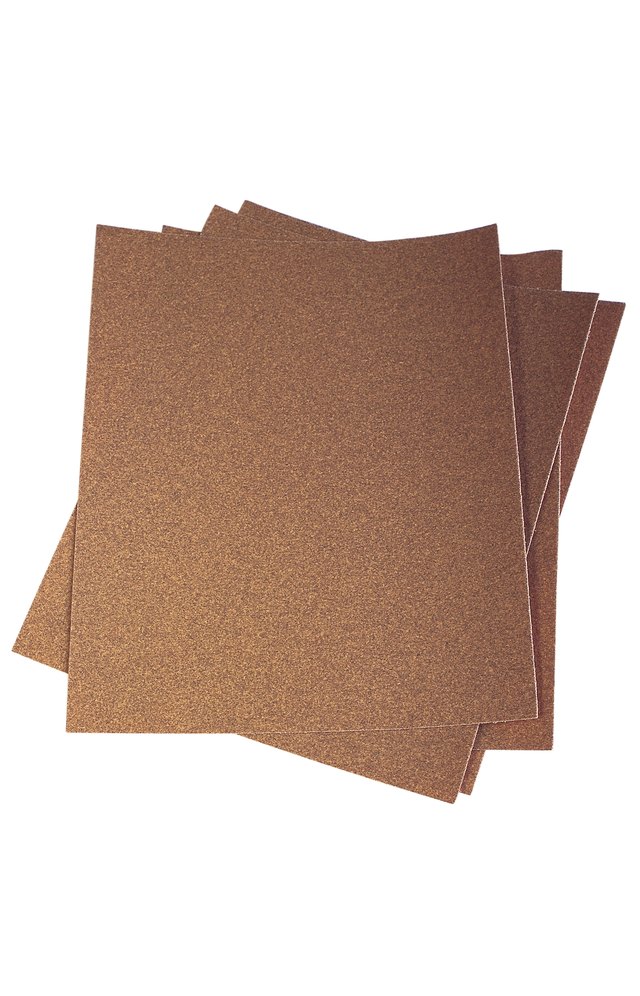
Sandpaper looks simple enough: one side is paper, the other side is angry. Yet using it correctly involves more than rubbing a surface until your arm files a formal complaint.
The secret to successful sanding is controlled scratch removal. A coarse abrasive creates relatively deep scratches while leveling defects or removing old material. Each finer grit then replaces those scratches with smaller ones until the surface is smooth enough for paint, stain, clear finish, polishing, or whatever glorious future you have planned for it.
Whether you are refinishing furniture, preparing cabinets for paint, smoothing drywall, removing rust, or rescuing a scratched tabletop, the same principles apply: choose the right abrasive, begin with an appropriate grit, use light and even pressure, clean between stages, and stop before you accidentally turn a solid board into a decorative wood wafer.
Understand What Sandpaper Grit Numbers Mean
The grit number identifies the approximate size of the abrasive particles bonded to the backing. A lower number means larger, more aggressive particles. A higher number means smaller particles and a finer finish.
In practical terms, 60-grit sandpaper removes material quickly, while 220-grit paper smooths relatively minor scratches. Ultra-fine grits such as 600, 1,000, and 2,000 are commonly used for wet sanding, polishing finishes, automotive work, and other specialized applications.
Some abrasives use a “P” before the number because they follow a different grading system. The exact particle size may vary slightly among standards and manufacturers, so follow the abrasive and finish manufacturers’ recommendations when precision matters.
A Practical Sandpaper Grit Chart
| Grit Range | General Grade | Common Uses |
|---|---|---|
| 24–60 | Very coarse | Heavy stock removal, stripping stubborn coatings, leveling rough lumber, and removing major defects |
| 80–100 | Coarse | Initial sanding of rough wood, removing paint, shaping edges, and eliminating deeper scratches |
| 120–150 | Medium | General surface preparation, smoothing wood, sanding primer, and removing marks from coarse paper |
| 180–220 | Fine | Final preparation before many stains, paints, and clear finishes |
| 320–400 | Very fine | Light sanding between finish coats, smoothing primer, and removing small dust nibs |
| 600 and higher | Ultra-fine | Wet sanding, polishing cured coatings, automotive finishing, metal work, and plastics |
These ranges are starting points rather than universal commandments carved into a workshop wall. The correct grit depends on the material’s condition and the finish you intend to apply.
Choose the Right Type of Sandpaper
Grit is only part of the decision. Sandpaper also differs by abrasive mineral, backing material, coating pattern, and resistance to clogging.
Aluminum Oxide
Aluminum oxide is a durable, versatile abrasive used on wood, paint, metal, and many general-purpose projects. It is widely available in sheets, discs, belts, and rolls. For a typical home workshop, it is the dependable all-rounderthe sensible shoes of the abrasive world.
Garnet
Garnet paper is traditionally used for hand-sanding bare wood. Its particles fracture during use, exposing fresh cutting edges and producing a smooth surface. It generally wears faster than aluminum oxide but can provide excellent control during final wood preparation.
Silicon Carbide
Silicon carbide is sharp and commonly found on waterproof wet-or-dry paper. It works well on paint, clear finishes, metal, plastic, glass, and automotive surfaces. When wet sanding is appropriate, water or another approved lubricant helps carry away debris and reduces loading.
Ceramic and Zirconia Abrasives
Ceramic and zirconia abrasives are durable, aggressive options frequently used for heavy material removal, metal grinding, and demanding power-sanding applications. They may be unnecessary for a small pine shelf but extremely useful when ordinary paper wears out faster than your patience.
Select the Correct Starting Grit
One of the most common sanding mistakes is beginning with paper that is too fine. Fine sandpaper can polish the tops of defects without removing them. You may sand for twenty minutes, admire your persistence, and discover that the scratch is still sitting there like an unpaid parking ticket.
Inspect the surface before choosing your starting grit:
- Begin around 60 or 80 grit for rough lumber, heavy scratches, thick coatings, or significant leveling.
- Begin around 100 or 120 grit for ordinary unfinished wood with moderate machine marks.
- Begin around 150 or 180 grit when the surface is already smooth and needs only final preparation.
- Use 180 to 220 grit for light scuff sanding before many paint or finish applications.
- Use approximately 320 grit or finer for gentle smoothing between compatible finish coats.
Choose the finest grit that can remove the existing defects efficiently. Starting unnecessarily coarse creates scratches that require additional work, while starting too fine wastes time and sandpaper.
Follow a Logical Sanding Sequence
After the starting grit has removed the original defects, move progressively through finer abrasives. A common sequence for unfinished wood is 80, 120, 150, and 180 grit. A smoother starting surface might need only 120, 150, and 180 grit.
Avoid making enormous jumps. Moving directly from 60 grit to 220 grit leaves the fine paper struggling to erase deep scratches. As a practical rule, do not skip more than one commonly available grit in the sequence unless testing proves that the next paper can remove the earlier scratches efficiently.
Before changing grits, remove the dust and inspect the surface under light coming from a low angle. Continue sanding until the scratches from the previous grit are gone. The purpose of 150-grit paper is not merely to spend time near the wood; it must remove the marks left by the grit before it.
How to Sand Wood by Hand
Hand sanding provides control around edges, corners, profiles, and delicate surfaces. It is also useful as a final step after machine sanding because straight strokes with the grain can remove faint orbital marks.
1. Secure and Inspect the Workpiece
Place the workpiece on a stable surface and clamp it when necessary. Remove protruding fasteners and dried glue before sanding. Glue residue can seal the wood and create pale spots when stain is applied.
2. Use a Sanding Block
Wrap the paper around a flat sanding block when working on flat surfaces. A block distributes pressure evenly and helps preserve flatness. Sanding only with your fingertips can create grooves because the pressure becomes concentrated beneath each finger.
For curved profiles, use a sanding sponge, flexible pad, dowel, rubber block, or a custom-shaped piece of foam. The backing should support the paper without changing the intended shape.
3. Sand With the Wood Grain
Move parallel to the visible grain whenever possible, especially during the final stages. Cross-grain scratches can become painfully obvious after stain is applied. Stain does not hide bad sanding; it often circles the mistake with a fluorescent marker.
4. Apply Light, Even Pressure
Let the abrasive particles do the cutting. Heavy pressure can clog the paper, generate heat, round over edges, and create an uneven surface. Use long, overlapping strokes and work methodically across the entire area.
5. Use Pencil Marks as a Guide
Draw light, loose pencil lines across a flat surface before sanding. When the lines disappear evenly, you have covered the whole area. Do not press hard enough to dent the wood, and avoid this technique on highly porous surfaces where graphite might become trapped.
6. Replace Worn Paper
Fresh sandpaper cuts more efficiently and requires less pressure. Replace a sheet or disc when it becomes smooth, torn, clogged, or noticeably slower. Worn paper is not saving money if it doubles the work and encourages you to lean on the tool like you are trying to start a lawn mower.
How to Use a Power Sander Correctly
Power sanders remove material quickly, but they can also damage a project quickly. Read the tool manual, install the correct abrasive, align dust-extraction holes, and secure the workpiece before starting.
Keep the Pad Flat
Random-orbit and finishing sanders should remain flat against the work. Tilting the machine onto an edge concentrates the cutting action in a small area and may create depressions or crescent-shaped marks.
Use Slow, Overlapping Passes
Guide the sander steadily across the surface, overlapping each pass. Racing across the board does not give the abrasive enough time to work. Do not leave the machine stationary while it is running, particularly with coarse paper.
Do Not Add Excessive Pressure
The machine’s weight is often enough. Excess pressure can slow the pad, reduce the random-orbit action, increase heat, wear the abrasive unevenly, and leave swirl marks. When removal is too slow, switch to a more appropriate grit instead of attempting to intimidate the sander.
Choose the Right Machine
- Random-orbit sanders are versatile choices for furniture, tabletops, cabinets, and general woodworking.
- Finishing sanders offer controlled sanding with rectangular sheets and can reach closer to corners.
- Belt sanders remove material aggressively and are best reserved for large, flat surfaces or significant leveling.
- Detail sanders help reach corners and narrow areas but can create uneven spots if held in one place.
Finish important wood surfaces with a light hand-sanding pass in the grain direction. This helps remove subtle machine marks before stain or clear finish makes them part of the permanent exhibition.
Match the Method to the Material
Bare Wood
For many wood projects, finish sanding between 150 and 220 grit is sufficient. The ideal stopping point depends on the species and finish. Sanding extremely fine can reduce stain absorption on some woods, creating a lighter appearance. Test the complete sanding and finishing schedule on scrap from the same board whenever possible.
Painted Surfaces
When repainting a sound surface, the goal is usually to remove gloss and create mechanical adhesionnot to excavate the object’s entire decorating history. Clean the surface first, then scuff sand with an appropriate fine or medium-fine grit. Feather chipped edges until they transition smoothly into the surrounding paint.
Before sanding old paint, determine whether it may contain lead or another hazardous material. Painted surfaces in older buildings should be tested and handled using applicable lead-safe practices rather than attacked with an uncontained power sander.
Drywall and Joint Compound
Drywall compound is soft, so use light pressure and a fine sanding screen, sponge, or papercommonly around 120 to 150 grit for initial smoothing. Keep the tool flat and avoid sanding through the paper face of the drywall. Use a bright work light positioned across the wall to reveal ridges and low spots.
Metal
Choose an abrasive rated for metal. Start coarse enough to remove rust, corrosion, burrs, or old coating, then refine the scratch pattern with progressively finer grits. Clean away grease before sanding and remove abrasive residue before applying primer.
Plastic and Clear Finishes
Plastic and cured coatings can overheat or scratch deeply. Use light pressure, fine wet-or-dry paper, and an approved lubricant when the material and product instructions permit wet sanding. Test an inconspicuous area first.
When and How to Wet Sand
Wet sanding uses waterproof abrasive paper with water or another manufacturer-approved lubricant. The liquid carries away particles, reduces clogging, and can create a more uniform scratch pattern.
Soak the paper only when the manufacturer recommends it. Keep the surface lubricated, sand lightly, and wipe away the slurry regularly so you can inspect your progress. Wet sanding is generally reserved for compatible metals, plastics, automotive coatings, and fully cured finishesnot ordinary raw wood.
Never introduce water near a corded power tool unless the equipment is specifically designed and approved for wet operation. For most household wet-sanding jobs, sanding by hand is the safer method.
Control Dust and Protect Yourself
Sanding creates fine airborne particles that can irritate the eyes, skin, nose, throat, and respiratory system. Some woods, coatings, metals, and building materials present additional hazards.
- Wear safety glasses or goggles.
- Use hearing protection when operating loud power equipment.
- Wear a properly fitted particulate respirator appropriate for the material being sanded.
- Connect power sanders to effective dust extraction whenever possible.
- Work in a well-ventilated area without blowing dust into occupied spaces.
- Keep dust away from flames, sparks, heaters, and other ignition sources.
- Do not sand material that may contain lead, asbestos, or another hazardous substance until it has been identified and a safe procedure established.
Vacuum dust using suitable equipment and wipe the surface as recommended for the finish. Do not assume that a quick blast from an air compressor makes the dust disappear. It merely gives the dust a travel itinerary.
Common Sanding Mistakes to Avoid
Starting With Paper That Is Too Fine
If the abrasive is not removing the defects, move to a coarser grit. Fine paper cannot negotiate with a deep scratch.
Skipping Too Many Grits
Large jumps leave deep scratches behind and make the finer paper work inefficiently. Use a sensible progression and inspect between stages.
Pressing Too Hard
Heavy pressure causes uneven cutting, excess heat, premature abrasive wear, and possible swirl marks. Use a coarser grit when faster removal is needed.
Rounding Over Sharp Edges
Edges lose material faster than broad surfaces. Reduce pressure near corners and avoid allowing a power sander to hang over an edge unless rounding is intentional.
Failing to Remove Dust Between Grits
Loose coarse particles can remain on the surface and create fresh scratches during the next stage. Vacuum and inspect the work before changing abrasives.
Sanding Before a Finish Is Dry
A soft finish may roll into gummy particles, clog the paper, tear, or smear. Follow the coating manufacturer’s drying and recoating instructions instead of testing the finish every six minutes with an increasingly suspicious finger.
Practical Experiences and Lessons From Real Sanding Projects
Common workshop experience shows that successful sanding usually depends less on strength than on observation. A person who pauses to inspect the scratch pattern often finishes faster than someone who sands continuously without checking the surface.
The Rough Tabletop Lesson
Consider a pine tabletop with planer marks, shallow dents, and dried glue near the joints. Beginning with 220-grit paper feels cautious, but it is not effective. The fine abrasive smooths the easiest areas while the planer marks remain. The user responds by pressing harder, which clogs the disc and creates uneven patches.
A better approach is to scrape away the glue and test 100-grit paper on a small area. Once the defects disappear, the tabletop can progress through 120, 150, and 180 grit. Pencil guide marks help confirm that each pass covers the entire top. What initially looked like a project requiring hours of heroic labor becomes a predictable sequence.
The lesson is simple: use the grit that matches the defect. Starting too fine is not gentler when it encourages excessive pressure and endless sanding.
The Cabinet Edge Lesson
Cabinet doors demonstrate how quickly edges can be damaged. A random-orbit sander may work beautifully on the center panel, but allowing the disc to hang over the perimeter removes material aggressively. Within minutes, a crisp painted edge can become rounded, exposing bare wood or fiberboard.
The safer method is to machine-sand broad, flat areas while keeping the pad fully supported. Edges and profiles receive a lighter hand sanding with a flexible pad. When preparing sound paint for another coat, the objective is merely to dull the gloss and smooth defects. Removing every trace of existing paint is unnecessary unless the coating is failing.
This experience teaches an important distinction: sanding for adhesion is different from sanding for removal. Knowing which job you are performing prevents a great deal of accidental demolition.
The Invisible Swirl-Mark Lesson
Orbital scratches can disappear under workshop lighting and reappear dramatically after stain. One common warning sign is a surface that looks smooth from directly above but shows circular marks when viewed under a light shining across the grain.
Slow, overlapping passes help prevent these marks. So does using fresh paper, keeping the pad flat, reducing pressure, and cleaning the surface between grits. A final hand-sanding pass with the grain provides extra insurance on highly visible surfaces.
Inspection is easiest before the finish is opened. Once stain has entered a circular scratch, the scratch becomes less of a sanding problem and more of a conversation topic.
The Dust-Control Lesson
Dust extraction is sometimes treated as an optional convenience, but it improves both safety and results. A sander connected to a capable vacuum keeps the abrasive cutting longer, makes scratch patterns easier to inspect, and reduces particles that could settle into a wet finish.
A clean work area also reveals defects sooner. On a dust-covered board, a glue smear and a perfectly sanded surface can look equally gray. After vacuuming and wiping the wood appropriately, shiny glue patches, scratches, and missed areas become easier to identify.
The Fresh-Sandpaper Lesson
Many people keep using a sanding disc because it is not visibly torn. However, abrasives become dull before the backing falls apart. The user compensates with more pressure, the machine runs hotter, and progress slows.
Replacing a worn disc often feels as though the sander has suddenly gained a more powerful motor. Mark the grit on cut pieces, store different grits separately, and replace abrasives when their cutting performance declines. Sandpaper is a consumable tool, not a family heirloom.
Across furniture, trim, cabinets, drywall, and metal projects, the most reliable routine remains consistent: inspect, choose the right starting grit, sand evenly, clean the surface, examine the scratches, and move finer only when the previous stage is complete.
Conclusion
Learning how to use sandpaper correctly transforms sanding from random rubbing into a controlled finishing process. Start with an abrasive coarse enough to remove the actual defects, progress through appropriate grits, use a sanding block on flat surfaces, keep power tools flat, and avoid excessive pressure.
Clean and inspect the work between stages, protect yourself from dust, and test the complete sanding-and-finishing schedule on scrap whenever possible. Sandpaper cannot fix every workshop decision, but used correctly, it can make many of them look considerably more intentional.

