
Beauty Unlocked
How to Create a Custom Stairway Runner For Less!
Aug
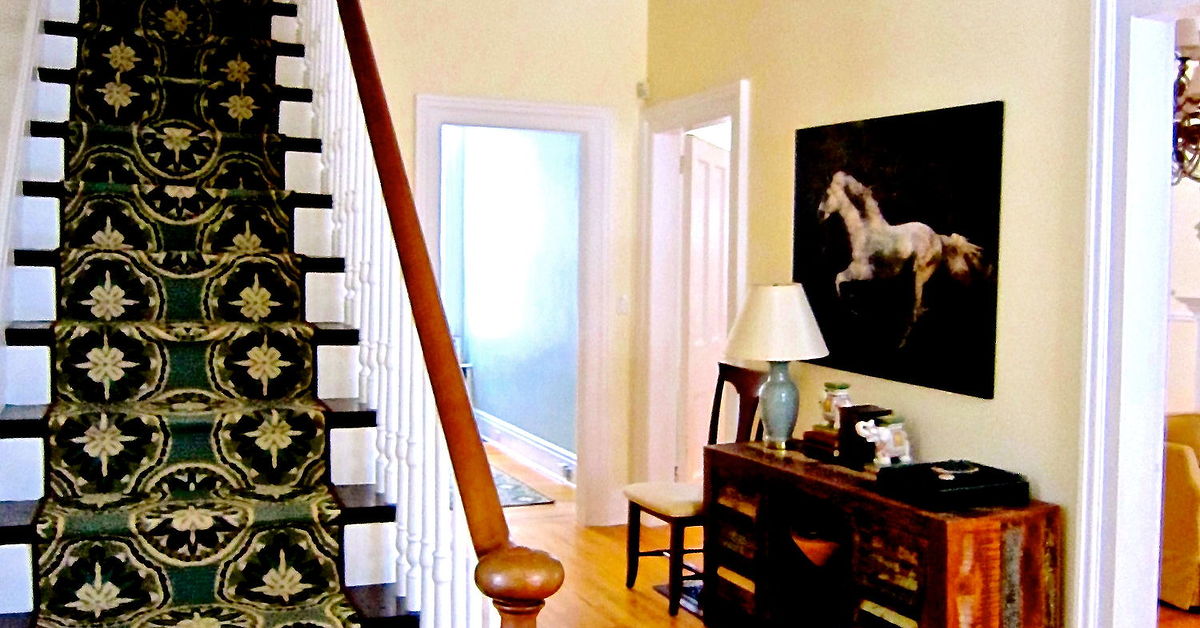
A custom stairway runner can make your staircase look like it belongs in a design magazine instead of a “before” photo from a renovation show. It adds warmth, grip, color, texture, and a little personality to one of the hardest-working zones in your home. The problem? Professional stair runners can get expensive quickly, especially when you add custom binding, padding, installation, stair rods, landings, turns, and the emotional cost of staring at 47 carpet samples until they all look beige.
The good news is that you can create a custom stairway runner for less by combining smart measuring, budget-friendly runner rugs, basic tools, and a patient weekend attitude. You do not need a mansion, a designer, or a bank account that gently weeps every time you open your flooring estimate. With the right plan, a DIY stair runner can look polished, feel secure, and cost far less than a fully custom carpet installation.
This guide walks you through how to choose the right runner, measure your stairs, install padding, secure the rug, hide the seams, and make everything look intentional. Because in DIY, “intentional” is the fancy cousin of “I fixed it before anyone noticed.”
Why Add a Stairway Runner?
A stair runner is a long strip of carpet or rug material installed down the center of a staircase, leaving part of the stair tread exposed on either side. It is both decorative and practical, which is the dream combination for home upgrades. Unlike a throw pillow shaped like a mushroom, a stair runner actually does something useful.
It Makes Stairs Safer
Bare wood stairs can be slippery, especially for kids, pets, socks, and anyone carrying laundry baskets taller than their ambition. A runner adds traction and can make each step feel more stable underfoot. For homes with older adults, active children, or enthusiastic dogs who believe stairs are a racetrack, this can be a meaningful upgrade.
It Reduces Noise
If your stairs currently announce every midnight snack mission with a dramatic creak-and-thump soundtrack, a runner can help soften the sound. Carpet padding and fabric absorb impact, making the staircase quieter and more comfortable.
It Protects the Stairs
Stairs take a beating. Shoes, paws, dust, backpacks, furniture moves, and gravity all have opinions. A runner protects the center of each tread, where most wear happens, while still letting pretty wood edges show.
It Adds Instant Style
A runner can transform a plain staircase into a focal point. Stripes feel classic and crisp. Vintage-inspired patterns hide dirt like tiny design magicians. Natural fibers bring texture. Bold colors make the stairs feel like they have a personality and possibly a podcast.
How Much Can a DIY Stair Runner Cost?
The final cost depends on the number of stairs, runner material, padding, tools, and whether you already own a staple gun. A professionally installed custom runner can cost significantly more because you are paying for custom carpet, binding, labor, measuring, and finishing. A DIY version can be done for much less by using ready-made runner rugs, remnant carpet, washable runners, or affordable roll runners from home improvement stores.
Here is a realistic budget-style breakdown for a straight staircase:
- Runner rugs: Often the biggest expense. Buying two or three matching runners is usually cheaper than ordering custom carpet.
- Rug pad or carpet padding: Adds cushion, grip, and a more finished feel.
- Staples: Use heavy-duty staples suitable for carpet and wood.
- Carpet tape: Helpful for positioning, but not a replacement for secure fastening.
- Tools: Staple gun, utility knife, measuring tape, straightedge, marker, scissors, and possibly a stair tool or bolster chisel.
- Optional extras: Stair rods, decorative nailheads, painted stair edges, or custom binding.
The biggest savings come from skipping fully custom carpet and choosing a ready-made runner that can be joined neatly. You can also save by doing your own prep work, painting or staining the exposed stair edges yourself, and using simple hidden staples instead of expensive decorative hardware.
Step 1: Choose the Right Runner Material
Not every rug is staircase material. Some rugs are beautiful on the floor but behave badly on stairs, bunching, slipping, fraying, or showing every footprint like a crime scene investigator.
Look for a runner that is durable, flexible, and not too thick. Low-pile rugs are easier to bend tightly around stair nosings and easier to staple neatly. Flatweave rugs can work well because they are flexible, but they may need a good rug pad for comfort. Wool is durable and naturally resilient, while synthetic fibers like nylon or polypropylene can be budget-friendly and easier to clean.
Best Budget-Friendly Runner Options
- Ready-made runner rugs: Great for straight staircases and easy to find in common lengths.
- Indoor/outdoor runners: Durable, often affordable, and good for homes with pets or muddy shoes.
- Vintage-style printed runners: Excellent at hiding wear, dust, and the occasional mystery crumb.
- Carpet remnants: A smart option if you can have the edges bound professionally.
- Roll runners: Sold by the linear foot and useful when you want fewer seams.
Runner Materials to Avoid
Avoid rugs that are overly plush, slippery, loosely woven, or so thick that they change the feel of each step. Very thick rugs can be harder to secure and may create a tripping hazard. Also avoid anything with a backing that cracks when bent. Your runner should curve over stair edges without acting personally offended.
Step 2: Measure Your Stairs Carefully
Measuring is where the project succeeds or quietly plots revenge. A stair runner needs enough length to cover every tread and riser, plus extra for adjustments, seams, and finishing. For each step, measure the tread depth from back to front, then measure the riser height from one tread to the next. Add those two measurements together, then multiply by the number of stairs.
For example, if each tread is 10 inches deep and each riser is 8 inches high, that is 18 inches per stair. If you have 13 stairs, you need 234 inches, or 19.5 feet, before adding extra. Always add extra length for trimming, pattern matching, and mistakes. The DIY gods appreciate a peace offering of extra material.
Do Not Forget These Measurements
- Stair width: Measure the full width of the staircase.
- Runner width: Decide how much wood you want visible on each side.
- Landing depth: If the runner continues onto a landing, measure that separately.
- Nosing shape: Rounded or thick nosings may require more material.
- Pattern repeat: Stripes, borders, and medallions need extra planning.
A common look is to leave 3 to 6 inches of exposed stair on each side, depending on the staircase width. Wider stairs can handle a wider runner. Narrow stairs usually look best with a more modest border so the runner does not feel like it is wearing shoulder pads.
Step 3: Plan the Layout Before You Staple Anything
Before installation, roll out the runner and inspect the pattern. If your rug has stripes, borders, or a central design, decide what matters most visually. Sometimes keeping the stripe perfectly straight is more important than centering the rug on every slightly uneven stair. Old houses are charming because nothing is square. They are also irritating because nothing is square.
Use painter’s tape or pencil marks to create a guideline down the stairs. Measure from one side of the staircase and mark the runner edge on each tread and riser. Do not rely on eyeballing unless your eyeballs have a contractor’s license.
Dry-Fit the Runner
Lay the runner over several stairs before securing it. Check the width, pattern direction, and how it bends around the nosing. If you are using multiple runners, decide where the seams will land. The best seam location is usually under a stair nosing or at the back of a tread where it is less visible.
Step 4: Prep the Stairs
Remove old carpet, staples, nails, and debris. Sweep and vacuum thoroughly. If you plan to paint or stain the exposed stair edges, do that before installing the runner. This is also the time to repair squeaks, fill holes, tighten loose boards, and sand rough spots.
Painted side borders can make a budget runner look custom. A crisp white, soft black, warm gray, or natural wood finish can frame the runner beautifully. Use durable floor or porch paint if the exposed edges will get foot traffic.
Check for Safety Issues
Before covering the stairs, make sure each tread is secure. A runner can improve grip, but it should not hide structural problems. If a tread moves, cracks, or feels unstable, repair it first. Carpet is not a personality makeover for unsafe stairs.
Step 5: Cut and Install Rug Padding
Padding makes a DIY runner feel more luxurious and helps reduce noise. Cut individual pieces of rug pad or carpet padding for each tread. The padding should be slightly narrower than the runner and should not wrap over the nosing unless your installation method specifically calls for it.
Place padding on the flat tread area, leaving space near the front edge and sides so it will not peek out. Secure it with carpet tape or staples. Keep it smooth and flat. Wrinkled padding under a stair runner is like wearing socks with a pebble inside: technically functional, emotionally unacceptable.
Step 6: Start at the Top
Most DIY stair runner installations begin at the top of the staircase and move downward. Position the runner carefully along your guideline. Secure the top edge neatly, either under the landing lip, at the top riser, or in another hidden transition area depending on your staircase layout.
Use heavy-duty staples placed where they will be least visible, such as under the nosing, deep in the crease where the tread meets the riser, and along the edges where the rug pattern can hide them. If your staples are shiny and obvious, color them with a marker that matches the rug before installation. This tiny trick is suspiciously satisfying.
Pull Tight, But Not Too Tight
As you move down each step, pull the runner snugly so there are no bubbles or loose areas. However, do not stretch it so aggressively that the pattern warps. Use a stair tool, putty knife, or bolster chisel to press the runner firmly into the corner where the tread meets the riser.
Step 7: Staple in the Right Places
Stapling is the heart of a budget stair runner installation. The goal is to secure the rug firmly while keeping fasteners hidden. For each step, staple along the top of the riser, tuck the rug tightly into the crease, staple near the back of the tread, pull it over the nosing, and staple underneath the lip if possible.
Keep checking your side measurements as you go. Even a small drift can become obvious after several stairs. A quarter inch here, a quarter inch there, and suddenly your runner is making a break for the dining room.
Waterfall vs. Wrapped Installation
There are two common looks for stair runners. A waterfall installation lets the runner flow smoothly from the tread over the nosing to the next riser. It is often easier for DIYers and works well with thicker or stiffer runners. A wrapped or upholstered style follows the contour of each tread and riser more tightly, creating a tailored look. It can look more custom but may require more precision.
Step 8: Join Multiple Runners Neatly
If your staircase is longer than one runner, you will need to join two pieces. Plan seams carefully so they fall in a less noticeable spot. Match the pattern before cutting. For striped or bordered runners, take your time lining everything up. This is not the moment for “close enough,” unless you enjoy seeing one crooked stripe every morning with your coffee.
Overlap or butt the edges depending on the rug type, then secure the seam with carpet tape underneath and staples in hidden areas. Trim bulky hems if necessary, but only if doing so will not cause fraying. If the rug edge is likely to unravel, fold it under or use binding tape.
Step 9: Finish the Bottom Edge
At the bottom of the staircase, fold the raw edge under for a clean finish. Staple it securely in a hidden spot, such as the bottom riser or under the final nosing. If your runner has a finished end, position it so that the visible edge looks intentional.
For an extra-polished look, add decorative stair rods. They are not always necessary for function if the runner is properly secured, but they can make a budget runner look more expensive. Think of them as jewelry for your stairs. Not required, but they do enjoy making an entrance.
How to Make a Cheap Stair Runner Look Custom
The difference between “budget DIY” and “custom-looking DIY” is usually in the finishing details. You do not need expensive materials if the installation is clean, straight, and thoughtfully styled.
Choose a Forgiving Pattern
Patterns hide dirt, seams, staples, and minor imperfections. Vintage motifs, small geometrics, heathered textures, and stripes are all practical options. Solid light-colored runners can look beautiful, but they show every speck of dust and every muddy paw print like they are building a legal case.
Paint the Stair Edges
Fresh paint or stain on the exposed stair edges instantly elevates the project. Dark edges create drama. White edges feel classic. Natural wood adds warmth. The key is contrast: the runner should look framed, not randomly dropped down the stairs during a rug emergency.
Add Binding or Faux Binding
If you use carpet remnants, professional edge binding can make them look high-end. For a cheaper alternative, choose a runner that already has a finished border. You can also use fabric trim or carpet binding tape in some cases, but make sure it is secure and suitable for foot traffic.
Use Consistent Spacing
Consistent spacing on both sides is what makes the runner feel custom. Measure every few steps as you install. Do not assume the staircase is perfectly even. Many staircases are built with the casual confidence of someone who said, “Nobody will notice.” You will notice.
Common Mistakes to Avoid
Using a Rug That Is Too Thick
Thick rugs can be difficult to bend, staple, and keep tight. They may also create an awkward step height. Choose low-pile or flatweave options for easier installation.
Skipping the Rug Pad
Skipping padding can save money, but the result may feel thin and less comfortable. Even inexpensive padding can make the runner feel more finished.
Relying Only on Carpet Tape
Carpet tape helps with positioning, but stairs need a secure installation. Staples, tack strips, or another strong fastening method are important for safety.
Ignoring Pattern Alignment
If your runner has stripes or a border, alignment matters. A crooked pattern is more noticeable on stairs because the eye naturally follows the runner from top to bottom.
Forgetting About Cleaning
Stairs collect dust, pet hair, and whatever the bottom of shoes brings home from the outside world. Choose a runner you can vacuum easily and spot-clean without panic.
Best Runner Styles for Different Homes
For Busy Family Homes
Choose a patterned, low-pile synthetic runner in a medium tone. It will hide dirt better than cream and clean more easily than delicate natural fibers.
For Classic Interiors
A wool or wool-look runner with a border is timeless. Stripes, herringbone, and subtle geometrics work especially well.
For Modern Homes
Try a simple black, charcoal, tan, or graphic runner with clean lines. Keep the exposed stair edges crisp and minimal.
For Vintage or Eclectic Homes
Use Persian-inspired or Turkish-style runner rugs. Mixing multiple rugs can work if they share a similar width, palette, and pattern style.
Extra Experience: What I Learned From Budget Stair Runner Projects
The biggest lesson from creating a custom stairway runner for less is that preparation matters more than price. A cheap runner installed carefully can look better than an expensive runner installed in a hurry. The stairs do not care what the receipt says. They care whether the runner is straight, secure, and trimmed neatly.
One practical experience is to buy more runner length than the exact math suggests. Stairs have nosings, pattern repeats, landing transitions, and tiny surprises. Extra material gives you room to match patterns and recover from small mistakes. Running out of runner on the last step is a special kind of DIY heartbreak. It is the home improvement version of baking a cake and realizing you forgot sugar.
Another helpful lesson is to choose a pattern with movement. A perfect solid runner can look elegant, but it is far less forgiving. If you are installing your first DIY stair runner, a vintage-style pattern, tweed texture, or stripe with some variation can hide staples and minor alignment issues. It also hides everyday wear, which is important because staircases are not museum exhibits. People will walk on them. Pets will nap on them. Someone will drop cereal. Life happens vertically, too.
Tool comfort also matters. A manual staple gun can work, but it can be tiring if you have many stairs. An electric or pneumatic stapler can make the job faster and cleaner, as long as you practice first and use the right staple length. Test staples on a hidden area or scrap wood. You want them secure, not poking through like tiny metal teeth.
Do not rush the first three steps. Once the top section is straight and tight, the rest of the installation becomes easier. If the runner starts crooked, it will usually get more crooked as you move down. Take your time setting the first edge, checking the center line, and smoothing the first tread and riser. A slow start can save a dramatic uninstall later.
Seams deserve extra patience. If you are joining two runners, try to place the seam where the eye will not linger. Under a nosing or near the back of a tread is usually better than the middle of a riser. Match the pattern before cutting, then secure the seam firmly so it does not lift over time. If the seam is slightly visible, do not panic. Most people are not inspecting your stairs with a flashlight. And if they are, they are no longer invited over.
Padding is worth it. Even thin rug padding can make a budget runner feel more substantial. It also helps soften sound, which is especially useful in homes where the staircase is near bedrooms or living spaces. Just make sure the padding is narrower than the runner so it stays hidden and does not create bulky edges.
Finally, remember that “custom” does not always mean expensive. Custom can mean you chose the width, painted the borders, matched the style to your home, and installed it with care. A DIY stair runner is one of those projects where effort shows. When finished, the staircase feels warmer, safer, and more designed. Best of all, every time someone compliments it, you get to say, “Thanks, I did it myself,” which is basically the official national anthem of DIY.
Conclusion
Creating a custom stairway runner for less is completely possible with smart planning, careful measuring, and a willingness to make friends with a staple gun. The key is choosing the right runner material, preparing the stairs properly, using padding, keeping the layout straight, and finishing the edges cleanly. You can save money by using ready-made runners, carpet remnants, or roll runners while still getting a polished, custom look.
A stair runner is more than decoration. It adds traction, reduces noise, protects your stairs, and gives your entryway or hallway a finished feel. Whether your style is classic, modern, vintage, coastal, farmhouse, or “I found this rug on sale and now I am emotionally attached,” the right runner can make your staircase look intentional and inviting.
Note: This project is suitable for many DIY homeowners, but stair safety matters. If your staircase is damaged, unusually shaped, curved, open-sided, or difficult to secure, consider consulting a professional installer before beginning.

