
Beauty Tools & Accessories
Five Workshop Hacks
Jul
A great workshop does not need to look like a glossy magazine spread with a floor so clean you could eat nachos off it. In fact, if your shop is spotless every hour of the day, congratulations: you may not be building anything. A real workshop has sawdust in suspicious places, clamps that disappear like socks in a dryer, and at least one coffee can full of screws that nobody is brave enough to sort.
But there is a big difference between “creative mess” and “I just spent 17 minutes looking for the pencil behind my ear.” The best workshop hacks are not gimmicks. They are small systems that make your space faster, safer, cheaper to use, and much less annoying. Whether your workshop is a two-car garage, a basement corner, a backyard shed, or a folding table that must surrender to dinner by 6 p.m., the goal is the same: make every square foot work harder than a bargain-bin drill on its last battery bar.
Below are five workshop hacks that solve the problems nearly every DIYer, woodworker, homeowner, and weekend tinkerer faces: tool clutter, wasted time, limited space, poor dust control, and chaotic project flow. They are practical, affordable, and easy to adapt. Better yet, they do not require you to mortgage the house for a wall of custom cabinets, although if you want those, I will admire them respectfully from a distance.
Why These Five Workshop Hacks Actually Matter
The most useful shop upgrades usually come down to three principles: visibility, accessibility, and repeatability. You should be able to see what you own, reach what you use most, and return everything to the same place without turning cleanup into a spiritual test. A well-organized workshop also supports safety. Clear floors reduce tripping hazards, dust control protects your lungs, and stable work surfaces prevent projects from sliding around like a greased raccoon.
These workshop hacks are designed around real-world behavior. Nobody wants a system that only works when you are well-rested, patient, and wearing a linen apron. A good shop system works when you are tired, covered in sawdust, and muttering at a board because it had the nerve to be warped.
Hack 1: Create a “Grab-and-Go” Tool Wall
Turn your wall into mission control
The fastest way to make a workshop feel bigger is to get tools off the bench and onto the wall. Pegboard, slatwall, French cleats, magnetic strips, and simple hook rails all do the same important job: they make tools visible. When a hammer, tape measure, square, pliers, clamps, and drill bits have obvious homes, your brain stops wasting energy on search-and-rescue missions.
Do not hang every tool you own on the wall. That creates “visual soup,” which is the shop version of opening 53 browser tabs and pretending you are productive. Instead, build a grab-and-go wall for the tools you use constantly. Put measuring and marking tools near the workbench. Keep cutting accessories near the saw station. Store drill bits, countersinks, and driver bits near the charging area. The wall should follow how you work, not how a catalog photo thinks you work.
Use outlines, labels, and zones
One underrated workshop organization trick is outlining tools directly on pegboard or adding simple labels. This may feel dramatic at first, like you are managing a tiny hardware museum, but it works. Empty spaces become obvious. Cleanup becomes automatic. Anyone helping you can return tools without asking, “Where does this thingy go?” while holding your best chisel like a garden stake.
Divide the wall into zones: measuring, cutting, fastening, sanding, finishing, and safety gear. Add a small shelf or bin under each zone for related consumables. For example, keep pencils, utility blades, painter’s tape, and layout markers under measuring tools. Store sanding discs and hand pads near sanders. Put safety glasses, hearing protection, gloves, and dust masks near the entry point so you see them before the machines start singing the song of poor decisions.
Cheap materials that work
You can build this system with basic pegboard, plywood strips, scrap lumber, or inexpensive metal rails. French cleats are especially useful because holders can be moved around as your tool collection changes. Magnetic strips are excellent for screwdrivers, small wrenches, drill bits, and layout knives, but keep them away from delicate measuring tools or anything that might be damaged by magnetism.
The big idea is not fancy storage. It is reducing friction. When the right tool is one step away, projects move faster and mistakes shrink. Your future self will thank you, probably while holding a tape measure you did not have to find under a pile of extension cords.
Hack 2: Build a Mobile Workstation Instead of a Fixed Kingdom
Put your workshop on wheels
In small workshops, mobility is magic. A rolling cart, mobile workbench, tool chest on casters, or flip-top stand can transform a cramped corner into a flexible workspace. Instead of designing the entire shop around one giant bench, create stations that move where the work happens.
A mobile workstation is perfect for drills, fasteners, glue, sanders, small clamps, and frequently used hardware. Roll it beside the workbench during assembly. Move it near the garage door for sanding. Park it out of the way when you need floor space. If your shop also stores bikes, lawn equipment, holiday decorations, or boxes mysteriously labeled “misc,” a mobile cart can be the difference between building a project and performing garage archaeology.
What to put on the cart
Think of your mobile station as a waiter for your tools. It should carry the items you constantly reach for: tape measure, pencil, square, drill, driver bits, glue bottle, utility knife, small clamps, screws, and safety glasses. Add shallow bins for small parts and a magnetic cup or tray for loose screws. Include a small trash container or offcut bucket, because a shop without a trash plan becomes a confetti factory.
If you work with power tools, add a mounted power strip to the cart, but manage cords carefully. Use cord clips or hooks so nothing drags across the floor. Locking casters are worth the money. A cart that rolls away while you are trying to assemble a cabinet is not a workstation; it is a prank with wheels.
Fold-down surfaces save space
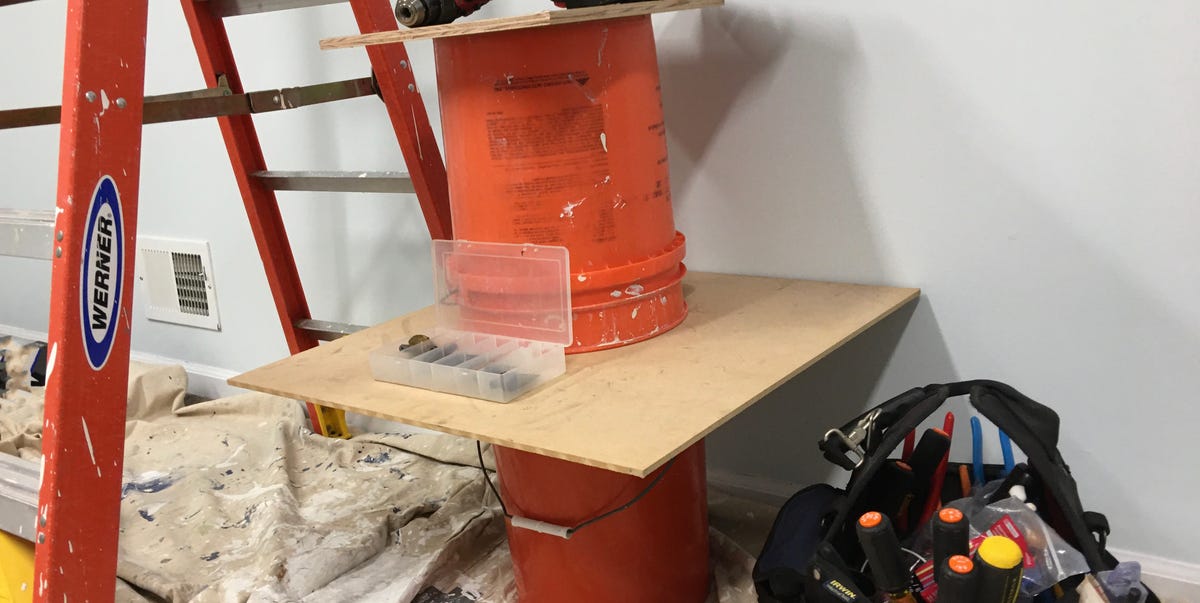
If floor space is precious, add a fold-down work surface to a wall or the side of a cabinet. A simple hinged plywood panel with folding brackets can serve as a sanding table, finishing area, layout surface, or temporary assembly bench. When the job is done, it folds flat. This is the workshop equivalent of a Murphy bed, except instead of guests, it hosts sawdust and questionable confidence.
The key is matching surfaces to tasks. Heavy pounding and chiseling need a sturdy bench. Layout, sanding, painting, and light assembly can often happen on a folding surface. By separating “heavy-duty” from “temporary,” you avoid overbuilding every work area and preserve valuable space.
Hack 3: Make a Clamp and Small-Parts System You Will Actually Use
Clamps are not optional
Every DIYer eventually learns the ancient law of workshops: you never have enough clamps. Clamps hold glued parts together, secure workpieces for cutting, replace a second pair of hands, and occasionally stop a project from becoming modern sculpture. But clamps are awkward to store. They tangle, slide, fall, and multiply in corners like metal rabbits.
A good clamp system keeps them upright, visible, and sorted by type. Bar clamps and pipe clamps can hang on a wall rack with notched supports. Spring clamps can clip to a board, dowel, or wire shelf edge. C-clamps and F-style clamps can sit on a narrow shelf with dividers. The goal is to grab the size you need without wrestling the entire clamp family.
Sort small parts like a hardware store
Small parts are where workshops lose their dignity. Screws, washers, wall anchors, brad nails, cabinet bumpers, picture hangers, and mystery brackets all love to gather in coffee cans, plastic bags, and drawers that sound like maracas. The fix is simple: use clear bins, divided cases, jars, or drawer organizers, and label them by size and purpose.
For fasteners, sort by type first, then size. Keep wood screws separate from drywall screws. Separate finish nails from brads. Put anchors and specialty hardware in their own cases. If you use a certain fastener often, give it a front-row spot. If you have not used an item in five years and cannot identify it without emotional distress, consider letting it retire.
Try the “project kit” method
One of the best workshop hacks for reducing chaos is the project kit. Before starting a project, place the specific fasteners, hinges, brackets, bits, blades, glue, finish, and instructions in one bin or tray. Keep that tray with the project until it is complete. This prevents the classic problem of buying another pack of screws because the first pack is hiding under the plans, which are hiding under the lumber, which is hiding under your optimism.
Project kits are especially useful for multi-day builds. At the end of each session, return everything related to that project to the kit. When you resume, you do not waste the first half hour reconstructing your own decisions.
Hack 4: Control Dust Before It Controls You
Sawdust is not shop glitter
Sawdust looks harmless because it is small, familiar, and often smells nice. Unfortunately, fine dust is one of the most serious workshop problems. It settles on tools, clogs finishes, creates slippery floors, and floats in the air where your lungs are inconveniently located. A clean workshop is not about being fussy. It is about breathing better, seeing your work clearly, and keeping machines in good shape.
The best dust-control system starts at the source. Connect saws, sanders, routers, and planers to a shop vacuum, dust extractor, or dust collector whenever possible. Use adapters to fit odd-sized ports. Empty vacuum containers before they are packed solid. Clean or replace filters as needed. A vacuum with a clogged filter is basically a loud bucket with confidence issues.
Use layers of protection
Dust control works best in layers. First, capture dust at the tool. Second, clean surfaces and floors regularly. Third, improve ventilation when safe and practical. Fourth, wear appropriate respiratory protection when sanding, cutting, routing, or using finishes that produce fumes or particles. Safety glasses and hearing protection should also live in plain sight, not buried in a drawer under a 2009 instruction manual.
For sanding, consider creating a simple downdraft box or using a perforated sanding surface connected to a vacuum. Even a basic setup can reduce the cloud that forms when you sand flat panels. For miter saws, which are famously talented at distributing dust across several zip codes, add a hood or backstop connected to dust collection. It does not need to be perfect to be useful.
Adopt the two-minute cleanup rule
After every major cutting or sanding session, do a two-minute cleanup. Vacuum the tool, sweep the floor, clear the bench, and empty the offcut bin if it is overflowing. Do not wait until the workshop looks like a hamster exploded. Small cleanup habits prevent giant cleanup events, and giant cleanup events are where motivation goes to die.
Keep a brush, dustpan, small vacuum nozzle, and trash container within arm’s reach of your main work area. If cleanup tools are convenient, you will use them. If they are hidden behind three bicycles and a snow shovel, you will pretend the dust adds character.
Hack 5: Design a Start-to-Finish Workflow
Stop making your shop fight your project
A workshop should have a flow. Materials come in, get cut, shaped, assembled, sanded, finished, and stored or installed. If every step requires moving lumber, stepping over cords, clearing a bench, and relocating three machines, the shop is not helping. It is heckling.
Start by mapping your most common projects. If you build shelves, furniture, picture frames, garden boxes, repairs, or household fixes, list the steps you repeat. Then place tools and surfaces in the order those steps happen. Lumber storage should be near the entry or cutting area. Measuring and marking tools should be near the bench. Sanding should have dust collection and good lighting. Finishing should happen away from heavy dust when possible.
Create zones, even in a tiny shop
You do not need a huge space to create zones. A zone can be a wall, a cart, a cabinet, or a shelf. The important thing is that related tasks have related storage. A cutting zone might include saws, blades, push sticks, measuring tools, and hearing protection. An assembly zone might include clamps, glue, squares, screws, and a flat surface. A finishing zone might include brushes, rags, gloves, stain, paint, and a safe drying area.
Label shelves by task, not just by object. “Sanding” is more useful than “random abrasive things.” “Electrical repair” is more useful than “drawer of items that may shock me.” Task-based zones reflect how people actually work.
Use lighting as a workshop tool
Good lighting is one of the cheapest upgrades with the biggest payoff. Shadows hide pencil lines, defects, glue squeeze-out, and measurement marks. Add bright overhead lighting and task lighting at the bench, saw, and finishing area. Adjustable lamps are useful for close work. If you can see better, you cut better, sand better, finish better, and make fewer mistakes. Also, you will stop blaming the tape measure for problems that were clearly caused by poor visibility and wishful thinking.
Finally, build a “reset ritual” into your workflow. At the end of each shop session, return tools, clear the bench, charge batteries, toss trash, and write the next step on a scrap of paper or whiteboard. That last note is powerful. When you come back later, you do not have to remember whether you already sanded to 180 grit or merely thought about it with great sincerity.
Extra Workshop Tips That Support the Five Hacks
Keep the floor as empty as possible
The floor should be for standing, moving, and occasionally dropping a screw that will never be seen again. Store lumber vertically or on wall racks when possible. Use ceiling storage for seasonal items, not daily tools. Put bulky equipment on mobile bases if it must share space. The more open your floor remains, the safer and more flexible your shop becomes.
Make charging boring and reliable
Cordless tools are wonderful until every battery is dead. Create one charging station with chargers, spare batteries, and a small bin for accessories. Label batteries by tool platform if you own multiple brands. Keep the station away from excessive dust and moisture. The goal is simple: when you need power, the battery is ready instead of delivering the blinking-light judgment of poor planning.
Store scraps with limits
Every workshop owner believes scraps are future treasure. Sometimes they are. Often they are just oddly shaped guilt. Create one scrap bin for small pieces and one rack area for usable boards. When the bin is full, sort it. Keep pieces that are genuinely useful for jigs, blocking, test cuts, or small projects. Toss the rest. A scrap system without limits becomes a wooden compost pile.
Experience Notes: What These Workshop Hacks Feel Like in Real Life
The funny thing about improving a workshop is that the biggest benefits rarely announce themselves with fireworks. You usually notice them during a normal project, right when something does not go wrong. The tape measure is exactly where it should be. The clamps are not buried under a tarp. The drill battery is charged. The floor is clear enough that you can carry a sheet of plywood without performing a dangerous ballet. It feels less like a dramatic upgrade and more like the shop has finally stopped arguing with you.
One of the most useful habits is giving every project a launch pad. Before cutting anything, set out the tools, hardware, plans, and safety gear you expect to need. This does not have to be fancy. A shallow tray, plastic bin, or piece of cardboard works. The point is to gather the project into one place before your attention is divided. On longer builds, that tray becomes a memory bank. When you return the next day, you know where the screws are, which bit you used, and whether the glue bottle is still pretending to be full.
Another real-world lesson: the best organization system is the one you can maintain when you are tired. Deep cabinets look beautiful, but if the tools you use every ten minutes are hidden behind doors, they will migrate back to the bench. Wall storage works because it is honest. You see the tool, use the tool, and return the tool. A mobile cart works for the same reason. It follows the mess, catches the mess, and gives the mess a parking spot.
Dust control also changes the mood of a shop more than people expect. When you connect sanders and saws to dust collection, wipe surfaces often, and keep a respirator nearby, the shop feels less like a storm cloud in a garage. Finishes come out cleaner. Tools stay nicer. You stop tracking sawdust into the house and pretending the dog did it. Most importantly, you build the habit of treating air quality as part of craftsmanship, not as an optional luxury.
Lighting is another upgrade that feels almost unfair. Add a bright task light over the bench and suddenly pencil lines become visible, glue squeeze-out stops hiding, and small defects reveal themselves before the finish does. Good light makes ordinary tools perform better because you can finally see what they are doing. It also reduces frustration, which is a highly underrated safety feature.
The final experience-based tip is to end every session with kindness toward your future self. Write down the next step. Put the sharp things away. Charge the batteries. Sweep the worst of the dust. Leave the bench clear enough that tomorrow’s project does not begin with excavation. A workshop does not need to be perfect. It just needs to welcome you back instead of making you pay an entry fee in frustration.
Conclusion: Small Hacks, Big Workshop Upgrade
Five workshop hacks can change the way you work without requiring a full renovation. A grab-and-go tool wall saves time. A mobile workstation makes small spaces flexible. A real clamp and small-parts system prevents chaos from winning. Dust control protects your tools, projects, and lungs. A start-to-finish workflow turns the shop into a partner instead of an obstacle course.
The secret is not buying more stuff. It is making your workshop easier to use. Start with one hack this weekend. Hang the tools you reach for most. Build a clamp rack. Sort one drawer of fasteners. Add a dust hose adapter. Clear the bench and write tomorrow’s first step on a note. These small improvements compound quickly. Before long, your workshop will still look like a place where real work happens, but it will stop acting like a junk drawer with power tools.
Note: This article is written from synthesized workshop organization, DIY, woodworking, home improvement, and safety best practices, fully rewritten in original language for web publication.

