
Skincare
DIY Fall Wreath
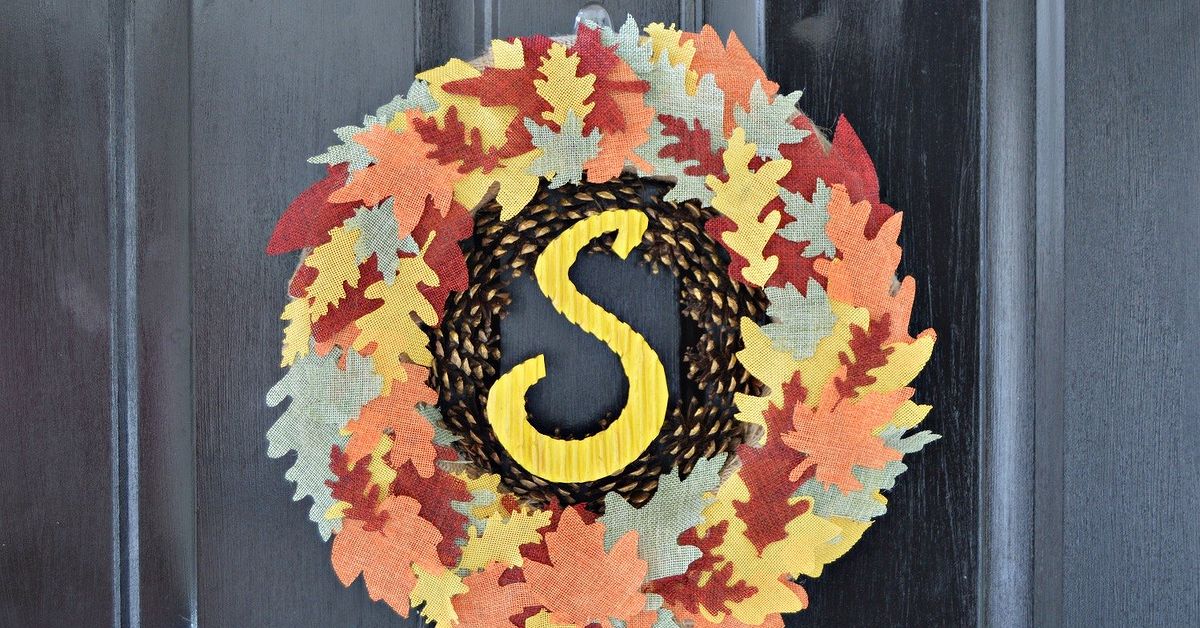
Sep
A DIY fall wreath is one of the simplest ways to give your home an autumn makeover without repainting the porch, buying new furniture, or filling the yard with enough pumpkins to alarm the neighbors. With a basic wreath form, a few seasonal decorations, and an hour of creative tinkering, you can make a welcoming piece that looks polished, personal, and far more expensive than it really is.
This guide explains how to make an easy grapevine fall wreath using faux foliage, berries, miniature pumpkins, pinecones, and ribbon. You will also learn how to choose a wreath base, arrange decorations professionally, avoid common crafting mistakes, and adapt the design for farmhouse, minimalist, bohemian, modern, or traditional homes.
Why Make Your Own Fall Wreath?
Store-bought fall wreaths can be beautiful, but they often come with two problems: the price tag and the mysterious assumption that everyone owns the same shade of orange front door. Making your own autumn wreath allows you to control the size, color palette, materials, and overall personality.
A handmade wreath can also be updated instead of replaced. If you attach the decorations with floral wire rather than permanently gluing everything down, you can remove the pumpkins after Thanksgiving, add evergreen branches for winter, or reuse the bare wreath form next year.
DIY wreath making is also friendly to different budgets. You can purchase artificial stems from a craft store, repurpose decorations from previous seasons, or collect suitable pinecones and sturdy branches from your yard. A restrained design using only three or four materials can look just as intentional as an overflowing floral arrangement.
Choose the Right Wreath Base
The wreath form is the foundation of the entire project. Different forms support different materials, so choosing the right one makes construction much easier.
Grapevine Wreath
A grapevine wreath is one of the best choices for fall decorating. Its twisted branches naturally complement pumpkins, leaves, berries, wheat, acorns, and dried flowers. Stems can often be pushed between the vines without glue, making the arrangement easier to adjust.
An 18-inch grapevine wreath works well on most standard front doors. For a wide entrance, double doors, or a large wall above a fireplace, consider a 22- to 24-inch base.
Wire Wreath Form
Wire forms are lightweight and useful when you want to cover the entire circle with bundles of greenery. Materials are normally secured with paddle wire, floral wire, zip ties, or pipe cleaners. A multi-ring wire frame is especially helpful for heavier foliage.
Foam or Straw Wreath Form
Foam forms work well with fabric, yarn, ribbon, felt leaves, and lightweight artificial flowers. Straw forms are suitable for corn husks, wheat, dried grasses, and farmhouse-style decorations. Both usually need to be completely covered so the base does not remain visible.
Metal or Embroidery Hoop
A hoop creates a clean, modern fall wreath. Instead of covering the whole circle, decorate approximately one-third to one-half of the hoop. The exposed metal or wood becomes part of the design, giving the wreath an airy, contemporary appearance.
Materials for an Easy DIY Fall Wreath
The following supplies create a classic asymmetrical wreath with plenty of texture but no risk of your front door looking like a craft store exploded against it.
- One 18-inch grapevine wreath
- Three to five faux autumn foliage stems
- Two faux berry sprays
- Two or three small artificial pumpkins or gourds
- Three pinecones
- One dried or artificial wheat bundle
- Two large faux flowers, such as mums or dahlias
- Floral wire or paddle wire
- Wire cutters
- Hot glue gun and glue sticks
- Scissors or floral snips
- Two to three yards of wired ribbon
- Protective work surface
These quantities are flexible. Before shopping, inspect your seasonal decorations and leftover craft supplies. A ribbon from an old gift basket, unused floral stems, or miniature pumpkins from a previous centerpiece may already provide half the materials you need.
How to Make a DIY Fall Wreath Step by Step
Step 1: Select a Color Palette
Choose three or four dominant colors before attaching anything. A traditional palette might include burnt orange, burgundy, mustard yellow, and brown. A softer farmhouse wreath could use cream, sage green, tan, and muted rust. For a modern design, consider plum, copper, dusty rose, or deep blue.
Limiting the palette keeps the wreath cohesive. Without a plan, it is remarkably easy to combine every fall color and accidentally create a decorative traffic jam.
Step 2: Prepare the Decorative Stems
Use wire cutters or floral snips to separate large bushes into smaller stems. Leave several inches of stem so each piece can be inserted securely into the grapevine base. Divide the materials into three groups: structural foliage, medium-sized fillers, and focal decorations.
Structural foliage includes long leaves, grasses, wheat, and branches. Fillers include berries, small flowers, seedpods, and short greenery. Pumpkins, large flowers, oversized pinecones, and bows act as focal points.
Step 3: Test the Arrangement Without Glue
Place the wreath flat on your work surface. Begin positioning the largest foliage pieces along the lower-left or lower-right portion of the wreath. Let some stems point upward and others curve downward to create movement.
Do not attach the materials yet. Photograph the arrangement with your phone once you like the basic shape. This simple step prevents the classic crafting tragedy in which you dismantle a beautiful layout and then cannot remember where anything went.
Step 4: Build the Foliage Foundation
Insert the longest stems into the grapevine and secure them with floral wire. Allow the foliage to follow the curve of the wreath rather than sticking straight outward. Overlap each new stem with the previous one so the arrangement appears continuous.
For an asymmetrical design, concentrate most of the decorations on one side while allowing a few smaller branches to extend toward the top or bottom. Leave part of the grapevine visible. The exposed base provides contrast and keeps the finished wreath from feeling too heavy.
Step 5: Add Flowers, Wheat, and Berries
Layer the medium-sized elements over the foliage. Position the flowers near the visual center of the arrangement, but avoid placing them in a perfectly straight line. Offset one flower slightly above or behind the other.
Tuck wheat and berry stems around the flowers to soften the edges. Use darker berries near the center and lighter materials toward the outside. This creates depth and helps the focal area stand out.
Step 6: Attach Pumpkins and Pinecones
Small pumpkins may need additional support because they are heavier than floral stems. Push a floral pick or sturdy wire through the bottom of each foam pumpkin, apply a small amount of hot glue around the insertion point, and wire the pick to the wreath.
Wrap floral wire around the lower scales of each pinecone, twist the wire at the back, and fasten it to the grapevine. Hot glue can provide extra stability, but wire should carry most of the weight whenever possible.
Step 7: Fill Visible Gaps
Hold the wreath upright and inspect it from several feet away. A design that looks full while lying on a table may reveal awkward gaps when vertical. Add short leaves, berries, or small seedpods where needed.
Do not eliminate every empty space. Negative space gives the eye somewhere to rest. The goal is an intentional composition, not a botanical wrestling match.
Step 8: Add a Bow or Hanging Ribbon
A wired velvet, plaid, burlap, or grosgrain ribbon adds softness and can connect the wreath to other porch decorations. Place the bow near the focal cluster, opposite it for visual balance, or at the top as a hanger.
For a modern look, skip the traditional bow and tie a simple knot with two long ribbon tails. Trim the tails at an angle or cut an inverted V into each end.
Design Tricks That Make a Fall Wreath Look Professional
Create a Clear Focal Point
Every wreath needs one area that attracts attention first. Group the largest flower, pumpkins, and a few contrasting berries in that location. Supporting materials should lead the eye toward the focal point rather than competing with it.
Repeat Colors and Materials
If you use burgundy berries near the center, repeat a smaller amount of burgundy elsewhere. If one side contains wheat, add two or three wheat stems near the opposite edge of the decorated area. Repetition makes varied materials feel related.
Work in Odd-Numbered Groups
Groups of three or five decorations often appear more natural than pairs. Try three pumpkins in different sizes, five pinecones distributed through the foliage, or three flower heads forming a loose triangle.
Vary the Depth
Some decorations should sit close to the wreath form while others extend forward or outward. Bend artificial stems gently to create layers. A wreath in which every item sits at the same height can look flat, even when it contains expensive materials.
Check the Silhouette
Look at the outer shape rather than focusing only on individual decorations. The outline should feel balanced, with no single stem extending several inches farther than everything else unless that dramatic effect is deliberate.
Five Fall Wreath Styles to Try
1. Rustic Farmhouse Wreath
Combine a grapevine base with cream pumpkins, wheat, cotton stems, dried grasses, pinecones, and a neutral plaid ribbon. Keep the colors muted and allow plenty of natural grapevine to remain visible.
2. Colorful Harvest Wreath
Use orange mums, red maple leaves, yellow berries, burgundy dahlias, and miniature gourds. Layer the deepest colors near the center and use golden foliage around the edges for a bright, abundant appearance.
3. Minimalist Hoop Wreath
Attach eucalyptus, dried yarrow, wheat, and one velvet ribbon to the lower third of a metal hoop. This style is quick to assemble and works particularly well in apartments, modern homes, and small entryways.
4. Pinecone and Acorn Wreath
Cover a grapevine or wire form with pinecones in several sizes. Add acorns, small seedpods, and preserved leaves. Leave the natural materials unpainted for a woodland look, or lightly brush selected pieces with metallic paint.
5. Nontraditional Fall Wreath
Replace orange with dusty pink, navy, lavender, teal, or olive green. Paint inexpensive faux pumpkins to match your palette, then combine them with coordinating foliage. Seasonal decor does not need to obey an orange-only dress code.
How to Hang and Protect Your Wreath
Use an over-the-door wreath hanger, removable exterior hook, ribbon loop, or securely installed nail appropriate for the door material. Confirm that the hanger can support the completed wreath, especially when using heavy pumpkins or dense natural materials.
Place wreaths containing dried flowers, paper, untreated natural leaves, or delicate ribbon on an interior door or beneath a covered porch. Direct rain, intense sunlight, and strong wind can fade colors, loosen adhesive, and damage fragile materials.
When the season ends, remove dust with a cool hair dryer or a gentle burst of compressed air. Store the wreath in a rigid wreath box rather than a soft bag. Secure loose decorations, add tissue paper around delicate pieces, and keep the box in a cool, dry area.
Common DIY Fall Wreath Mistakes
Using Too Much Hot Glue
Hot glue is useful, but large visible blobs make a wreath look messy and complicate future updates. Use wire for structural support and glue mainly to stop small pieces from shifting.
Attaching Decorations Before Testing the Layout
Arrange everything first. Moving a wired stem takes seconds; removing a heavily glued pumpkin can require patience, tools, and language unsuitable for a wholesome autumn craft article.
Ignoring the Door Color
A dark wreath may disappear against a black or navy door. A pale wreath can look washed out against white siding. Choose materials that provide enough contrast to remain visible from the street.
Making the Wreath Too Small
A wreath that looks substantial on a craft table may appear tiny on a large exterior door. Measure the available space before buying the base and remember that an asymmetrical arrangement can extend beyond the listed diameter.
Forgetting About Weight
Miniature pumpkins, wood signs, fruit, and dense pinecones add weight quickly. Reinforce heavier pieces with wire and use a reliable hanger instead of trusting a tiny ribbon loop with an optimistic personality.
Experience-Based Lessons From Making Fall Wreaths
The most useful wreath-making lessons usually appear after the supplies have been unpacked and the glue gun is already hot. The first is that restraint is harder than creativity. It is tempting to use every pumpkin, berry spray, pinecone, leaf, flower, and ribbon in the room. Yet the strongest designs often rely on fewer materials arranged with more intention.
A helpful practical habit is to begin with only about two-thirds of the decorations you purchased. Build the foliage layer, add a focal cluster, and then hang the wreath temporarily. Walk into another room, return, and look at it from the distance a visitor would see it. Many supposedly empty areas will suddenly appear balanced. If the wreath still seems thin, add small accents gradually.
Another lesson concerns color. Materials that look harmonious beneath bright store lighting can clash at home. Before removing tags or cutting stems, place the supplies near the door where the wreath will hang. Natural daylight often reveals whether a muted rust is actually neon orange or whether a supposedly cream pumpkin has the unmistakable glow of a table-tennis ball.
Working with floral wire also becomes easier with experience. Short pieces are suitable for securing small decorations, while longer pieces can wrap around bulky stems or pinecones. Twist the wire at the back of the wreath and tuck sharp ends inward. Gloves can be helpful when handling stiff grapevine, wire, or rough pinecones.
Budget projects benefit from spending money selectively. A sturdy reusable wreath base and reliable wire cutters are usually better investments than large quantities of trendy decorations. Inexpensive artificial stems can look convincing when separated, reshaped, and layered with natural materials. One premium velvet ribbon or realistic flower may elevate an otherwise low-cost arrangement.
Wreath-making with friends or family introduces another kind of experience: no two people will interpret the same pile of supplies identically. One person may create a perfectly symmetrical wreath, while another builds a dramatic crescent of foliage that appears to be escaping toward the ceiling. That variety is the point. A handmade fall wreath should reflect the maker rather than imitate a factory-produced decoration exactly.
It is also worth accepting that the first arrangement is rarely the final one. Stems get moved, bows shrink, pumpkins migrate, and pinecones somehow roll under furniture. Treat the process as decorating rather than assembly. Photograph promising layouts, make adjustments, and avoid permanent glue until the composition feels settled.
Finally, the best DIY fall wreath is not necessarily the fullest, most expensive, or most complicated. It is the wreath that suits the home, survives the season, and makes the entrance feel more welcoming. Whether your finished design contains three dried branches or thirty artificial pumpkins, a thoughtful handmade wreath gives autumn decor something a store receipt cannot provide: a story.

