
Beauty Unlocked
This Bike Pump Now Sucks
Aug
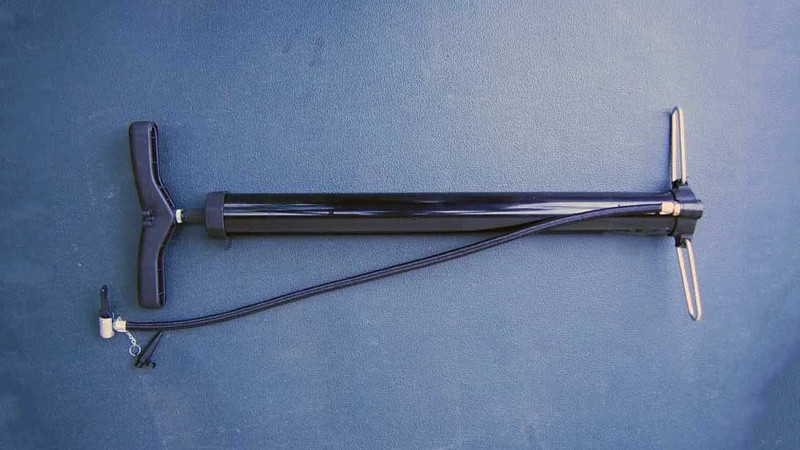
A bicycle pump normally has one respectable job: push air into a tire. Give it a few simple modifications, however, and the same inexpensive tool can begin pulling air out of containers, bags, molds, and workshop projects. In other words, the pump starts suckingand, for once, that is a compliment.
The idea became popular among makers after experimenters demonstrated that a basic floor-style bicycle pump could be converted into a surprisingly capable manual vacuum pump. The modification does not require an electric motor, specialized machining, or a suspiciously large credit-card statement. It mainly involves changing the direction in which air moves through the pump.
The finished tool will not replace a laboratory vacuum system or a professional HVAC pump. It can, however, handle small resin projects, vacuum bagging experiments, leak tests, storage bags, science demonstrations, and other jobs where moderate negative pressure is enough. It is an excellent example of workshop creativity: take a familiar object, reverse one part, flip another, and suddenly it has an entirely new résumé.
What Does “This Bike Pump Now Sucks” Actually Mean?
The title is a literal description of the conversion. A standard bicycle pump uses a piston to draw outside air into a cylinder and then force that air through a hose. A one-way valve prevents the pressurized air from returning during the next stroke.
To create a manual vacuum pump, the airflow is reversed. Instead of taking air from the room and pushing it into a tire, the modified pump takes air from a connected container and releases it into the room. Each stroke removes another small volume of air, gradually reducing pressure inside the container.
One widely discussed version of the conversion reportedly reached approximately 11 psi below atmospheric pressure. Since normal sea-level atmospheric pressure is roughly 14.7 psi, that is a meaningful vacuum for a hand-operated device. It is not “outer space in a pickle jar,” but it is strong enough to make many small workshop experiments usefuland occasionally dramatic.
How a Normal Bicycle Pump Works
The Piston Creates Pressure Changes
Inside a typical floor pump is a piston attached to the handle by a metal shaft. A flexible rubber or leather seal sits around the piston. As the handle moves, the piston changes the available volume inside the cylinder.
During the intake portion of the cycle, increasing cylinder volume lowers the internal pressure and draws air into the pump. During the compression portion, decreasing volume raises the pressure and forces air toward the hose.
The Check Valve Controls Direction
A check valve acts like a tiny traffic officer with one rule and no interest in negotiation: air may travel in one direction only. In an ordinary bike pump, the valve allows compressed air to move toward the tire while blocking reverse flow.
A vacuum conversion changes that one-way path. The new arrangement lets air enter through the hose from the vacuum chamber, pass through the pump, and escape through an outlet. Without a properly oriented check valve, the pump may remove air on one stroke and politely return it on the next. That is less “vacuum technology” and more “air cardio.”
The Piston Seal May Need Reversing
Many inexpensive pumps use a flexible cup-shaped piston seal. Its shape allows it to seal tightly when pressure is applied from one direction while relaxing slightly during the opposite stroke.
For vacuum use, the seal may need to be flipped so it seals during the suction stroke. The exact arrangement depends on the pump model, which is why a simple pump with a removable cylinder cap is usually easier to modify than a sealed, feature-packed model.
Choosing a Good Pump for the Conversion
The best candidate is usually a basic floor pump with a steel shaft, removable internal components, and very few extras. A built-in pressure gauge may look useful, but a gauge designed only for positive tire pressure normally cannot measure vacuum accurately.
Avoid pumps that are glued shut, electronically controlled, or made with delicate proprietary fittings. Mini pumps can sometimes be converted, but their small cylinders remove very little air per stroke. You may eventually reach a useful vacuum, although your arms could file a formal complaint first.
Look for the following characteristics:
- A cylinder that can be opened without destructive cutting
- A sturdy piston rod and handle
- A replaceable or reversible piston seal
- A simple hose connection
- Enough cylinder volume to remove air efficiently
- Common fittings that can be adapted to vacuum tubing
Parts Needed for a Manual Bike-Pump Vacuum Conversion
The exact hardware depends on the pump, but a practical setup generally includes the following components:
- A basic bicycle floor pump
- A one-way check valve suitable for air or vacuum service
- Flexible vacuum-rated tubing
- Barbed hose fittings or threaded adapters
- Hose clamps or secure compression fittings
- Thread-sealing tape or compatible pipe sealant
- An optional vacuum gauge
- An optional inline catch container
- A vacuum-safe chamber or heavy-duty vacuum bag
Vacuum-rated tubing matters because thin, soft tubing may collapse as internal pressure falls. A connection can look beautifully airtight while sitting on the workbench, then flatten like an abandoned drinking straw the moment suction begins.
An inline catch container is especially valuable when working with resin, liquids, moisture, or dusty materials. It sits between the project and the pump, collecting contamination before it reaches the piston and valves.
How to Convert a Bicycle Pump Into a Vacuum Pump
1. Inspect and Disassemble the Pump
Disconnect the hose and open the top of the pump cylinder according to its construction. Pull out the piston assembly carefully, noting the original direction of the seal, washers, spacers, and retaining hardware. Taking photos during disassembly can save a great deal of detective work later.
2. Reverse the Piston Seal
Remove the piston’s retaining nut or screw and reverse the flexible cup seal so that it expands against the cylinder wall during the desired suction stroke. Reinstall the backing washers and fastener in their original order unless the new seal orientation requires a different arrangement.
The piston should slide smoothly while maintaining contact with the cylinder wall. If it binds, the seal may be folded, overtightened, dry, or incorrectly positioned. Use only a lubricant compatible with the pump seal and the materials being processed.
3. Reverse or Replace the Check Valve
Locate the pump’s original one-way valve. Depending on the design, it may be built into the base, hose fitting, or piston assembly. Reverse its orientation if the part allows it, or replace it with a check valve arranged so air flows away from the connected chamber.
Confirm the direction before final assembly. Many check valves have an arrow showing permitted airflow. In this application, the arrow should point from the vacuum chamber through the pump and toward the exhaust side.
4. Adapt the Hose
Remove the tire-specific valve head if it creates leaks or restricts airflow. Replace it with a barbed fitting that matches the vacuum tubing. Tighten threaded connections carefully and use suitable thread sealant where appropriate.
Do not depend on loose push-fit connections or heroic layers of duct tape. Vacuum systems are unforgiving. A microscopic gap that would be irrelevant in many household projects can prevent the chamber from reaching its target pressure.
5. Add a Gauge and Isolation Valve
A vacuum gauge lets you measure performance rather than judging the system by handle resistance and optimistic facial expressions. Install the gauge near the chamber so it reflects chamber pressure instead of only pressure at the pump inlet.
An isolation valve is also useful. Once the desired vacuum is reached, close the valve before disconnecting or stopping the pump. If pressure rises quickly afterward, the system has a leak, the chamber is outgassing, or both.
6. Test the System Gradually
Begin with an empty vacuum-safe container or a sturdy commercial vacuum bag. Pump slowly while watching the gauge, hose, fittings, and chamber walls. Listen for hissing and check connections with an appropriate leak-detection method.
Never begin with a questionable glass jar just because it has a lid and appears emotionally prepared. Containers under vacuum experience external atmospheric force, and failure can send sharp fragments inward and outward with considerable energy.
What Can a Converted Bike Pump Do?
Degassing Small Batches of Resin or Silicone
Mixing epoxy, urethane, or silicone can trap bubbles. Lowering the surrounding pressure causes those bubbles to expand and rise. A manual pump may help with small batches, especially when perfection is not required.
However, many professional material instructions recommend a much deeper vacuum than a converted bike pump can reliably produce. Some silicone products are commonly degassed near 29 inches of mercury, which is close to a full vacuum. The bike-pump version is better viewed as a budget experiment or partial degassing tool, not a guaranteed replacement for professional equipment.
Always use a container several times larger than the mixed material. Resin or silicone can expand dramatically during degassing and may climb out of a small cup like a science-fiction dessert.
Vacuum Bagging Veneer and Small Composite Parts
Vacuum bagging uses atmospheric pressure as a distributed clamp. After air is removed from a sealed bag, outside air presses the bag against the workpiece. This can hold veneer, fabric, fiberglass, or lightweight composite layers evenly against a mold.
A manual pump is best suited to small projects with good seals. Large bags often leak slightly and may require continuous pumping. Professional vacuum bagging systems use powered pumps and controls because they must maintain consistent pressure throughout curing.
Simple Vacuum Forming
In vacuum forming, a heated plastic sheet is pulled over a mold by suction. A converted bicycle pump can work for very small molds when the plastic, sealing frame, and vacuum reservoir are carefully designed.
The limitation is speed. Heated plastic cools quickly, while a manual pump removes air one stroke at a time. A reservoir that is evacuated before forming can release suction more rapidly, but it introduces additional fittings and safety considerations. For larger or more detailed parts, a shop vacuum or dedicated forming machine is generally more practical.
Leak Testing
A chamber, hose assembly, or sealed container can be evacuated and isolated. If the vacuum gauge moves steadily back toward atmospheric pressure, air is entering somewhere.
This method is useful for comparing seals and identifying obvious leaks. It is not a substitute for calibrated industrial leak testing, but it can reveal a loose fitting, cracked tube, damaged gasket, or poorly sealed bag.
Storage Bags and Packaging Experiments
The pump can remove air from compatible storage bags used for clothing, bedding, or workshop materials. A large bag contains a large volume of air, so expect plenty of pumping. The job may begin as organization and end as an upper-body workout.
Food packaging requires greater caution. Removing air does not sterilize food, stop every microorganism, or make perishable items safe at room temperature. Use food-safe bags and fittings, follow established refrigeration rules, and never treat a homemade pump as a substitute for proper food-preservation practices.
Understanding the Limits of the DIY Vacuum Pump
A converted floor pump produces moderate vacuum at a modest flow rate. It is useful because it is inexpensive, quiet, portable, and independent of electricity. Its limitations are equally important.
It is generally unsuitable for:
- Evacuating refrigeration or air-conditioning systems
- Removing deep moisture from HVAC lines
- Large industrial vacuum bags
- High-production resin degassing
- Medical or life-support applications
- Handling flammable, corrosive, or toxic vapors
- Processes requiring precisely controlled absolute pressure
Refrigeration work, for example, requires a deep vacuum measured in microns. A hand pump that creates a respectable workshop vacuum is still nowhere near the pressure level needed to dehydrate an HVAC system properly.
Vacuum Safety Is Not Optional
Atmospheric pressure may feel harmless because people live in it every day, but it becomes a powerful force when one side of a container is evacuated. At an 11 psi pressure difference, every square inch of chamber surface experiences approximately 11 pounds of force.
A circular lid six inches in diameter has an area of roughly 28 square inches. At that pressure difference, the atmosphere may press on it with more than 300 pounds of total force. Suddenly, the bargain-store candy jar looks less like equipment and more like an audition for a disaster video.
Use a chamber specifically designed for vacuum service. Wear eye protection, keep observers away, and use an implosion shield when appropriate. Inspect the chamber for cracks, scratches, chemical damage, or weakened fittings before every session.
Do not vacuum hot liquids, volatile solvents, fuels, or unknown chemicals. Reduced pressure lowers the boiling point of liquids, allowing them to boil at temperatures that would normally seem harmless. Vapors can also damage seals, contaminate the pump, or create fire and health hazards.
Install a catch pot when there is any possibility of liquid, foam, resin, or dust entering the hose. Release vacuum slowly after finishing so materials do not splash, foam, or shift unexpectedly.
Workshop Experience: What Using This Sucking Bike Pump Is Really Like
The first practical lesson is that leaks dominate the experience. The piston conversion may work perfectly, yet the gauge barely moves because one threaded fitting is loose or the chamber gasket has a tiny fold. Beginners often suspect the pump immediately, but the hose joints and lid seal are usually guiltier.
A useful testing routine is to begin with the smallest possible system. Connect the pump to a short hose, cap the hose securely, and operate the handle. Resistance should increase noticeably as pressure drops. Add the gauge next, followed by the catch pot and finally the chamber. Testing one component at a time makes troubleshooting far less mysterious.
The second lesson is that chamber volume matters enormously. A compact container may reach a useful vacuum after a manageable number of strokes. A large storage bag can require what feels like a full afternoon of manual labor. The pump removes approximately one cylinder volume per effective stroke, minus leakage and dead space. Doubling the chamber volume therefore makes the process noticeably slower.
The third lesson is that a good check valve transforms the tool. A poor valve may leak backward, require excessive cracking pressure, or restrict airflow. With an appropriate low-resistance valve, the handle develops a satisfying rhythm and each stroke produces measurable progress. With the wrong valve, the project resembles an argument with a stubborn accordion.
A gauge also changes the experience. Without one, the user tends to pump longer than necessary or stop too early. With a gauge, it becomes possible to compare seal materials, measure how quickly pressure rises after isolation, and determine whether additional strokes are producing meaningful improvement.
For vacuum bagging, the most impressive moment is not the gauge reading but the way atmospheric pressure conforms the bag to the workpiece. Wrinkles tighten, loose layers settle, and pressure spreads across complicated shapes without a collection of clamps blocking every angle. The technique feels almost magical until a tiny leak begins whistling from a corner.
Resin experiments teach another memorable lesson: bubbles grow before they disappear. A cup that appears only half full can foam toward the rim as pressure drops. Using an oversized container and reducing pressure gradually keeps the experiment on the correct side of entertaining.
Manual operation is quieter than an electric vacuum pump and makes pressure changes easy to control. It is also tiring during long sessions. For occasional projects, that tradeoff is reasonable. For repeated production work, the conversion quickly demonstrates why commercial pumps have motors.
The best overall experience comes from treating the tool as an educational, moderate-vacuum device rather than an inexpensive replacement for every vacuum pump on the market. It excels at showing how pistons, seals, check valves, pressure differentials, and leaks interact. It can also perform genuinely useful small jobs when expectations remain realistic.
Perhaps that is the real charm of the project. The finished pump is simple enough to understand completely. Every hiss has a cause, every gauge movement tells a story, and every handle stroke performs visible work. Modern tools often hide their operation behind batteries, software, and sealed housings. This one reveals the physics with every pull.
Final Verdict
Turning a bicycle floor pump into a manual vacuum pump is inexpensive, clever, and surprisingly practical. Reversing the piston seal and redirecting airflow through an appropriately oriented check valve allows an ordinary inflation tool to remove air instead.
The result is useful for small vacuum bags, basic leak testing, science demonstrations, partial resin degassing, storage bags, and lightweight forming experiments. It is portable, quiet, repairable, and capable of working during a power outageprovided the operator still has functioning arms.
Its moderate vacuum level and limited pumping speed must be respected. Professional resin work, HVAC servicing, large composite projects, and hazardous processes require purpose-built equipment. A safe chamber, secure fittings, suitable tubing, a catch pot, and sensible eye protection are not optional accessories.
As a maker project, however, the conversion is hard to dislike. The humble bicycle pump begins with one job, undergoes a small mechanical identity crisis, and emerges as a useful vacuum tool. This bike pump now sucks, and that is exactly why it is worth building.
Note: This project involves stored mechanical energy and possible chamber implosion. Use only vacuum-rated containers and components, wear protective equipment, and never evacuate hazardous substances.

