
Body Care
How to Replace a Window Screen: Easy Step-by-Step Guide
Jul
A torn window screen is one of those tiny home problems that somehow feels personal. One day you are enjoying a fresh breeze, and the next day a mosquito is flying through your living room like it pays rent. The good news? Learning how to replace a window screen is easier than most people think. You do not need a contractor, a garage full of tools, or the emotional strength of a home renovation TV host. You need a flat surface, new screen mesh, spline, a screen rolling tool, and a little patience.
This easy step-by-step guide explains how to replace a window screen using your existing frame, how to choose the right screen material, when to patch versus replace, and how to avoid the classic beginner mistakes: loose mesh, wavy corners, sliced spline, and the dreaded “why is it tighter on one side?” situation.
Whether your screen was damaged by weather, pets, children, age, or one heroic attempt to swat a fly, this DIY window screen repair project can usually be finished in less than an afternoon. Even better, it is affordable, satisfying, and immediately useful. Few home repairs give you such a nice reward: fresh air without flying roommates.
What Is a Window Screen Made Of?
Before replacing a window screen, it helps to understand the basic parts. Most modern window screens have a lightweight aluminum or vinyl frame, a piece of mesh, and a flexible cord called spline. The spline presses the screen mesh into a narrow groove around the frame and holds everything in place. Think of it as the screen’s seat belt. Not glamorous, but very important.
Main Parts of a Window Screen
- Screen frame: The outer structure, usually aluminum, vinyl, or wood.
- Screen mesh: The material that keeps insects out while allowing air through.
- Spline: A rubber or vinyl cord that locks the mesh into the frame groove.
- Frame groove: The channel where the screen and spline sit.
- Pull tabs or lift tabs: Small handles used to remove and reinstall the screen.
If the mesh is ripped but the frame is still straight and solid, you can usually reuse the frame. If the frame is bent, cracked, missing corners, or warped, you may need to repair or replace the whole screen frame before installing new mesh.
Should You Patch or Replace a Window Screen?
Small holes can often be fixed with a screen repair patch, adhesive patch, or screen repair tape. This is a quick solution for tiny punctures, especially if the screen is in a less visible area. But if the tear is large, the mesh is sagging, or the screen has several holes, full window screen replacement is the better choice.
A patch works like a bandage. It helps, but it is not exactly invisible. A full replacement gives the screen a cleaner look, better tension, and longer-lasting performance. If your screen looks like it survived a raccoon fencing tournament, replace it.
Patch the Screen If:
- The hole is small, usually under a few inches.
- The rest of the mesh is still tight and in good condition.
- You need a fast temporary fix.
- The screen is in a low-visibility window.
Replace the Screen If:
- The mesh is torn across a large area.
- The screen is sagging or loose.
- The spline is brittle, cracked, or falling out.
- You want a cleaner, more professional finish.
- You are upgrading to pet-resistant, solar, aluminum, or no-see-um screen mesh.
Tools and Materials You Will Need
Window screen replacement does not require fancy equipment. Most supplies are available at hardware stores and home improvement centers. The most important tool is the spline roller, also called a screen rolling tool. It has two small wheels: one side helps press the mesh into the groove, and the other helps roll the spline into place.
Tools
- Tape measure
- Flathead screwdriver or awl
- Utility knife with a sharp blade
- Scissors
- Screen rolling tool or spline roller
- Marker or pencil
- Clamps or painter’s tape, optional but helpful
- Work gloves, especially for aluminum mesh
Materials
- Replacement screen mesh
- New spline, matched to your frame groove size
- Cleaning cloth
- Mild soap and water
- Replacement frame corners, if needed
One important tip: do not guess the spline size if you can avoid it. Remove a small piece of the old spline and bring it to the store for comparison. Spline comes in different diameters, and the wrong size can make the project frustrating. Too small, and the screen may pop loose. Too large, and you may feel like you are wrestling a rubber snake into a spaghetti noodle.
Choosing the Best Replacement Screen Mesh
The right screen mesh depends on your home, climate, budget, and household chaos level. A quiet guest room window does not need the same screen as a patio door guarded by two enthusiastic dogs and a toddler with a juice box.
Fiberglass Screen Mesh
Fiberglass is the most common option for DIY window screen replacement. It is flexible, affordable, easy to cut, and forgiving for beginners. If you accidentally pull it a little unevenly, fiberglass is less likely to crease permanently than metal mesh. For most homeowners, fiberglass is the best starting point.
Aluminum Screen Mesh
Aluminum screen mesh is stronger than standard fiberglass and has a crisp look. However, it can dent or crease if handled roughly. It is a good choice for homeowners who want a more rigid screen and are comfortable working carefully.
Pet-Resistant Screen
Pet-resistant screen is made from heavier, tougher material designed to stand up better to claws, paws, and the occasional dramatic dog nose. It is thicker than standard mesh, so visibility and airflow may be slightly reduced, but durability improves.
No-See-Um Screen
No-see-um screen has a tighter weave designed to block tiny insects such as gnats, sand flies, and no-see-ums. It is a smart upgrade for coastal areas, marshy regions, or any place where the bugs seem to have advanced engineering degrees.
Solar Screen
Solar screen helps reduce glare and heat from sunlight. It is useful for hot climates and windows that get strong afternoon sun. The tradeoff is that solar screen can darken the view and reduce airflow compared with standard insect screen.
How to Replace a Window Screen Step by Step
Now for the main event: how to replace a window screen without turning your worktable into a crime scene of mesh scraps and regret. Take your time, keep the frame flat, and remember that screen repair is a “steady hands” project, not a “maximum force” project.
Step 1: Remove the Screen Frame From the Window
Open the window and carefully remove the screen frame. Most screens have pull tabs, spring clips, plungers, or a flexible edge that allows the screen to lift out. Avoid bending the frame as you remove it. If the screen is stuck, check for clips or tracks before pulling harder.
Place the screen on a flat work surface with the spline side facing up. A sturdy table, workbench, or clean floor works well. If you work outside, choose a calm day. Wind and loose screen mesh are not friends.
Step 2: Pry Out the Old Spline
Find the end of the old spline in the groove. Use a flathead screwdriver or awl to gently lift it out. Once you have enough to grab, pull the spline out around the entire frame. If the spline is still flexible and in good condition, you may be able to reuse it. However, old spline often becomes brittle, stretched, or dirty, so replacing it is usually smarter.
After the spline is removed, lift away the damaged screen mesh. Congratulations: your screen frame is now naked. Try not to make it weird.
Step 3: Clean the Frame and Groove
Before installing the new mesh, clean the frame and especially the spline groove. Dirt, old rubber pieces, pollen, and debris can prevent the new spline from seating properly. Use a cloth, mild soap, and water. A small brush or old toothbrush can help clean the channel.
Let the frame dry completely. Moisture in the groove can make the spline slippery and annoying to work with. This is also the time to inspect the frame corners. If they are cracked or loose, repair them before installing the new screen.
Step 4: Measure and Cut the New Screen Mesh
Roll out the replacement screen mesh over the frame. Leave extra material on all sides. A good rule is to allow at least one to two inches of overlap around the frame. This extra mesh gives you something to hold while rolling in the spline and helps prevent the screen from slipping out of position.
Cut the mesh with scissors. It does not have to be perfect yet because you will trim the excess after the spline is installed. At this stage, bigger is better. Too much overlap is easy to cut away. Too little overlap leads to muttering.
Step 5: Position the Mesh Over the Frame
Lay the mesh squarely over the frame. Try to align the weave with the frame edges so the finished screen looks straight. If the mesh has been curled from the roll, place the curved side down when possible. This helps it lie flatter.
Use painter’s tape or light clamps to hold the screen in place, especially on larger screens. Do not stretch the mesh too aggressively. The goal is smooth and lightly taut, not trampoline-tight. Pulling too hard can bow the frame inward.
Step 6: Press the Mesh Into the Groove
Using the rounded or convex side of the spline roller, gently press the screen mesh into the frame groove. Work slowly along one side. This creates a small channel for the spline and helps the screen sit neatly.
Keep one hand on the mesh to guide it, but avoid pulling so hard that the frame bends. If a wrinkle appears, pause and smooth it out before continuing. Tiny adjustments now prevent big annoyances later.
Step 7: Roll the New Spline Into Place
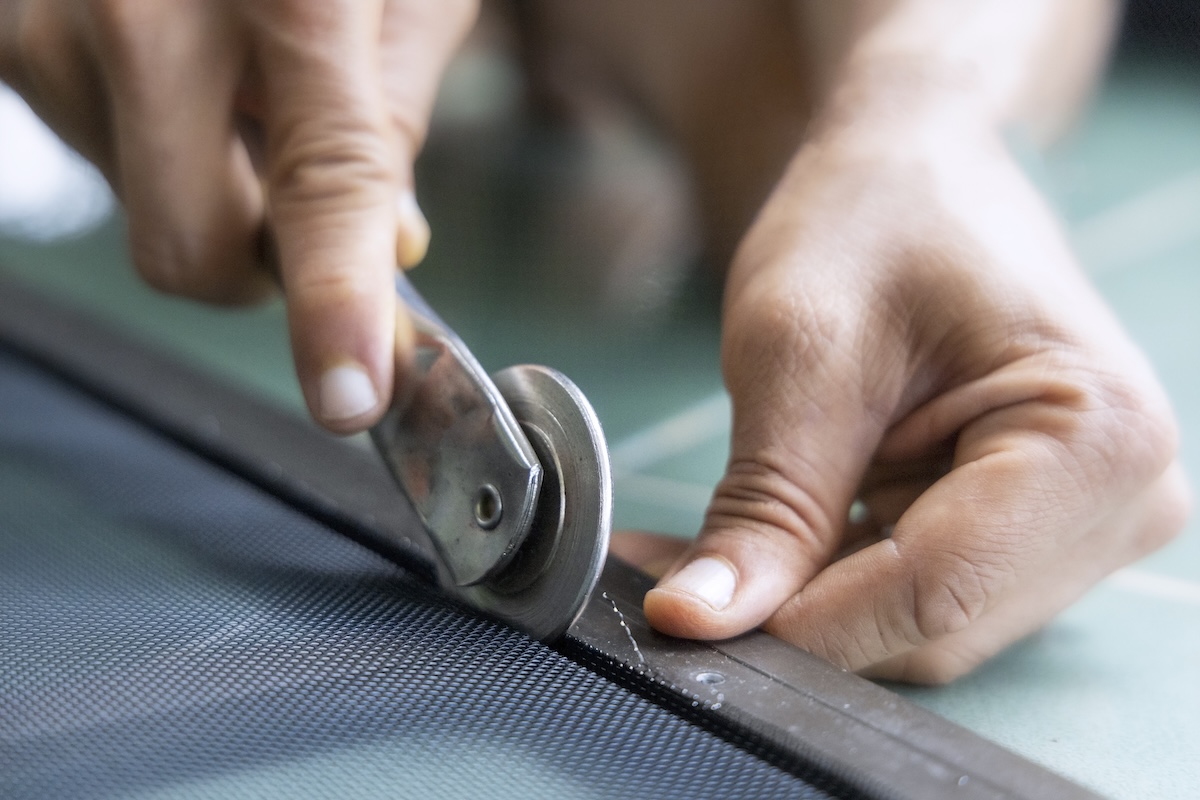
Start at a corner and press the end of the spline into the groove over the screen mesh. Use the grooved side of the screen rolling tool to roll the spline into the channel. Move steadily around the frame, keeping the screen smooth as you go.
At the corners, use gentle pressure and take your time. Corners are where screens like to bunch up, wrinkle, or develop little diagonal waves. If the spline pops out or the mesh gets crooked, pull that section back out and redo it. There is no shame in a do-over. The screen does not judge you.
Step 8: Check the Screen Tension
After the spline is installed around all four sides, check the screen tension. It should look smooth, flat, and even. A little give is normal. If the mesh is sagging badly, remove part of the spline and re-roll that section while gently smoothing the screen.
If the frame has bowed inward, the screen may be too tight. This often happens when someone pulls the mesh like they are tuning a snare drum. Remove the spline and reinstall with less tension.
Step 9: Trim the Excess Screen Mesh
Use a sharp utility knife to trim the excess mesh. Hold the blade at a slight angle away from the spline and cut along the outside edge of the groove. Work slowly. A dull blade can snag the mesh, while a careless blade can slice your new screen or damage the spline.
This is the step where patience pays off. Clean trimming makes the screen look professional, even if five minutes earlier you were arguing with a rubber cord.
Step 10: Reinstall the Window Screen
Place the screen back into the window, making sure it sits securely in the track or clips. Test the fit by gently pressing the frame edges, not the mesh. Never push hard in the center of the screen. Window screens are designed to keep out insects, not support body weight, pets, or ambitious elbows.
Once installed, step back and admire your work. You have successfully completed a DIY window screen replacement, which means you may now walk around the house looking for other screens to fix. This is normal. Power is intoxicating.
Common Window Screen Replacement Mistakes
Even though replacing a window screen is simple, a few mistakes can make the final result look messy. Here are the big ones to avoid.
Using the Wrong Spline Size
Spline that is too thin will not hold the mesh securely. Spline that is too thick may be difficult to roll in and can damage the frame or mesh. Use the old spline as a size reference whenever possible.
Pulling the Mesh Too Tight
A tight screen sounds good until the frame bows. Keep the mesh smooth and gently taut, not stretched to superhero levels.
Skipping Frame Cleaning
Old dirt and spline fragments can stop the new spline from seating evenly. Cleaning the groove takes only a few minutes and improves the final result.
Cutting Too Close Too Soon
Do not trim the mesh before installing the spline. Leave extra material until the screen is fully secured.
Using a Dull Utility Knife
A dull blade tears and drags. Use a fresh blade for clean edges and fewer mistakes.
How Much Does It Cost to Replace a Window Screen?
The cost depends on the size of the screen and the type of mesh. Basic fiberglass mesh and spline are inexpensive, and a spline roller is usually a low-cost tool you can reuse for future repairs. Specialty mesh, such as pet-resistant, solar, stainless steel, or no-see-um screen, costs more but may be worth it for specific needs.
If you already own a utility knife, scissors, and a screwdriver, the main expenses are mesh, spline, and the screen tool. Replacing several screens at once often lowers the cost per screen because one roll of mesh can cover multiple frames.
How to Maintain Your New Window Screen
After replacing your window screen, a little maintenance can keep it looking good longer. Clean screens gently with a soft brush, vacuum attachment, or mild soap and water. Avoid harsh scrubbing, pressure washers, or pushing directly on the mesh.
Remove screens carefully before deep cleaning windows. Store seasonal screens flat or upright in a safe area where they will not be bent. Keep pets from pawing at screens, and teach children not to lean against them. A window screen is not a safety barrier, even if it looks confident.
Extra Experience: What Replacing a Window Screen Teaches You in Real Life
The first time you replace a window screen, you may expect the job to be purely mechanical: remove old screen, add new screen, roll spline, trim, done. In reality, the project teaches a few practical lessons that apply to many home repairs. The biggest lesson is that preparation matters more than force. Many beginners try to muscle the spline into the groove, but the better approach is to clean the channel, choose the right spline, align the mesh, and roll slowly. When the setup is right, the work feels surprisingly smooth.
Another useful experience is learning how different screen materials behave. Fiberglass is forgiving. It bends, flexes, and lets you correct small mistakes. Aluminum looks sharp, but it demands a gentler touch because creases can become permanent. Pet-resistant screen is tough, but it may require more pressure and the correct spline size. No-see-um mesh can feel denser and slightly less airy, but it is a beautiful upgrade when tiny insects are a problem. After doing one or two screens, you start to understand why “screen mesh” is not just one product. It is a small decision that affects airflow, visibility, durability, and comfort.
You also learn that corners are the personality test of window screen repair. Straight runs are easy. Corners require patience. If you rush, the mesh bunches. If you pull too hard, the frame twists. If you roll carelessly, the spline climbs out of the groove like it has somewhere better to be. The solution is simple: slow down at each corner, guide the mesh with your fingers, and do not be afraid to pull out a short section and redo it. The best DIYers are not people who never make mistakes; they are people who fix mistakes before pretending the project is finished.
One real-world tip: replace screens in batches if several are damaged. Once your tools are out and your technique is warmed up, the second and third screens go much faster than the first. Label each frame with painter’s tape if your windows are different sizes. Screens can look identical until you try to reinstall them and discover that one is half an inch too wide. That is when a peaceful Saturday becomes a detective drama.
Finally, replacing a window screen gives you that underrated homeowner confidence. It is a small repair, but it changes how you look at your house. Suddenly, a torn screen is not an annoyance; it is a 30-minute project. A loose spline is not a mystery; it is a quick fix. You stop seeing every repair as a service call and start seeing some of them as manageable, affordable, and maybe even fun. Not party fun, perhaps, but “I fixed that and now mosquitoes can complain outside” fun.
Conclusion
Replacing a window screen is one of the most beginner-friendly DIY home repairs. With the right mesh, correct spline, a screen rolling tool, and a careful approach, you can restore airflow, improve curb appeal, and keep insects where they belong: outside, living their tiny bug lives away from your snacks.
The key is to work patiently. Remove the old spline, clean the frame, cut the mesh with enough overlap, roll the spline evenly, trim carefully, and reinstall the screen without pressing on the mesh. Once you learn the process, window screen replacement becomes a simple skill you can use again and again.
Note: This article is written for general DIY guidance. Always follow the instructions for your specific window, frame, screen material, and hardware. If a screen is located high above ground or the frame is damaged beyond simple repair, consider professional help for safety and best results.

