
Beauty Unlocked
10 Shower Niche Ideas for Your Bathroom
Jul
A shower niche is one of those bathroom features that looks simple until you start planning one. Then come the questions: How tall should it be? Where should it go? Should it match the wall tile or wear a tiny mosaic tuxedo? And, most importantly, will your family-size shampoo bottle actually fit?
At its best, a recessed shower niche provides convenient storage without stealing standing room. It replaces dangling caddies, crowded corner shelves, and the risky practice of balancing conditioner bottles on the shower valve. It can also become an architectural focal point, adding color, pattern, depth, and personality to an otherwise flat tiled wall. Design publications consistently highlight built-in niches as practical space savers, particularly in compact bathrooms.
The following shower niche ideas combine storage, durability, and good looks. Whether you are designing a compact guest bathroom or a walk-in shower worthy of a boutique hotel, there is an option here that can work without making your toiletries look like they are waiting in line at airport security.
What to Consider Before Choosing a Shower Niche
Before falling in love with a color, shape, or Pinterest-worthy tile pattern, settle the practical details. A successful niche begins behind the tile, where nobody will admire it but everybody will regret it if it fails.
Measure the Products You Actually Use
Do not design the niche around an imaginary collection of elegant apothecary bottles unless that is truly how you live. Measure your tallest shampoo, widest body-wash pump, shaving products, soap dishes, and anything else that regularly enters the shower. Oversized bottles need more vertical clearance than many standard niches provide, so product measurements should influence the niche dimensions and shelf spacing.
Check the Wall Before Framing
A niche normally fits between wall studs, but plumbing lines, electrical wiring, HVAC components, and structural framing may limit its placement. Exterior walls can also present insulation and condensation challenges. Custom niches offer substantial design freedom, while prefabricated units are available in standardized sizes and may simplify waterproofing and installation.
Make Waterproofing the Main Character
Tile and grout are the decorative finish, not the entire waterproofing system. The niche must be integrated into the shower’s approved moisture-management system, including properly treated seams, fasteners, corners, and penetrations. Its horizontal surfaces should also direct water toward the shower rather than allowing it to pool against the back wall. Manufacturer instructions and local building requirements should guide installation.
1. Create a Seamless, Tile-Matched Niche
For a clean and understated bathroom, continue the shower wall tile through the back and sides of the niche. Matching the tile allows the storage area to blend into the wall instead of becoming a separate visual feature.
This approach works especially well in minimalist bathrooms, small showers, and spaces already using bold stone veining or dramatic wall tile. The niche performs its job quietly while the overall material takes center stage. It also helps avoid the “decorative postage stamp” effect that can occur when a tiny accent pattern is introduced without connecting to anything else in the room.
Plan the niche location with the tile dimensions in mind. Aligning the top, bottom, and sides with existing grout joints can produce a more intentional result and reduce awkward tile slivers. Large-format tile is particularly effective because fewer grout lines create a smooth, modern appearance.
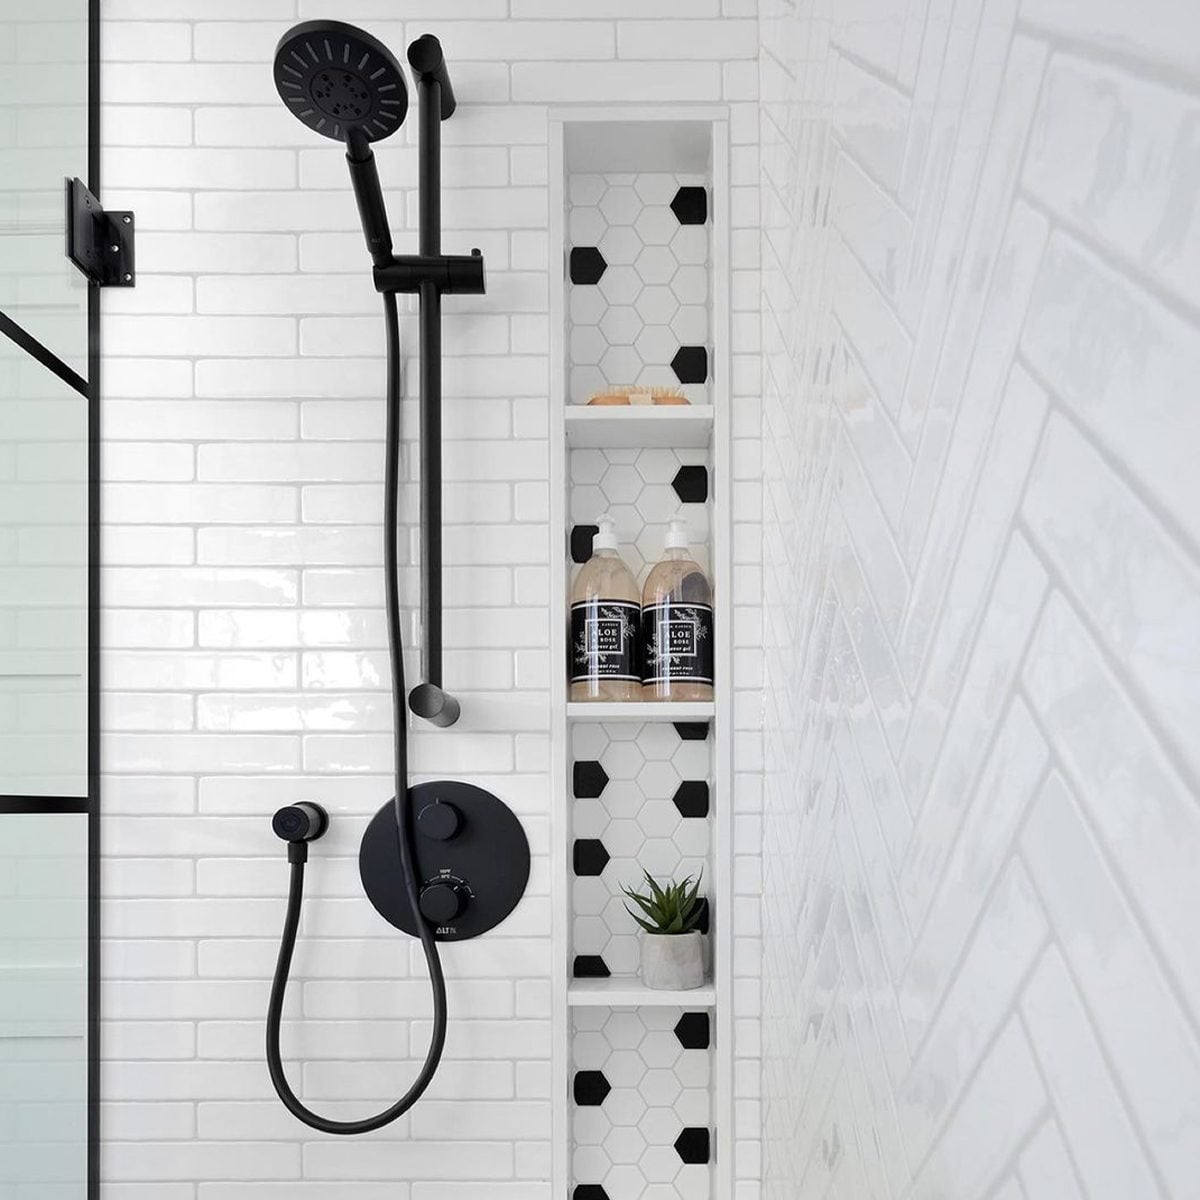
2. Add a Contrasting Mosaic Back
A shower niche offers a low-risk place to introduce an expensive, colorful, or highly patterned tile. Because the surface area is small, you can use a decorative mosaic without covering the entire shower or causing your renovation budget to faint dramatically onto the floor.
Consider hexagons, penny rounds, glass mosaics, herringbone patterns, or handmade ceramic tile. The accent can repeat the shower floor, coordinate with the vanity backsplash, or introduce a color found in towels and accessories. Daltile specifically recommends using either the shower-floor material or a contrasting finish inside a niche to build visual connection and personality.
Keep the surrounding trim simple when the mosaic is visually busy. A restrained border helps the pattern look polished rather than trapped inside a picture frame assembled during a caffeine emergency.
3. Install a Long Horizontal Shower Niche
A wide horizontal niche creates generous shared storage and can visually lengthen the shower. It is especially useful in family bathrooms, double showers, and primary suites where two people bring enough products to stock a small pharmacy.
A horizontal niche may span several stud bays, which can require additional framing and structural planning. For that reason, it should be designed before the wall is closed and reviewed by a qualified remodeler. Once the framing is resolved, the long opening can be divided with a shelf or left open for a streamlined appearance.
Use the niche to reinforce other horizontal lines, such as a floating vanity, tub ledge, linear drain, or rectangular wall tile. The result feels cohesive because the room’s visual elements appear to speak the same design language rather than participating in separate conversations.
4. Choose a Tall Vertical Niche
A vertical niche uses wall height rather than width, making it a smart solution when framing space is limited. It can accommodate tall bottles at the bottom and smaller products on upper shelves without requiring a wide opening.
Vertical niches are particularly attractive beside a rainfall showerhead, near a handheld sprayer, or within a narrow walk-in enclosure. Their upright proportions can emphasize ceiling height, especially when paired with vertically stacked subway tile. Vertical tile arrangements are often used to draw the eye upward and give compact showers a taller appearance.
For balanced proportions, divide the niche thoughtfully rather than placing every shelf at the same interval. Leave one generous compartment for bottles and one or two smaller spaces for soap, razors, or facial cleansers.
5. Build a Double Shower Niche
Two separate niches can be more practical than one oversized opening. A double-niche configuration allows each user to have personal storage, separates tall containers from smaller items, or places frequently used products at different heights.
The niches may be stacked vertically, aligned side by side, or installed in different areas of a large shower. Stacked niches are often easier to frame because they stay within the same stud bay. Side-by-side niches create symmetry and work beautifully behind a centered shower fixture or along a wide feature wall.
For a subtle look, repeat the wall tile inside both openings. For more drama, use the same accent tile in each niche so they read as a coordinated pair. Think of them as bathroom twins: related, useful, and ideally not fighting over the same bottle of conditioner.
6. Try an Arched Shower Niche
An arched niche softens the straight lines commonly found in bathrooms. It can complement an arched mirror, rounded doorway, curved vanity, or traditional architectural details while adding a custom-crafted feel.
This shape works with Mediterranean, Spanish Revival, transitional, organic modern, and vintage-inspired interiors. Handmade tile, zellige-style tile, and small mosaics adapt especially well to curved openings. Fireclay Tile has featured arched niches as a way to add character while maintaining useful recessed storage.
An arch requires more precise framing, substrate preparation, waterproofing, and tile cutting than a basic rectangle. Keep the dimensions generous enough that the curve does not reduce usable storage. Beautiful geometry is less charming when the shampoo has to live on the floor.
7. Add a Stone Slab Shelf
Instead of wrapping every niche surface in small pieces of tile, use a solid slab for the bottom or interior shelves. Quartz, engineered stone, granite, and suitable natural stone can provide a crisp edge with fewer grout joints.
A slab shelf can match the vanity countertop, shower curb, bench top, or window sill, creating continuity throughout the bathroom. It is also easier to wipe than a shelf divided by multiple grout lines. Choose a material approved for wet conditions, and confirm whether it requires sealing or special cleaning products. Natural stone generally needs more maintenance than ceramic or porcelain tile.
For a refined appearance, slightly extend the slab beyond the face of the niche or use a mitered edge. The projection should remain modest so nobody bumps an elbow against a luxurious but surprisingly aggressive piece of stone.
8. Frame the Niche With Metal Trim
Metal edging gives a shower niche a crisp, finished outline while protecting exposed tile edges. Common finishes include brushed nickel, chrome, matte black, brass, bronze, and stainless steel.
Match the trim to the shower fixtures for a coordinated look, or use a contrasting finish to make the niche stand out. Black trim against white tile creates graphic definition, while warm brass can soften marble-look porcelain or deep green ceramic tile.
Prefabricated metal niches are another option. These inserts create a clean, contemporary appearance and may eliminate much of the detailed tile work inside the opening. Stainless steel versions are made specifically for wet locations and are available with integrated shelves.
9. Hide the Niche on a Side Wall
Not every niche needs to become a feature. Placing it on a side wall keeps bottles accessible to the person showering while reducing their visibility from the bathroom doorway.
This layout is ideal for homeowners who love the look of a pristine feature wall but also own products with labels in twelve unrelated colors. The main wall can showcase uninterrupted tile, veining, or book-matched patterns, while the side niche quietly handles storage.
A side-wall niche may also receive less direct spray, depending on the showerhead position. Even so, it must be waterproofed and sloped correctly. Locate it where the user can reach it comfortably without standing beneath the strongest stream or twisting awkwardly on a wet floor.
10. Include a Lower Shaving Niche or Foot Ledge
A small lower niche can provide a convenient place to rest a foot while shaving, washing, or applying skin-care products. It uses less room than a full shower bench and can be especially useful in a compact enclosure.
Designers and remodelers frequently recommend shaving niches or compact foot ledges because they add function without consuming much standing space. However, the feature must be positioned at a comfortable height, sized to support the intended use, and finished with slip-conscious materials and smooth edges.
A lower niche may match the main storage niche or disappear into the wall tile. Keep it away from plumbing controls and direct spray when possible, and make sure it does not protrude into the walking area. The goal is better balance, not an unexpected obstacle course before breakfast.
How to Select the Best Tile for a Shower Niche
Ceramic and Porcelain Tile
Ceramic and porcelain are popular because they are available in a broad range of colors, sizes, textures, and prices. Porcelain is dense and durable, while glazed ceramic can be an excellent option for shower walls and niche interiors. Both are generally straightforward to maintain when installed with appropriate setting materials and waterproofing.
Glass Tile
Glass reflects light and can make a small niche sparkle, but installation demands careful substrate preparation, compatible mortar, clean cuts, and full coverage behind the tile. Some transparent products reveal uneven adhesive or backing, so installer experience matters.
Natural Stone
Marble, travertine, slate, and other natural stones offer unique movement and color. They may also require sealing, periodic maintenance, and cleaners formulated for the specific stone. Ask about stain resistance, mineral deposits, and long-term care before selecting a pale or highly porous material for a constantly wet space.
Mosaic Tile
Mosaics conform easily to small surfaces and can simplify installation around unusual shapes. However, more pieces usually mean more grout joints. Use high-quality grout suitable for wet environments and select a color that supports the design without turning every soap spot into a breaking-news event.
Common Shower Niche Mistakes to Avoid
The first mistake is choosing a location before checking the framing and utilities inside the wall. The second is making the opening too small for real products. The thirdand most seriousis treating waterproofing as an optional upgrade.
Other problems include shelves that hold water, niches placed directly in heavy spray, awkward tile slivers, insufficient vertical clearance, sharp exposed edges, and layouts that force users to bend or reach too far. A niche should be planned alongside the plumbing, tile layout, showerhead, controls, bench, and glass enclosure rather than added after everyone assumes someone else measured it.
When remodeling an existing tiled shower, cutting in a new niche is more complex than simply opening the wall. It can disturb the existing waterproofing system and reveal unexpected pipes or wiring. In those situations, a surface-mounted shelf may be less disruptive and more economical.
Real-World Experiences and Lessons From Planning Shower Niches
One of the clearest lessons from bathroom projects is that storage needs are almost always underestimated. A niche may look enormous when it is empty and freshly tiled, but it becomes surprisingly modest after adding two shampoos, conditioner, body wash, face wash, a scrub, razors, soap, and the mysterious bottle nobody remembers buying. Before construction, arranging everyday products on a table provides a much more realistic picture of the required width and height.
Adjustable thinking is also valuable. Households change products, and bottle dimensions are not standardized. A tall lower compartment with a shorter shelf above tends to be more adaptable than several identical cubbies. Fixed shelves may look perfectly symmetrical, but practical storage rarely follows perfect symmetry. The tallest section should accommodate pump dispensers without forcing users to tilt them sideways like furniture being carried through a narrow doorway.
Another important lesson concerns visibility. A bold niche looks wonderful in an inspiration photograph because the stylist has placed three matching amber bottles inside it. Real bathrooms tend to contain brightly colored packaging, half-empty containers, and at least one plastic bath toy staring into the middle distance. Homeowners who prefer a calm bathroom often appreciate a niche on the side wall, where the storage remains accessible without dominating the room.
Maintenance deserves equal attention. Small mosaics and textured tile create visual interest, but every grout joint and deep texture adds another place for soap residue to collect. In hard-water areas, solid shelves and smoother finishes can make routine cleaning easier. Dark tile hides some stains while highlighting pale mineral deposits; white tile does the opposite. Apparently, even water spots have opinions about interior design.
Tile layout should be finalized before framing whenever possible. Moving a niche slightly can align its edges with grout lines, center it within a tile module, or prevent narrow cuts around the perimeter. These details may seem minor during construction, but they are surprisingly noticeable after completion. A well-aligned niche looks integrated into the shower; a poorly aligned one can look as though it wandered in after the tile installer had already gone home.
The relationship between the niche and showerhead also affects daily use. Storage placed directly beneath powerful spray stays wet longer and may collect more soap residue. A protected wall often keeps products drier and reduces the amount of water sitting on the shelf. Convenient reach still matters, so the best position usually balances access, visibility, and exposure rather than maximizing only one of them.
Budget experiences vary as well. Decorative tile inside a niche can be an affordable way to use a premium material because only a small quantity is needed. On the other hand, custom framing, specialty trim, slab fabrication, complex curves, and detailed waterproofing increase labor. The niche itself may not require much material, but precision is expensive. Saving money by rushing the waterproofing is rarely a bargain, especially when the repair involves removing beautiful tile that was supposed to last for years.
Finally, the best shower niches are designed around habits rather than trends. A minimalist single niche may be perfect for one person with three products. A busy family may need a long shelf, two separate niches, or individual storage zones. Someone who shaves in the shower may benefit from a low foot ledge, while another user may prefer a bench. There is no universally perfect size or shape. The winning design is the one that quietly supports the morning routine without demanding daily negotiations over where the conditioner belongs.
Final Thoughts
The best shower niche ideas balance attractive materials with realistic storage, comfortable placement, careful tile alignment, and dependable waterproofing. A seamless tiled niche can keep a small shower calm and uncluttered, while an arched opening, contrasting mosaic, stone shelf, or metal frame can turn built-in storage into a memorable design feature.
Choose the dimensions by measuring actual products, coordinate the opening with the tile layout, and involve an experienced professional when framing, plumbing, structural changes, or waterproofing are involved. A well-designed niche should feel as though it always belonged in the roomand should prevent shampoo bottles from performing dangerous gymnastics around your feet.
Note: The design suggestions in this article are intended for planning and inspiration. Shower framing, waterproofing, material selection, and installation should follow applicable building codes and the written instructions for the complete waterproofing system being used.

