
Skincare
Easy Ways to Remove a SIM Card from an Android: 4 Steps
Aug
Removing a SIM card from an Android phone should be a ten-second job, not an archaeological excavation involving tweezers, flashlights, and increasingly creative vocabulary. Yet the tiny tray, nearly invisible eject hole, and delicate nano-SIM can make the task feel more complicated than it really is.
Whether you are switching carriers, moving your number to a new phone, troubleshooting a “No SIM” warning, preparing a device for repair, or traveling internationally, the same basic process works for most modern Android phones. This guide explains how to remove a SIM card safely in four straightforward steps, what to do when the tray refuses to open, and how physical SIM cards differ from eSIMs.
Before You Begin: Make Sure Your Android Has a Physical SIM Card
Not every Android phone contains a removable SIM card. Some devices use an eSIM, which is a digital carrier profile stored electronically inside the phone. An eSIM does not slide into a tray, so there is nothing physical to eject. Instead, it is managed through the phone’s network settings and, in some cases, through the carrier.
Other Android phones support both a physical nano-SIM and an eSIM. Dual-SIM models may also have two physical SIM positions, or a hybrid tray that holds either a second SIM card or a microSD card. Because manufacturers arrange these parts differently, checking the hardware diagram or user guide for your exact model is a wise first move. It is much better than confidently poking the nearest small hole and discovering that it was a microphone.
On many phones, you can review active mobile plans by opening Settings and looking for a menu such as Network & internet, Connections, SIMs, SIM manager, or Mobile network. The wording varies by Android version and manufacturer.
Android distinguishes removable physical SIM cards from downloadable eSIM profiles, and tray locations vary by device.
What You Need to Remove an Android SIM Card
Gathering the right equipment is refreshingly easy. You normally need only:
- Your Android phone
- The original SIM ejector tool
- A clean, well-lit, flat work surface
- A small container or envelope for the SIM card
If the original ejector tool has disappeared into the same mysterious dimension that collects spare buttons and matching socks, a thin, straightened paper clip may work on many phones. It should fit into the tray’s eject hole without scraping the surrounding frame. Avoid thick pins, knives, mechanical-pencil tips, wooden toothpicks, and anything likely to snap.
Remove any bulky phone case before starting. Some cases overlap the tray or make it difficult to press the ejector tool straight into the hole.
How to Remove a SIM Card from an Android in 4 Steps
Step 1: Turn Off the Phone and Locate the SIM Tray
Save anything you are working on, disconnect charging cables, and power off the Android phone. Although certain modern devices may tolerate a SIM swap while powered on, manufacturers and carriers commonly recommend shutting the phone down first. Doing so reduces the chance of network errors, interrupted card access, or accidental problems involving a shared microSD tray.
Next, inspect the phone’s outer edges. The SIM tray is usually found along the left, right, top, or bottom edge. Look for a narrow rectangular outline with a small circular eject hole beside or within it. The tray outline is the important clue. A random hole without an obvious tray seam may be a microphone.
Common tray locations include:
- Samsung Galaxy phones: Frequently along the top, bottom, or side edge, depending on the model.
- Google Pixel phones: Commonly on a side or bottom edge, with the exact position changing between generations.
- Motorola phones: Often on the upper-left or side edge.
- Older Android phones: Sometimes beneath a removable back cover and battery.
If you cannot see a tray, search the model name in the manufacturer’s user guide. Do not keep testing holes until one produces a prize. Smartphones are not vending machines.
Official Google, Samsung, Motorola, Verizon, and HMD guidance shows that tray placement and removal methods vary by model, while many instructions recommend powering down first.
Step 2: Insert the SIM Ejector Tool Straight into the Hole
Place the phone on a stable surface or hold it firmly with the screen facing away from the direction of pressure. Insert the narrow end of the SIM ejector tool directly into the tray’s eject hole.
Keep the tool perpendicular to the phone’s edge. Pressing at an angle may bend the tool, scrape the tray, or prevent the internal release mechanism from moving. Apply steady, controlled pressure. On most devices, the tray will pop outward by a few millimeters.
The required pressure can feel firmer than expected, especially on a new phone with a tightly fitted tray gasket. However, “firm” does not mean “launch your entire body weight through a paper clip.” If the tool bends, the phone slides across the table, or nothing moves after a controlled push, stop and confirm that you are using the correct hole.
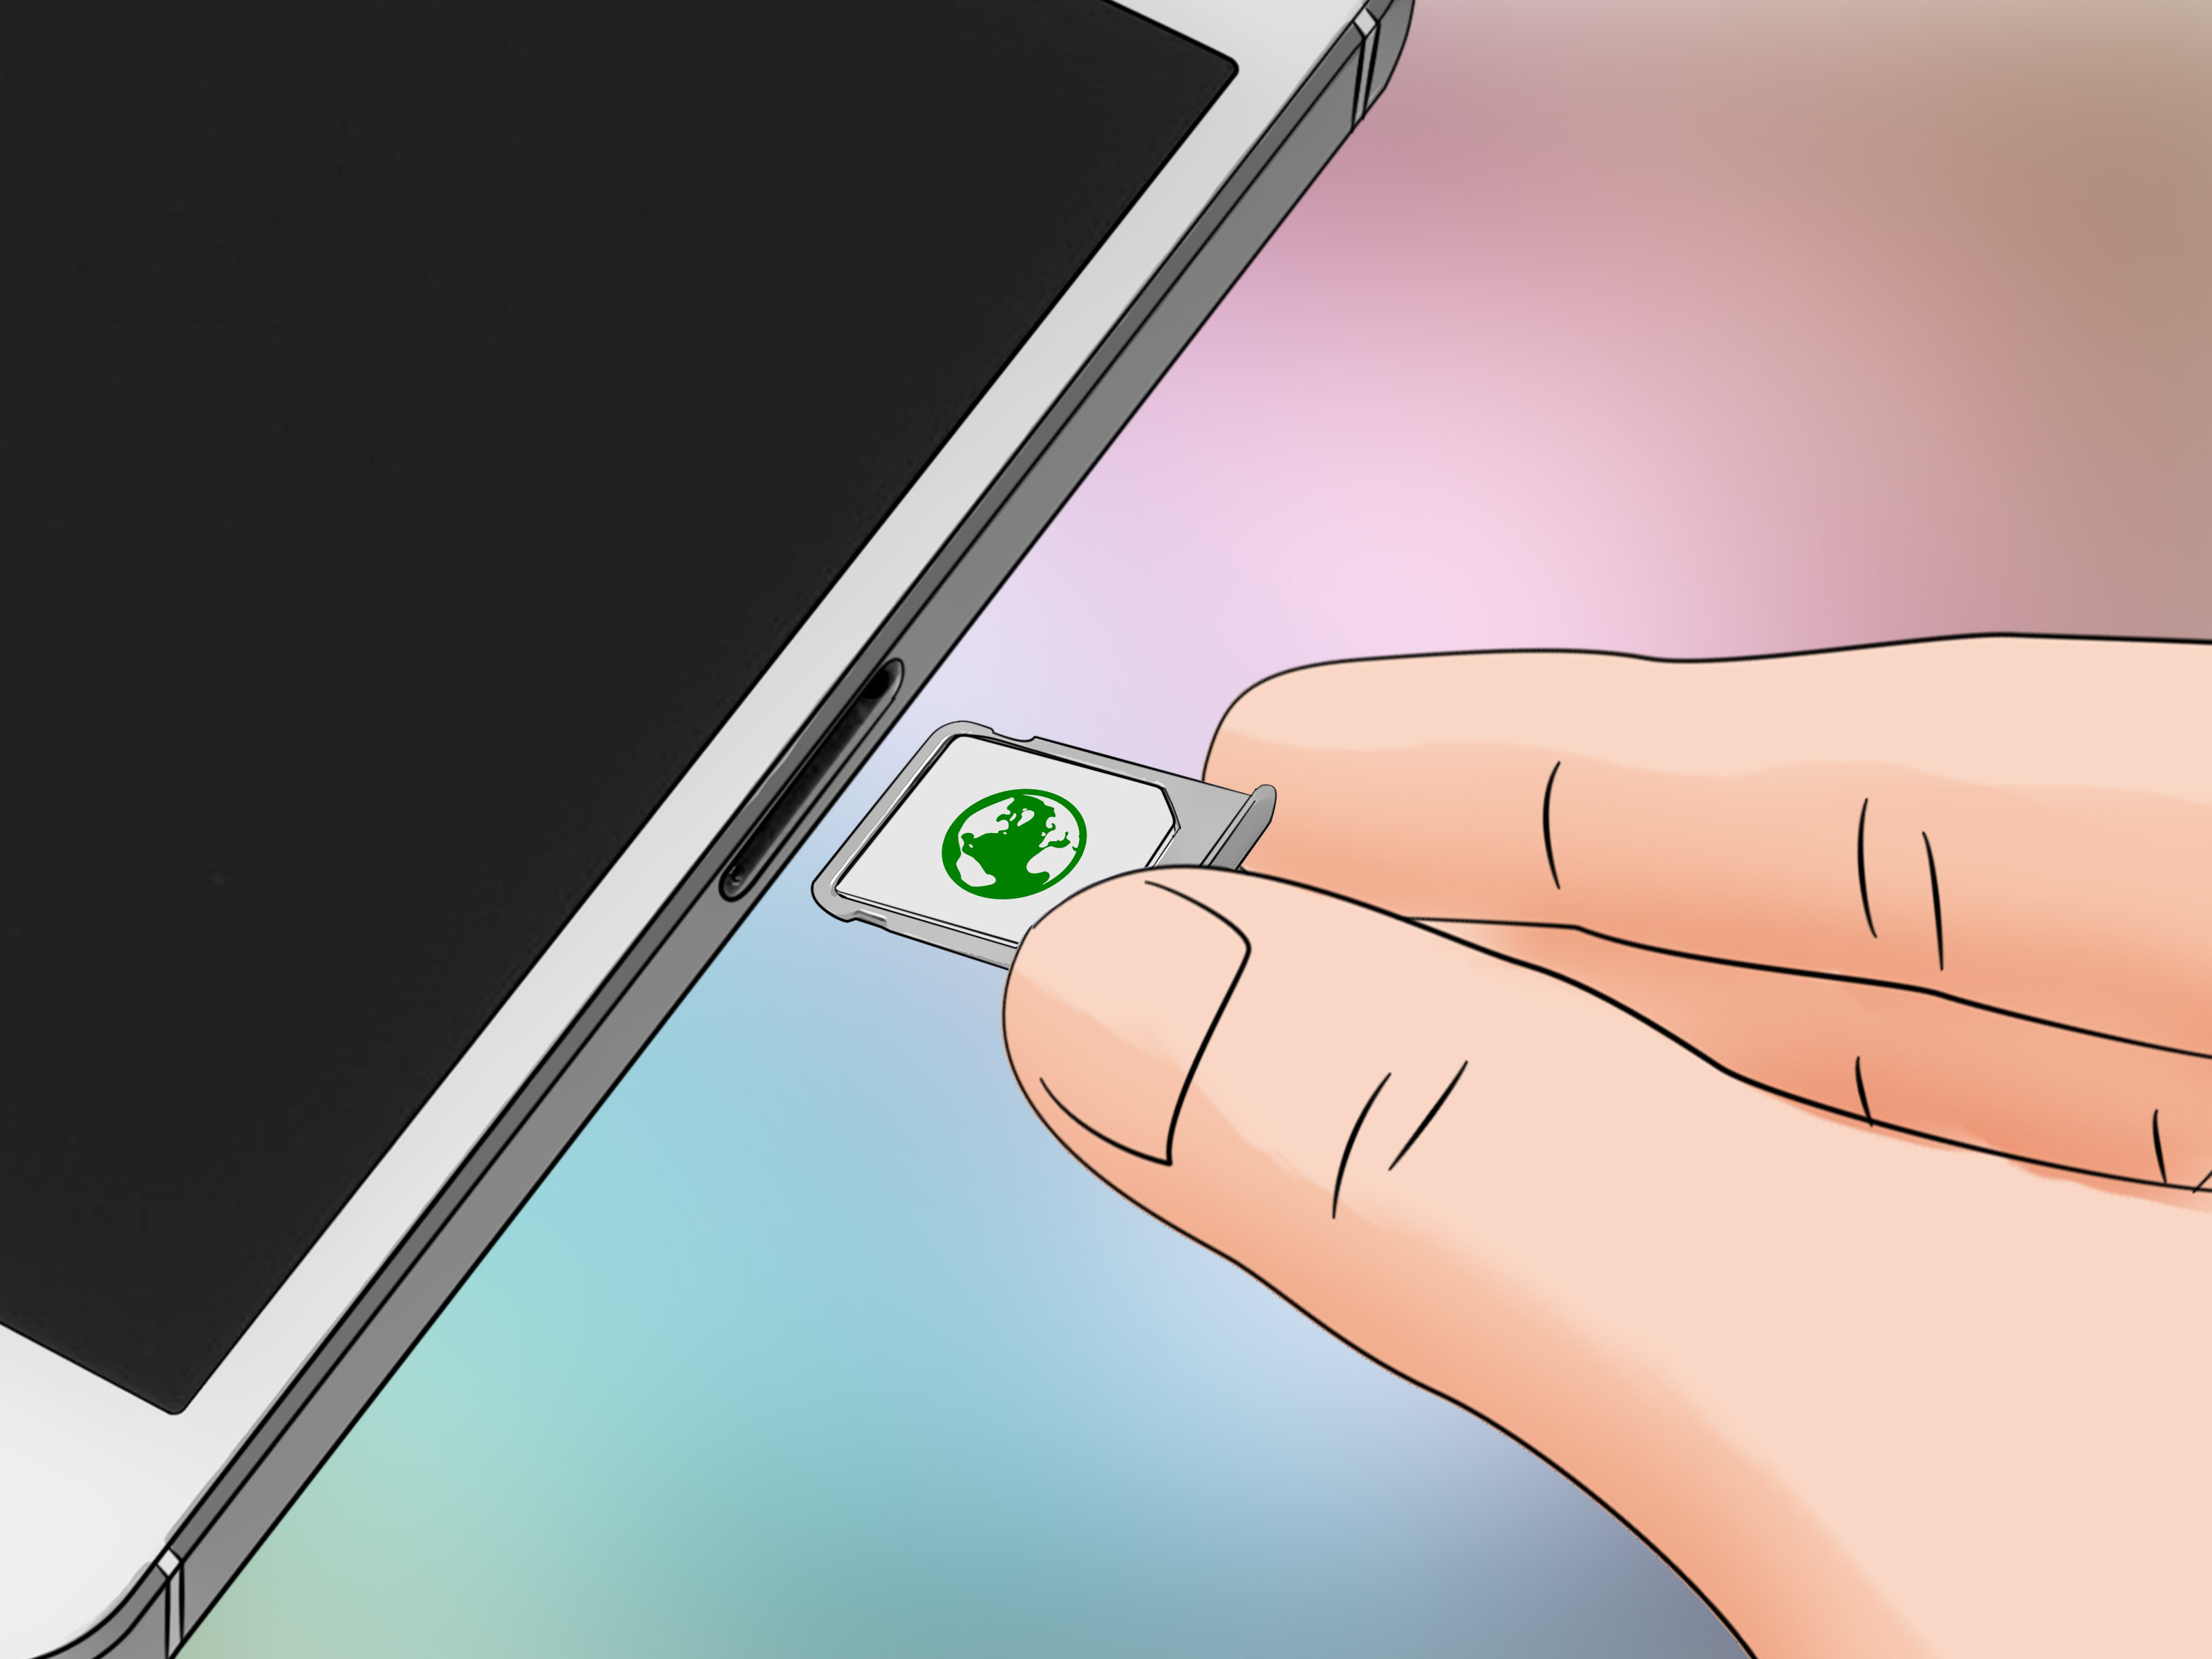
Once the tray has popped out, remove the tool. Grip the exposed edge of the tray with your fingertips and pull it out slowly. Keep the tray level because a loosely seated SIM or microSD card can fall onto the floor.
Manufacturer and repair instructions commonly call for a SIM eject tool or a suitable straightened paper clip, inserted straight into the tray hole with controlled pressure.
Step 3: Lift the SIM Card Out of the Tray
Set the tray on a clean surface and observe how the SIM card is positioned before removing it. Most current Android phones use a nano-SIM, the smallest standard removable SIM format. Its clipped corner matches a corresponding shape in the tray, preventing correct installation in the wrong orientation.
Lift the card gently using a fingertip. Do not scrape the gold-colored contacts with a metal object, and do not bend the card. Skin contact is usually not disastrous, but handling the SIM by its edges helps keep oils and debris away from the contact area.
If the tray also contains a microSD card, leave that card in its original position unless you intend to remove it. A shared tray may have:
- One slot for a SIM and one for a microSD card
- Two dedicated SIM positions
- A hybrid second position that accepts either SIM 2 or a microSD card
If you removed a microSD card while the phone was running, data corruption could occur if an app was actively using the card. This is another reason to power down first or properly unmount the memory card through Android’s storage settings.
Place the removed SIM in a small envelope, plastic case, or labeled container. Nano-SIM cards are remarkably skilled at vanishing into carpet fibers.
Official Samsung, Motorola, and HMD instructions emphasize correct card orientation, gentle handling, and additional care when a tray also contains a memory card.
Step 4: Reinsert the Empty Tray and Restart the Phone
Examine the empty tray before returning it to the phone. It should be flat, clean, and free of cracks. Align it in the same direction in which it was removed, then slide it gently into the slot.
Never force a tray that feels crooked or blocked. Pull it out, check the orientation, and try again. A correctly aligned tray should move smoothly and sit flush with the phone’s frame. Forcing it can bend the tray, damage internal contacts, or compromise the seal around water-resistant devices.
After the tray is fully seated, turn the phone back on. Without an active SIM or eSIM, Android may display messages such as “No SIM,” “Emergency calls only,” or “No mobile network.” Wi-Fi, local apps, downloaded media, the camera, and many other features should continue to work normally.
If you are transferring the SIM to another compatible phone, insert it using that device’s tray orientation and complete any activation instructions from your carrier. Moving the card does not automatically guarantee service if the new device is carrier-locked, incompatible with the network, or requires activation.
Official instructions warn against forcing a misaligned tray and describe reinserting it gently until it sits correctly.
What to Do If the SIM Tray Will Not Open
Confirm That You Found the Correct Hole
Use a bright light to look for the tray’s rectangular outline. If you see only a tiny hole with no seam beside it, check the device diagram before trying again. Microphone openings can sit uncomfortably close to SIM trays on some models.
Remove the Phone Case
A case may partially cover the tray or prevent the tool from entering at a straight angle. Take the case off and try again on a stable surface.
Use a Stiffer, Properly Sized Tool
A weak paper clip may bend before it activates the release mechanism. The original SIM ejector tool is preferable because it is narrow and rigid. If using a substitute, choose one that fits smoothly and does not require widening the hole.
Press Straight, Not Sideways
The internal release responds to inward pressure. Twisting, levering, or dragging the tool sideways can damage the opening without helping the tray move.
Stop When the Tray Appears Jammed
If the tray is bent, the card was installed without the tray, or a tool tip has broken inside the opening, do not pour glue into the slot or attack the phone with household pliers. An authorized repair provider or experienced phone technician can often remove the obstruction without turning a small inconvenience into a motherboard repair.
Repair guidance documents cases in which bent tools, broken tips, and incorrectly positioned cards made tray removal more difficult, supporting a stop-before-damage approach.
How to Remove an eSIM from an Android Phone
An eSIM cannot be removed with an ejector tool because it is not a removable card. To disable or erase an eSIM, open the mobile network settings and select the appropriate plan.
On a Google Pixel, the path may resemble:
Settings > Network & internet > SIMs > Select the eSIM > Erase SIM
On a Samsung Galaxy phone, it may resemble:
Settings > Connections > SIM manager > Select the eSIM > Remove
Menu labels can change with software updates. More importantly, deleting an eSIM profile may mean you need assistance from your carrier to download or activate it again. When moving service to another phone, use the carrier’s transfer process rather than erasing the profile first unless instructed to do so.
Google, Samsung, Verizon, T-Mobile, and Android documentation distinguish electronic profile removal from physical card removal and note that carrier involvement may be required for reactivation.
Will Removing the SIM Card Delete Photos, Apps, or Contacts?
Removing a physical SIM card normally does not erase the phone’s internal storage. Your installed apps, photos, videos, downloads, and Android settings remain on the device.
However, a SIM may contain limited carrier information and, on some older setups, a small number of contacts. Most modern Android users store contacts in a Google account, Samsung account, device storage, or another cloud service. Before selling or trading in a phone, back up important data, remove the SIM card, sign out of accounts, and perform the manufacturer’s recommended factory-reset procedure.
Also remember that removing a SIM does not unlock the phone from its carrier, cancel your wireless plan, erase an eSIM, or protect data already stored on the device. Those are separate actions.
Common Mistakes to Avoid
- Poking a microphone hole: Find the tray outline before inserting anything.
- Using excessive force: Controlled pressure should release the tray; violence is not a phone accessory.
- Forcing the tray back in: Stop if it is crooked or does not slide smoothly.
- Losing the SIM: Work over a table, not a shag carpet or storm drain.
- Removing a shared tray carelessly: A microSD card may also be present.
- Assuming every Android has a tray: The active plan may use eSIM technology.
- Using a brittle toothpick: A broken wooden tip inside the eject hole creates an entirely new tutorial.
Practical Experiences and Lessons from Real-World SIM Removal
The four-step process sounds almost comically simple until a phone owner encounters one tiny surprise. The following representative experiences show how ordinary mistakes happen and how a calmer approach usually prevents damage.
Experience 1: The “Why Isn’t This Tray Opening?” Moment
A common scenario begins with a new phone, an ejector tool, and a small hole near the charging port. The user presses once, then harder, but the tray does not move. The problem is not a stubborn traythe tool is in a microphone opening.
The practical lesson is to identify both the hole and the tray seam. A real eject point belongs to a visible removable panel. When there is no rectangular outline, stop and check the model diagram. Thirty seconds of research is cheaper than testing the phone’s internal architecture by force.
Experience 2: The Paper Clip That Turned into Modern Art
Another user cannot find the original tool and grabs the nearest paper clip. It is too large, so the end is squeezed, twisted, and sharpened until it resembles abstract sculpture. Unsurprisingly, it still does not work well.
A thin, straightened paper clip can be a useful substitute, but it needs to enter the eject hole freely and remain rigid under moderate pressure. If it bends immediately, replace it rather than increasing force. Keeping the original ejector tool taped inside the phone’s box or stored in a labeled drawer saves time later.
Experience 3: The SIM Card That Disappeared
The tray opens successfully, the nano-SIM is lifted out, and then it slips from the user’s fingertips. Because nano-SIM cards are small, thin, and apparently committed to adventure, the card lands under a desk beside three crumbs and a cable that no one remembers buying.
Working over a clear table prevents this problem. Place a folded white sheet of paper beneath the phone so the card is easy to see. As soon as it is removed, put it in a small container or attach it to a card with low-tack tape. Avoid placing adhesive over the gold contacts.
Experience 4: The Hybrid Tray Surprise
A user removes the tray to switch carriers and discovers both a SIM and a microSD card. The memory card shifts out of position, and the tray no longer slides back smoothly. The temptation is to push harder, but that risks bending the tray or lodging the memory card incorrectly.
The better solution is to remove the tray completely and reseat both cards in their molded recesses. Each card should lie flat, with no raised edge. Hybrid trays deserve extra attention because one small misalignment can prevent the entire assembly from fitting.
Experience 5: The Phone Still Says “No SIM”
Sometimes the goal is not removal but troubleshooting. A phone repeatedly loses cellular service, so the user powers it off, removes the SIM, checks it for visible dirt or damage, and seats it again. After restarting, the connection returns.
When reinsertion does not solve the problem, the next useful tests are trying the SIM in another compatible phone or trying a known-working SIM in the original device. These tests help separate a card problem from a tray, account, or phone problem. Carrier support may need to replace or reactivate the SIM.
T-Mobile troubleshooting guidance recommends powering down, reseating the SIM, restarting, and testing the card in another compatible device when appropriate.
Experience 6: Discovering That the Phone Uses an eSIM
One of the funniest modern variations is searching every edge of a phone for a tray that does not exist. After several minutes, the owner learns that the carrier plan was activated through an eSIM.
The lesson is simple: check the network settings before beginning physical work. If the plan is listed as an eSIM, transferring or removing it is a software and carrier process. An ejector tool cannot negotiate with a digital profile, no matter how persuasive the user feels.
The Overall Lesson
Successful SIM removal is less about strength than observation. Find the correct tray, use a suitable tool, press straight, keep the cards organized, and stop when something feels wrong. Most complications occur when a rushed ten-second task becomes a five-minute contest between a person and a very small piece of metal.
Conclusion
To remove a SIM card from an Android phone, power the device off, locate the correct SIM tray, press the ejector tool straight into its hole, and lift the card carefully from the tray. Reinsert the empty tray gently and make sure it sits flush with the phone’s frame.
The procedure is nearly universal, but tray positions, card orientations, dual-SIM layouts, and eSIM features vary among models. When the tray does not open with controlled pressure, consult the device guide or contact a qualified technician rather than forcing it. Your SIM card may be tiny, but the repair bill for an enthusiastic mistake may not be.
SEO Information

