
Body Care
How To Train a Clematis on a Tree Trunk
Aug
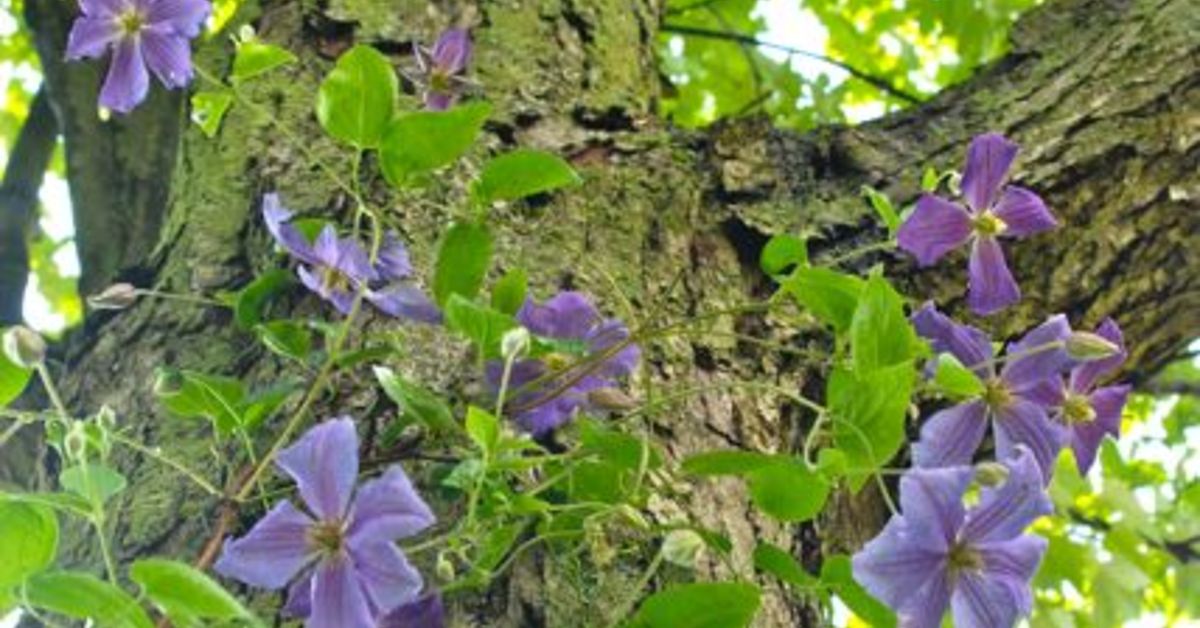
A mature tree and a flowering clematis can make a spectacular garden partnership. The tree supplies height and texture; the clematis supplies the floral fireworks. Done well, the vine seems to float through the branches as though the tree decided to wear jewelry. The trick is giving the vine something slender to grip without damaging the bark.
Most climbing clematis hold on by curling their leaf stalks, called petioles, around narrow supports. A broad trunk is often too smooth or thick for those petioles. Instead of tying every stem to the tree, build a light, removable ladder that guides the vine into the lower branches.
Can Clematis Grow Safely Up a Tree?
Yes, when both plants are suitable partners. Choose a healthy, established tree with an open canopy, sturdy branches, and no major wounds or loose bark. Avoid newly planted, declining, storm-damaged, or very thin-barked trees. The vine may be light, but wet foliage and tangled stems still add weight and wind resistance.
Small ornamental trees, old fruit trees, and open deciduous trees often work well. Dense evergreens are harder because their interiors can be dark and dry. Never direct the vine toward utility lines, gutters, dead limbs, or branches that require frequent pruning.
Choose the Right Clematis
Clematis varieties differ enormously in mature size and pruning needs. Match the vine to the tree rather than buying the most dramatic flower on the label and hoping everyone behaves.
Match the Mature Size
For a small tree, select a moderately vigorous large-flowered hybrid or viticella-type clematis. Very vigorous varieties may suit a large, sturdy tree, but they need closer control. Be cautious with nonnative sweet autumn clematis, which can grow and seed aggressively in some regions. Check local invasive-plant guidance and confirm the botanical name before planting.
Know the Pruning Group
- Group 1: Early bloomers flower mainly on old stems. Prune lightly after flowering.
- Group 2: Many large-flowered cultivars bloom on old and new growth. Remove dead wood and prune lightly.
- Group 3: Late bloomers flower on current-season growth. Cut them back hard in late winter or early spring, usually to healthy buds 8 to 18 inches above the ground.
Group 3 is often easiest on a tree because yearly pruning lets you remove old growth, inspect the support, and retrain fresh shoots. Group 1 can be beautiful, but its older flowering stems must remain in place.
Choose the Planting Position
Do not plant directly against the trunk. Digging there may damage major roots, and soil beneath a mature tree is often dry and competitive. Position the clematis about 18 to 36 inches away when space allows, then angle its first support toward the trunk.
Choose rich, well-drained soil that stays evenly moist. Most clematis bloom best with several hours of sun, although afternoon shade can help in hot climates. Apply two or three inches of organic mulch to cool the soil, but keep it away from both the clematis stems and tree bark.
Build a Tree-Safe Climbing Support
The best support is narrow, removable, and spaced slightly away from the bark. Good options include coated garden mesh, a slim trellis panel, soft garden cord with horizontal crosspieces, or twiggy branches secured near the plant.
A narrow freestanding mesh panel placed a few inches in front of the trunk is especially useful. Anchor it to stakes in the soil rather than fastening it to the tree. Once covered, it nearly disappears, yet it remains easy to repair or remove.
If you must suspend cords from a sturdy branch, use soft adjustable ties and leave generous room for branch growth. Add horizontal pieces every 8 to 12 inches so the clematis petioles can curl around them.
Avoid These Damaging Shortcuts
Do not drive nails, screws, staples, or hooks into a living tree. Never wrap bare wire, tight mesh, or zip ties around the trunk. As the tree expands, forgotten fasteners can cut into bark and girdle living tissue. Tight mesh can also trap debris, hide bark problems, and become embedded.
How To Train a Clematis on a Tree Trunk Step by Step
1. Plant Without Injuring Tree Roots
Water the clematis before planting. Dig carefully and move the hole rather than cutting a large tree root. Set the plant according to its nursery label and local guidance, firm the soil gently, water deeply, and mulch.
2. Create a Bridge to the Trunk
Place a bamboo cane, short trellis, or fan of twiggy branches beside the vine and angle it toward the main support. Install this route early because young clematis stems are brittle near the base.
3. Select Several Main Shoots
Choose three to five healthy stems and spread them into a fan. Relying on one leader creates sparse coverage and leaves the display vulnerable if that stem breaks.
4. Tie Loosely and Temporarily
Use soft plant ties, stretchy horticultural tape, or loose twine. A figure-eight tie keeps the stem from rubbing against the support. Place ties below a leaf joint, leave room for thickening, and remove them once the leaf stalks have grabbed the mesh.
Inspect fast-growing shoots every week or two. A tie that looked roomy in May may become a tiny belt by June.
5. Guide Some Stems Sideways
Do not send every shoot straight upward. Train several diagonally or horizontally before allowing them to climb. This creates flowers across the visible trunk instead of a bare green rope topped with blooms above eye level.
6. Ease Stems Into Lower Branches
When shoots reach the canopy, lay them gently through open branch forks. Do not wind them tightly around living wood. Add a temporary cord across wide gaps until the vine reaches smaller twigs it can use naturally.
7. Limit the Final Height
Redirect growth away from roofs, wires, weak limbs, and windows. Thin crowded stems so light and air reach both plants. If maintenance requires unsafe ladder work, the variety is too vigorous for that location.
Watering, Feeding, and Pruning
Tree and clematis roots share the same soil pantry. During the first season, water deeply whenever the upper soil begins to dry. Apply water slowly around the root zone rather than frequently sprinkling the surface. Established vines still need help during long dry periods, especially beneath a canopy that intercepts rainfall.
Feed modestly. Too much nitrogen can produce heroic foliage and disappointing flowers. Use compost or a balanced slow-release fertilizer only when soil conditions or plant performance justify it.
Prune according to the cultivar’s group. Group 3 plants can be cut back near the base in late winter or early spring. Remove the old top growth in short sections instead of yanking a dry tangle from the branches. Group 1 plants are shaped after flowering, while Group 2 plants usually receive a lighter cleanup that preserves older flowering stems.
If the label is lost, observe when and where the vine blooms for a season. Meanwhile, remove only dead, damaged, or obviously weak stems. Whatever the group, keep growth away from wounds and remove stems that rub the bark or block tree-care access.
Common Problems and Quick Fixes
The Vine Slides Down the Trunk
Add finer mesh or more horizontal strings. Rough-looking bark may still be too broad for the petioles to grasp.
The Lower Trunk Is Bare
Fan new shoots sideways and redirect selected stems early. Annual hard pruning often improves lower coverage on Group 3 plants.
The Tree Disappears Under Foliage
Thin the vine, reduce its height, and choose a less vigorous cultivar next time. The goal is a partnership, not a botanical hostage situation.
Ties Are Cutting Into Stems or Bark
Remove them immediately. Replace them with loose, soft, adjustable ties and inspect every attachment in spring and midsummer.
Seasonal Maintenance That Keeps Both Plants Healthy
In late winter or early spring, inspect the tree, remove obsolete ties, repair the support, and prune the clematis according to its group. As new shoots emerge, choose the strongest stems and spread them before they become tangled. During summer, check moisture beneath the canopy, redirect wandering growth, and loosen every attachment that has become snug.
After flowering, shape Group 1 vines if needed and remove damaged stems from any group. In fall, clear loose debris and make sure the support will not whip against the bark during winter storms. A twice-yearly support inspection is essential because tree branches expand continuously, even when the vine appears unchanged.
My Experience Training Clematis Up a Tree Trunk
The first time I tried this technique, I assumed rough bark was a complete trellis. I planted the clematis near an old ornamental tree, leaned the shoots against the trunk, and waited for nature to handle the paperwork. Nature declined. The shoots grew upward for a few inches, slid sideways, and formed a leafy heap at the base.
The solution was almost comically simple. I placed a narrow panel of coated wire mesh several inches in front of the trunk and connected the plant to it with two bamboo canes. Within days, the curling leaf stalks found the thin wire. Once the plant understood the route, training became less like wrestling spaghetti and more like gently directing traffic.
I also learned not to over-tie. My early instinct was to secure every stem as if a hurricane were scheduled for Tuesday. The display looked stiff, and fast-growing stems soon pressed against the ties. Now I attach only the main shoots, keep every loop loose, and remove ties as soon as the plant grips the support.
Spreading the stems sideways made the biggest visual difference. When I trained everything vertically, the vine rushed into the branches and produced most of its flowers above eye level. The next season, I fanned three shoots across the lower support before letting them climb. Flowers appeared over a much broader section of trunk, which was the whole point.
Water management was another lesson delivered by mildly dramatic foliage. Soil beneath an established tree can dry even after light rain because leaves intercept water and tree roots compete aggressively. A slow, deep soaking around the clematis worked better than frequent surface sprinkling. Mulch reduced moisture swings, but I kept it away from the vine crown and tree bark.
Pruning became easier after I switched to a Group 3 cultivar. Cutting it back each year gave me a clean start and prevented old stems from accumulating in the branches. I removed the dry growth in short pieces rather than pulling the entire mass. That took longer but protected buds and stopped the support from becoming a botanical fishing net.
I found that photographs were surprisingly useful. A quick picture from the same angle each month showed where coverage was developing and where shoots were racing into the canopy. It also helped me remember the locations of temporary ties. Garden memory is optimistic; a photo is much less sentimental.
The most important lesson was restraint. A successful tree-trained clematis should reveal the character of both plants. I now redirect shoots before they bury the canopy and inspect every branch loop at least twice a year. The finished display looks natural, but it is carefully edited naturethe gardening version of “I woke up like this” after considerable preparation.
When the partnership works, the payoff is excellent: cool roots, sunlit flowers, vertical color, and a second season of interest for a quiet tree. Give the vine a slim path, protect the bark from tight fasteners, prune by flowering group, and let the clematis do what it does bestclimb elegantly while accepting nearly all the compliments.
Conclusion
Training clematis on a tree trunk is about designing a safe route, not fastening the vine tightly to bark. Start with a healthy tree and appropriately vigorous cultivar, plant away from major roots, add a removable support, guide several shoots loosely, and prune according to bloom group. With light seasonal editing, the tree becomes a living trellis and the clematis becomes its most photogenic houseguest.

