
Body Care
How to Fold a Dollar Into a Heart: 2 Easy Methods
Jul
Giving someone cash is practical. Folding that cash into a heart is practical with a tiny tuxedo on. Whether you are slipping a dollar into a Valentine’s Day card, making a wedding tip feel more personal, or upgrading a birthday envelope from “here is money” to “behold, romance with legal tender,” learning how to fold a dollar into a heart is a small craft with a big payoff.
The good news: you do not need glue, scissors, tape, glitter, a craft-room empire, or the patience of a monk. You only need one U.S. dollar bill and a flat surface. A crisp bill works best because it holds creases more sharply, but a gently used bill can still become a respectable little heart. If your dollar has lived a hard life in a jeans pocket, flatten it under a heavy book for a few minutes before you start. Think of it as spa treatment for currency.
This guide covers two beginner-friendly methods: a classic dollar bill heart and a cleaner pocket-style heart that looks extra neat inside cards. Both methods use simple origami folds and can be made with any U.S. bill denomination, since standard U.S. paper currency is the same size across denominations. A $1 bill is perfect for practice. A $20 bill is perfect when you are feeling generous. A $100 bill is perfect if you enjoy making everyone at the table suddenly pay attention.
Before You Start: What You Need
Materials
You only need one dollar bill for each heart. For the best result, choose a bill that is clean, flat, and not torn. If the bill has a strong center crease already, do not panic. You can usually work with it, especially in Method 1. The folds will hide many small wrinkles, which is also the secret to good lighting in selfies.
Helpful Setup Tips
Work on a smooth table, desk, countertop, or hardcover book. Avoid soft surfaces like beds or couches because they make creases mushy. Origami depends on crisp folds. Every time you fold, run your fingernail or the edge of a card gently along the crease. Do not scrape too hard; you are making a gift, not interrogating the dollar.
Also, remember that folding money is fine for a temporary craft gift, but you should not cut, glue, staple, burn, or permanently damage U.S. currency. These heart folds are reversible, which means the recipient can unfold the bill and spend it later. That is part of the charm: it is sentimental, but it still buys coffee.
Origami Terms You Will See
If you are new to origami, two words matter most: valley fold and mountain fold. A valley fold means the paper bends toward you, forming a little V-shaped valley. A mountain fold means the crease points upward like a ridge. For this dollar heart tutorial, you do not need to memorize diagrams or become an origami professor. Just follow the written directions slowly, keep the edges aligned, and press each crease firmly.
Method 1: The Classic Dollar Bill Heart
This is the easiest method and the best place to start. It creates a cute, compact heart with rounded top corners and a point at the bottom. It is great for Valentine’s Day, anniversaries, lunchbox surprises, graduation cards, wedding envelopes, or tipping someone in a way that says, “I appreciate you and also watched one craft tutorial.”
Step 1: Place the Bill Face Down
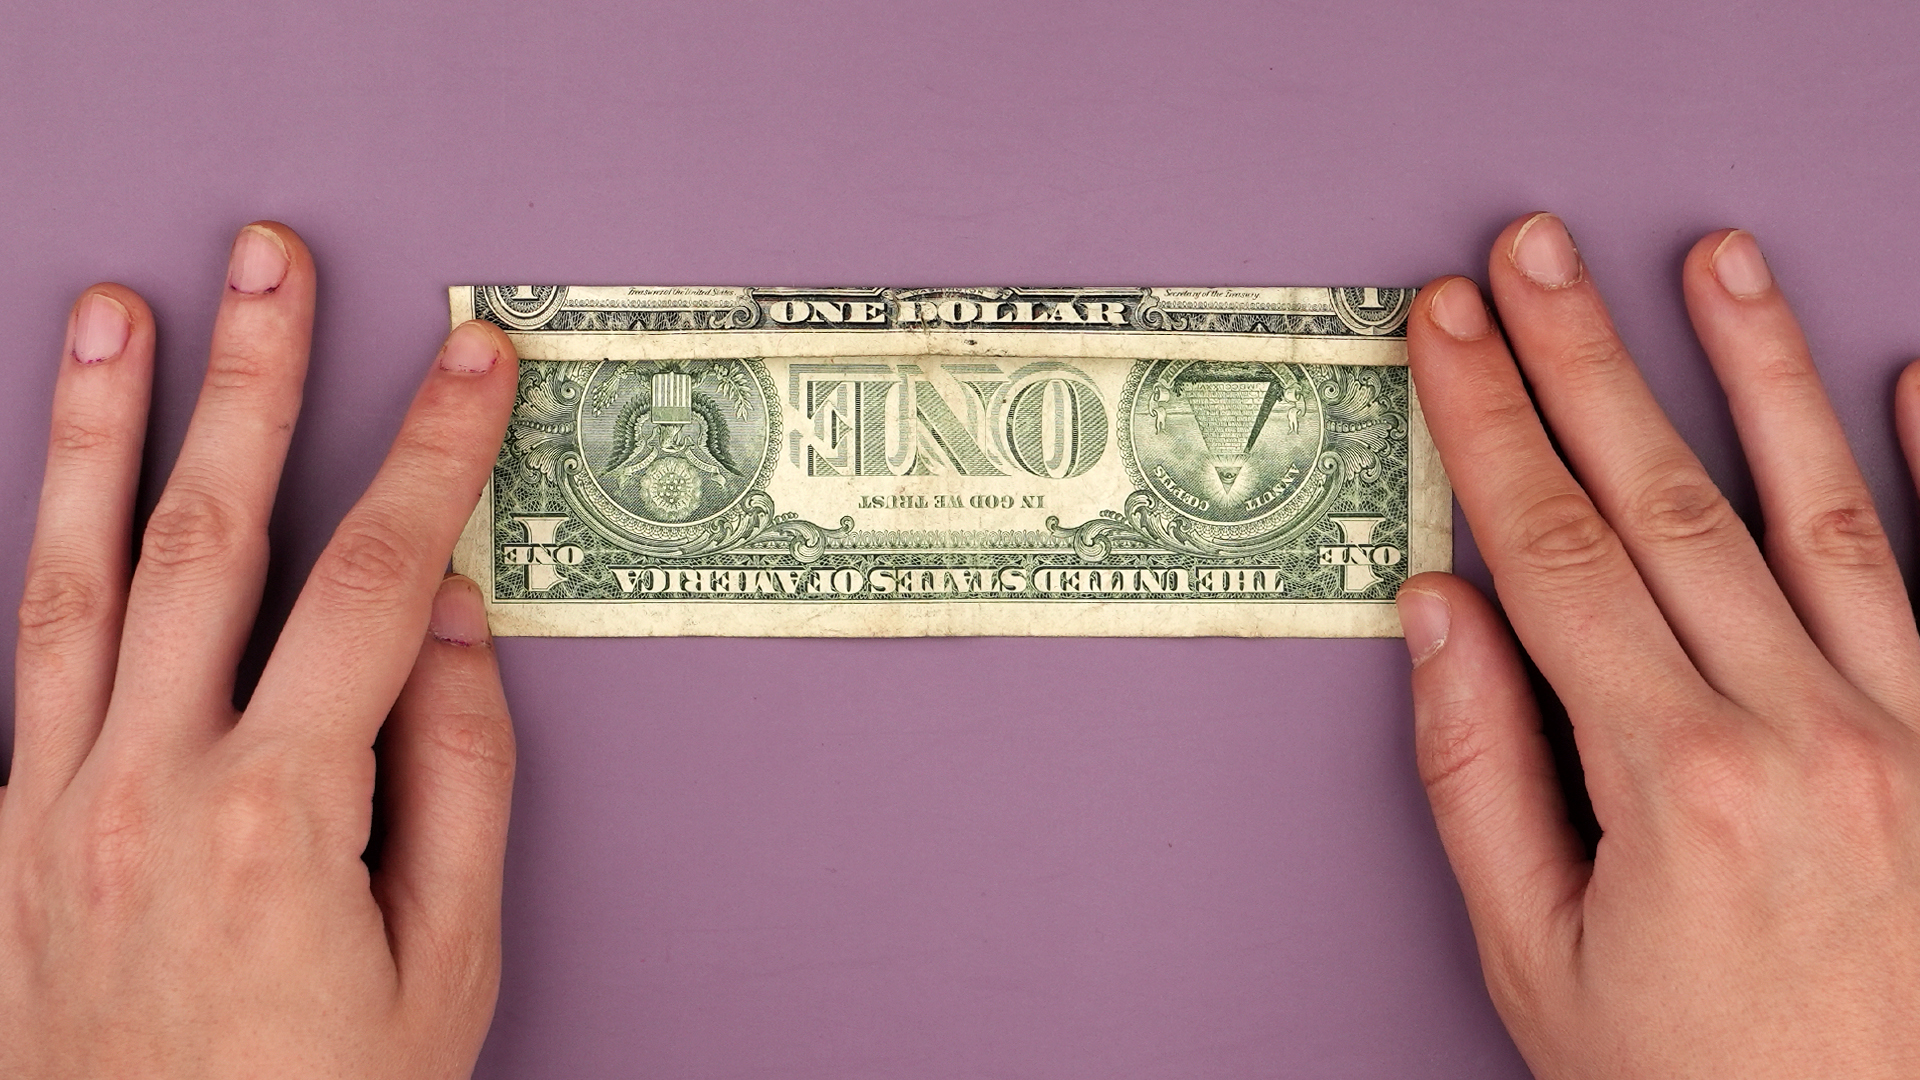
Lay the dollar bill horizontally in front of you with the back side facing up. The long edges should run left to right. Smooth the bill flat with your fingers. If one side is more wrinkled, place that side facing up so the cleaner side becomes the front of the heart later.
Step 2: Fold the Bill in Half Lengthwise
Fold the bottom long edge up to meet the top long edge. Press firmly along the fold, then unfold it. This creates a horizontal center guideline. It may feel like an unnecessary warm-up, but this crease is your map. Without it, the heart may lean to one side like it just heard shocking gossip.
Step 3: Fold the Bill in Half Crosswise
Now fold the left short edge over to meet the right short edge. Press the crease, then unfold. You should now have a vertical center line and a horizontal center line crossing in the middle of the bill.
Step 4: Bring the Bottom Corners Toward the Center
Take the lower left corner and fold it upward so the bottom edge lines up with the vertical center crease. Repeat with the lower right corner. The bottom of the bill should now form a point, almost like the start of a paper airplane. This point will become the bottom tip of your dollar heart.
Step 5: Fold the Top Edge Down
Take the top long edge and fold it downward toward the center of the bill. The exact amount can vary slightly, but aim to fold down enough to begin forming the top of the heart. Press the crease well. You are now shaping the upper lobesthe two rounded humps that make the heart look like a heart and not a confused kite.
Step 6: Shape the Upper Corners
Fold the upper left corner inward and downward at a small diagonal angle. Repeat on the upper right corner. These small diagonal folds soften the square edges and create the rounded top of the heart. If the corners look too sharp, fold tiny tips behind the heart to smooth them out.
Step 7: Flip and Adjust
Turn the bill over. You should see a heart shape. Press all folds again, especially the bottom point and top corners. If one side looks bigger than the other, gently reopen the last corner fold and adjust the angle. Origami is forgiving as long as you do not crush it in frustration. Take your time.
Step 8: Flatten Under a Book
For a polished finish, place the heart under a heavy book for ten to fifteen minutes. This helps the heart stay flat inside a card or gift envelope. When you remove it, the folds should look cleaner and the shape should hold better.
Method 2: The Clean Pocket-Style Dollar Heart
This second method creates a neat, locked heart that feels a little more finished. It is still beginner-friendly, but it uses more precise folds. The final result looks especially nice in greeting cards because the front is smoother and the back holds the layers more securely. Choose this method when presentation matters, such as weddings, anniversaries, bridal showers, graduation gifts, or “I forgot to buy a gift bag but I am still emotionally available.”
Step 1: Start With the Bill Face Up
Lay the dollar horizontally with the front side facing up. Smooth it carefully. If you want a specific part of the bill to show on the finished heart, experiment with orientation. For example, turning the bill upside down before folding can change how the printed design appears on the front.
Step 2: Fold the Bottom Edge Up Slightly
Fold the bottom long edge upward about one-quarter inch. This small fold creates a clean border and helps the finished heart look tidy. Press the crease firmly. Repeat the same fold on the top long edge, folding it downward about one-quarter inch. The bill is now slightly narrower, with neat folded borders along both long sides.
Step 3: Fold the Bill in Half Crosswise
Fold the left short edge over to meet the right short edge. Press the center crease, then unfold. This vertical crease will guide the two sides of the heart.
Step 4: Bring Both Ends Toward the Center
Fold the left end of the bill inward so its short edge meets the center crease. Fold the right end inward the same way. You should now have a shorter rectangle with both ends meeting in the middle. Press firmly so the folds stay in place.
Step 5: Create the Bottom Point
Take the lower left outside corner and fold it diagonally upward toward the center line. Repeat with the lower right outside corner. The lower edges should angle toward each other and form a point at the bottom. This is the heart’s lower tip.
Step 6: Open the Top Layers Slightly
At the top, gently separate the folded layers on each side. You are not unfolding the entire bill; you are just opening the top corners enough to squash them into flatter shapes. This step makes the rounded upper lobes of the heart.
Step 7: Squash Fold the Top Corners
On the left side, press the opened top layer down into a small flattened triangle or kite shape. Repeat on the right side. Keep the shapes as symmetrical as possible. This is the trickiest part of Method 2, but once you see the top of the heart forming, it becomes much easier.
Step 8: Tuck Tiny Corners Behind
Fold the sharp top corners and side tips backward to round the heart. These tiny folds make the finished dollar heart look smooth instead of boxy. Flip the heart over and check the front. Adjust the corners until both sides look balanced.
Step 9: Lock and Flatten
Press the back layers gently so they hold together. Some versions of this fold allow small flaps to tuck under nearby layers. If your bill naturally creates a pocket, tuck the loose tips inside. If not, simply press the creases well and flatten the heart under a book. No tape needed. The recipient should be able to unfold and use the bill later.
Which Method Should You Choose?
Choose Method 1 if you want the fastest and easiest dollar bill heart. It is ideal for beginners, kids with adult supervision, classroom crafts, casual gifts, and last-minute card upgrades. It can be completed in just a few minutes after you practice once or twice.
Choose Method 2 if you want a cleaner, more decorative heart. It takes a little more attention but gives a polished result. The locked layers make it feel more intentional, which is helpful if you are giving folded money for a wedding, anniversary, graduation, or holiday gift.
Both methods are simple enough for beginners, and both work with any U.S. bill. The biggest difference is style. Method 1 is quick and charming. Method 2 is tidy and gift-ready. In other words, Method 1 is “I made this with love,” and Method 2 is “I made this with love and also lined up the corners because I respect presentation.”
Creative Ways to Use a Dollar Bill Heart
Slip It Into a Greeting Card
A folded dollar heart instantly makes a card feel more personal. Tape is not necessary; just place the heart inside the card or secure it with a paperclip. Add a short handwritten message such as, “A little love for your next coffee,” or “For something sweet.”
Use It as a Gift Topper
Place the money heart on top of a wrapped gift, inside a ribbon, or next to a name tag. It works especially well for small gifts where the cash is a bonus rather than the whole present.
Make a Money Bouquet
Fold several bills into hearts and attach them loosely to wooden skewers or floral picks without damaging the bills. Arrange them with paper flowers or tissue paper. This idea is popular for graduations, birthdays, and bridal showers because it turns cash into a centerpiece.
Add It to a Tip
Leaving a dollar heart as part of a restaurant tip, hotel housekeeping tip, or coffee-shop surprise can brighten someone’s day. Just make sure the amount is appropriate. A cute fold does not magically transform a tiny tip into a generous one. Origami has many powers, but it cannot fix math.
Create a Valentine’s Day Surprise
Place a dollar heart in a lunchbox, coat pocket, wallet, or gift bag. It is small, sweet, and unexpected. Pair it with a note for extra charm.
Troubleshooting: Why Your Dollar Heart Looks Weird
The Heart Is Lopsided
This usually happens when the center crease is slightly off. Unfold the bill back to the guide crease and realign the sides. Even a small adjustment can make the heart look more balanced.
The Corners Will Not Stay Down
Use a crisper bill or press the folds more firmly. You can also place the finished heart under a heavy book. Avoid glue or tape if you want the bill to remain spendable.
The Bill Is Too Wrinkled
Wrinkled bills can still work, but the result may look softer. Flatten the bill under a book first, or practice with the wrinkled bill and save a cleaner one for the final gift.
The Top Does Not Look Like a Heart
Focus on the tiny corner folds at the top. Those little folds create the rounded lobes. If they are too small, the heart looks square. If they are too large, the top looks pinched. Adjust until the shape feels right.
Tips for a Better-Looking Dollar Origami Heart
First, make every crease with confidence. Weak folds lead to a floppy heart, and nobody wants a floppy heart unless we are discussing emotional recovery after a breakup. Second, keep the left and right sides symmetrical. Each time you fold one corner, fold the matching corner immediately after so the angles stay similar.
Third, practice with a regular piece of paper cut to dollar-bill proportions if you are nervous. A standard U.S. bill is a long rectangle, so practicing with a similar rectangle helps you understand the movement before using real money. Finally, do not rush the final shaping. The last tiny folds make the biggest difference in how polished the heart looks.
Experience Section: What Folding Dollar Hearts Teaches You
The first time you fold a dollar into a heart, you may expect it to be a quick party trick. And it is. But after making a few, you start to notice that the real magic is not the paper folding; it is the reaction. A plain dollar tucked into a card is useful, but it can feel a little ordinary. A dollar heart says, “I spent an extra two minutes making this feel like a moment.” That small effort changes the whole personality of the gift.
One of the best uses for a dollar bill heart is in situations where cash might otherwise feel impersonal. For example, graduation gifts often include money because graduates need practical help. They need gas, books, dorm supplies, snacks, laundry money, and possibly one emergency pizza after a dramatic group project. Folding the bill into a heart softens the practicality. It turns the gift into encouragement, not just currency.
Dollar hearts also work beautifully for kids who are learning to give gifts. A child can fold a dollar heart for a parent, grandparent, teacher, or friend with just a little guidance. The process teaches patience, hand-eye coordination, and the satisfying lesson that small details matter. The finished heart may be crooked, but that often makes it more lovable. Perfect folds are nice; tiny handmade imperfections are where the charm lives.
For adults, the experience is surprisingly calming. Folding a bill requires focus, but not so much focus that it feels stressful. You line up edges, press creases, turn the bill over, adjust corners, and suddenly the brain gets a little break from notifications, errands, and whatever mysterious thing the dishwasher is doing. It is a tiny craft meditation. You end up with a heart, and you did not have to buy a craft kit with 400 pieces and one missing instruction sheet.
Another lesson is that presentation can make a modest gift feel memorable. A single folded dollar is not expensive, but it can still be thoughtful. Slip it into a handwritten note, add it to a bouquet, or place it in a jar labeled “treat yourself fund.” The fold becomes a message. It says the gift-giver cared enough to make the ordinary a little more special.
After you learn both methods, you may find yourself folding dollar hearts at odd times: while waiting for dinner, while preparing birthday cards, while trying to make a tip more cheerful, or while proving to a skeptical friend that yes, money can have feelings if you crease it correctly. The skill is easy, portable, and endlessly useful. Best of all, it makes people smileand for a craft that costs exactly one dollar, that is a pretty excellent return on investment.
Conclusion
Learning how to fold a dollar into a heart is simple, affordable, and surprisingly delightful. Method 1 gives you a quick classic heart that is perfect for beginners and casual gifts. Method 2 creates a cleaner pocket-style heart with a polished look for special occasions. Both methods require only one bill, a flat surface, and a willingness to crease with confidence.
Use your dollar heart in cards, tips, gift toppers, bouquets, lunchbox surprises, or holiday envelopes. It is a tiny handmade touch that turns cash into something personal. And when the recipient eventually unfolds it to spend, they will still remember the thought behind it. That is the sweet spot: useful, cute, and just fancy enough to make a dollar feel like it dressed up for dinner.
Note: This article is written as original, publication-ready HTML body content based on real dollar origami techniques, practical craft experience, and current U.S. currency handling guidance.

